# Quick Start
The control plugins rely on the Sansi Universal Controller (hereinafter referred to as "the controller") and serve as a technical solution for extending the functionality of the controller. They allow for functional enhancements without needing to restart the controller. By loading various types of plugins, different usage scenarios can be met, such as in meeting rooms, stadiums, command centers, exhibition halls, and more.
The underlying technology for plugin development is Vue + Vuex + Element-Plus. The project defaults to using npm for management, with the option to switch to pnpm or yarn. It is necessary to configure the Node environment (Node version >= 16, recommended version 16.18.1). It is advisable to use IDE tools such as WebStorm or VS Code for development and to set up the Node environment and related development tools before actual development.
⚠️Note: Before starting, please install the Node environment (recommended version 16.18.1) and prepare the development tools (recommended: WebStorm or VS Code).
# Install the Controller
- Download the latest version of Sansi Universal Controller (opens new window)最新版本。
- Install the controller according to the deployment manual.
- Create a new project according to the user manual.
# Install the Framework
npm i sccs -g
# Initialize the Project
# Create an empty directory and enter it
mkdir my_plugin
cd my_plugin

# Initialize the project
sccs init

# Fill in the plugin information as prompted; after completion, plugin name, ID, and other information can be modified in the main.json file in the project root directory.

? 插件名称: My Plugin
? 插件标识: 1B96551SSSDAD4C2D4
? 插件版本: 1.0.0
? 插件描述: Test Plugin

# Install project dependencies
npm install

# Wait for the command to finish executing
# Debug the Project
To debug the project, you need to open the controller. After running the following command, a debug plugin will automatically be added to the controller, allowing you to observe the effects.
sccs dev
# Compile the Project
The compiled project will be generated in the release directory in the project root with the .plug suffix
sccs build
# Publish the Project
Publishing the project will automatically compile it and then submit it to the cloud platform. You need to follow these steps:
# Local Publish
- Apply for a token for publishing from the Sansi Cloud Platform (opens new window)
- Add the environment variable SANSI_CLOUD_PLUGIN_TOKEN with the value of the obtained token string.
- Run
sccs publish --open
# CI Automatic Publish
- Apply for a token for publishing from the cloud platform.
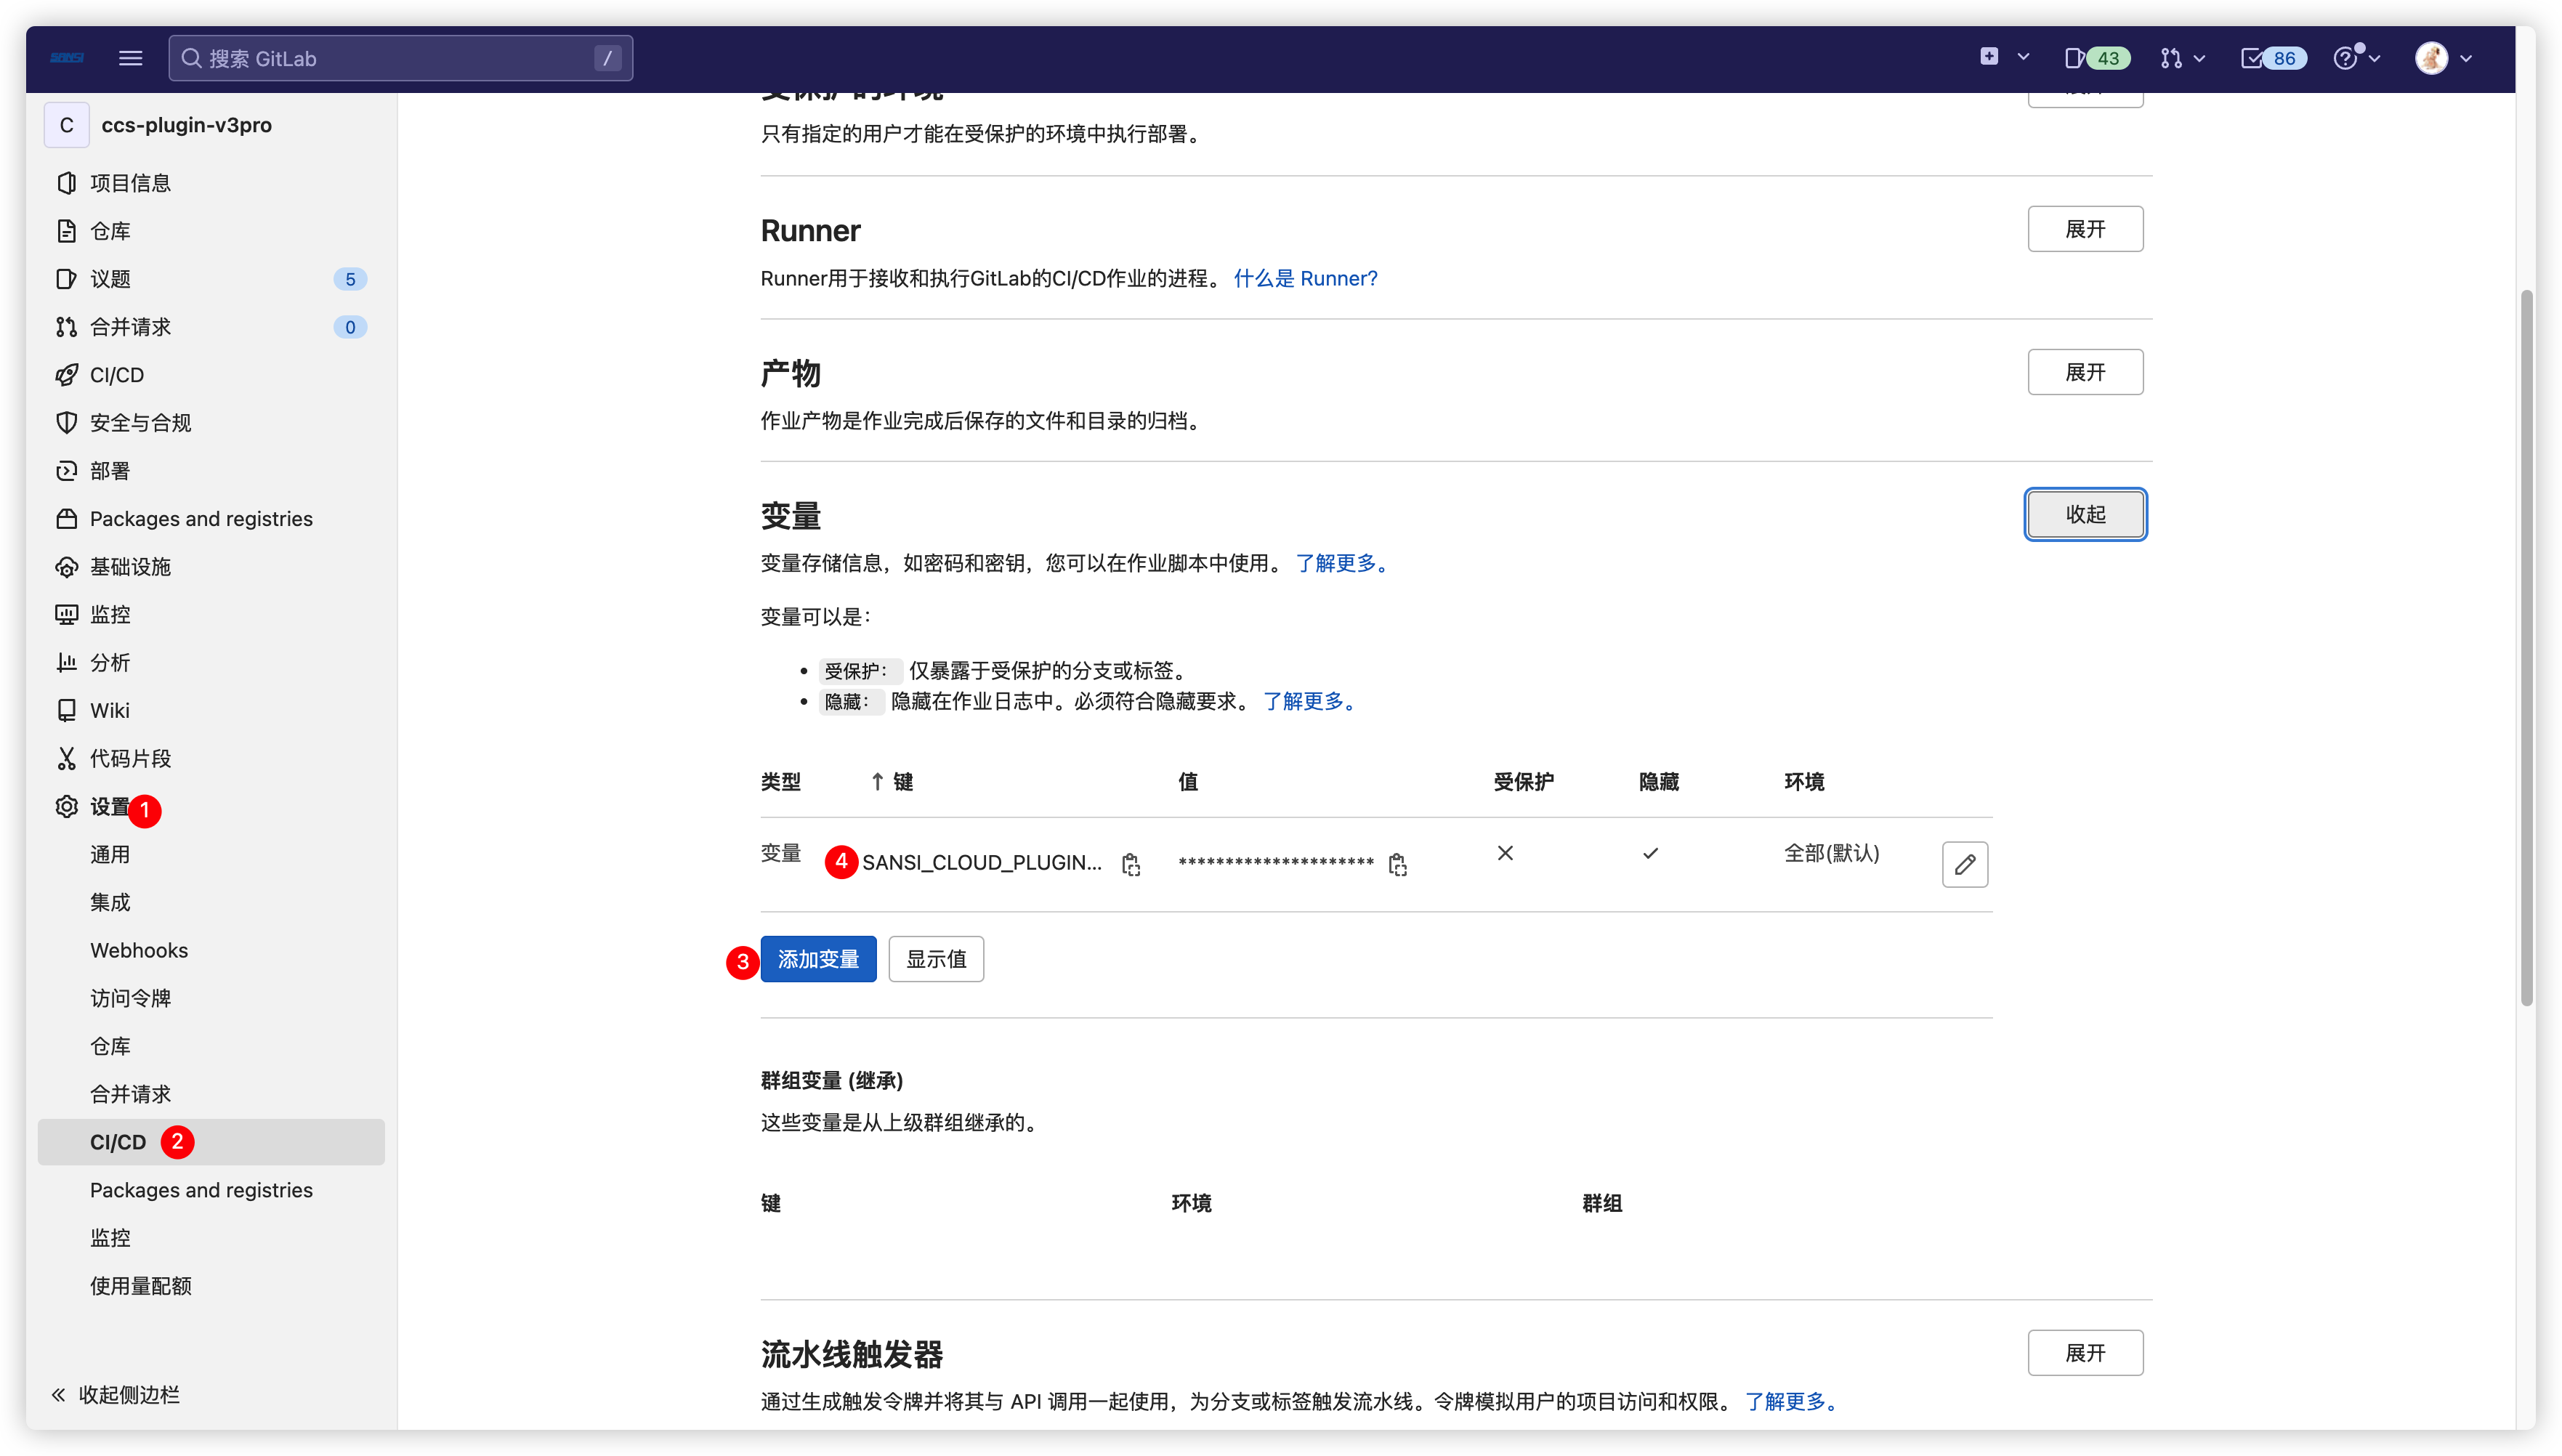
- dd the environment variable SANSI_CLOUD_PLUGIN_TOKEN in the GitLab repository with the value of the obtained token string.
- Add
sccs publish --opento the CI process for publishing.
⚠️Note:
sccs publish --open indicates a public release.
To cancel public release, omit the --open argument with sccs publish,or state sccs publish --open false both indicating that the version is not for public release.
Non-public releases cannot be directly searched in the online plugin of the controller; you need to log into the cloud platform for viewing, downloading, or access through a sharing link followed by local loading.
Apply for Token 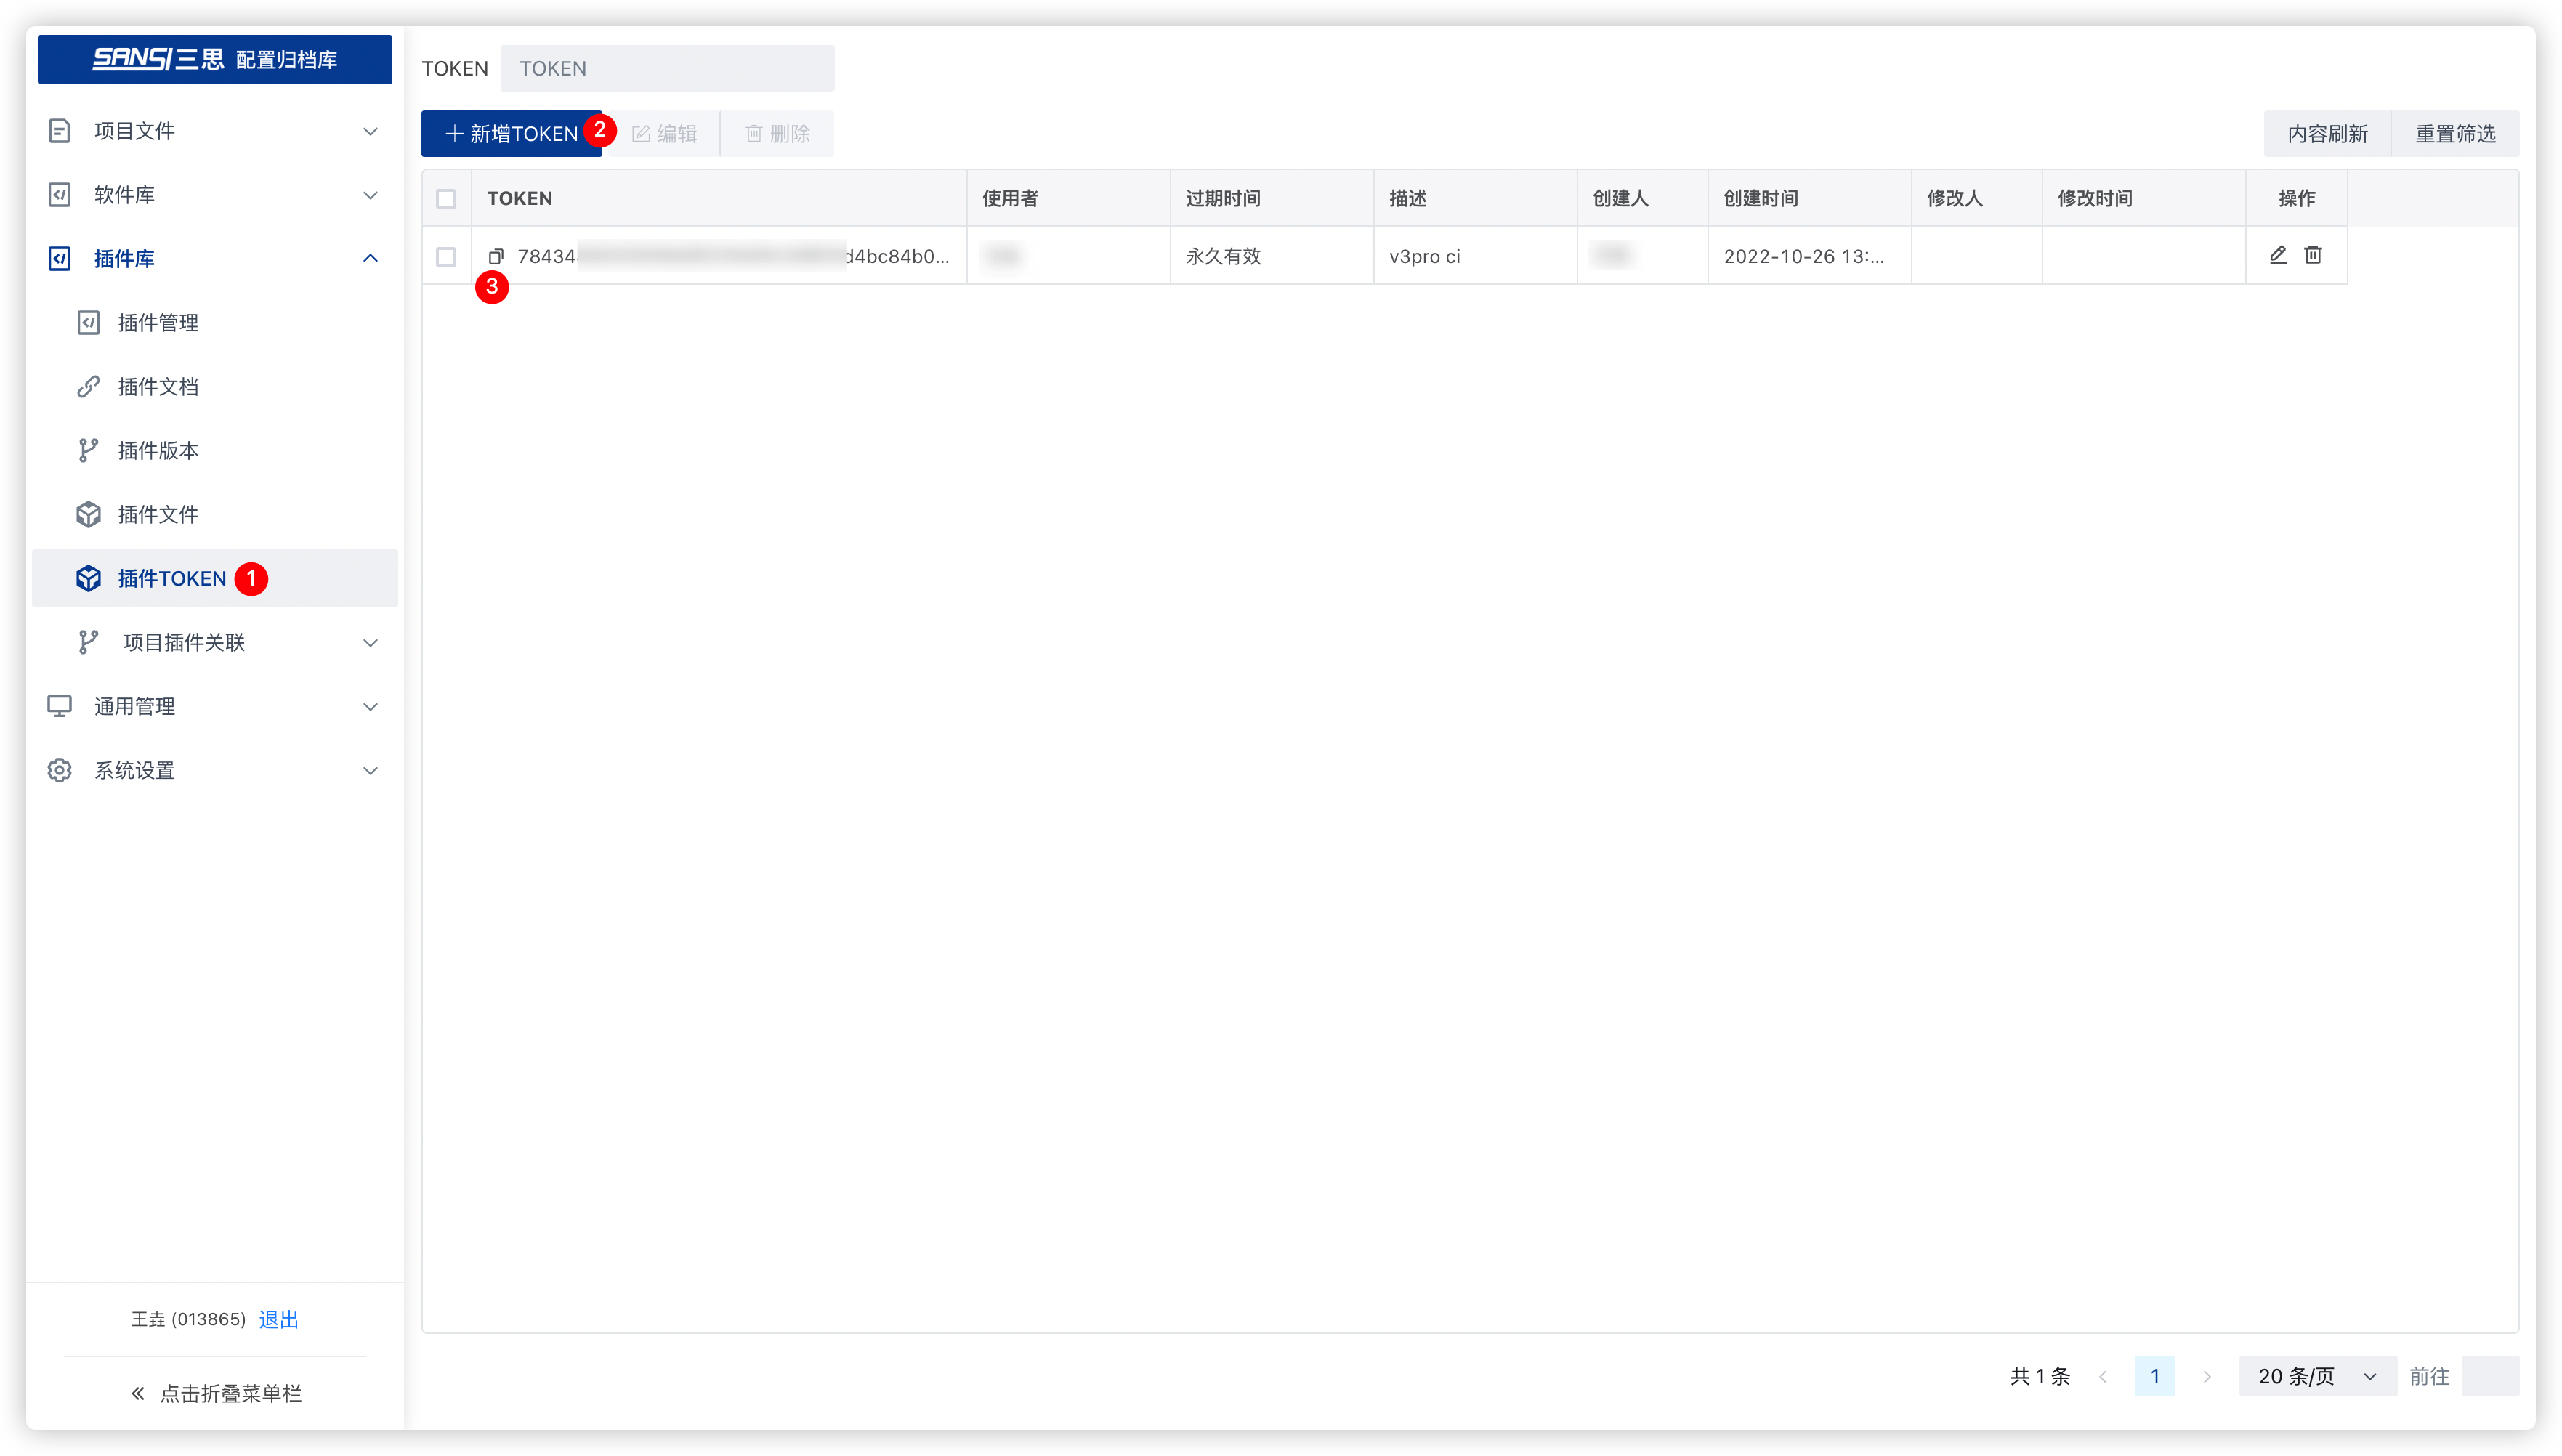
Configure CI Variables
# Configuration Functions
# View Current Configuration
sccs config list
# Get Remote Repository Address
sccs config --get-registry
# Set Remote Repository Address
If you do not wish to use the default remote publishing address, you can use this function to configure it.
sccs config --set-registry http://127.0.0.1:8888