# Service Plugins
| Document Version | Content Revision | Reviser | Revision Date |
|---|---|---|---|
| V1.0 | Added basic content for user manual | Wang Yao, Gao Guanghui | 2023-11-25 |
# Quick Start
Service plugins are a technical solution for providing functional extensions to the central control system. They can add functionality without requiring a restart of the central control system. By loading different types of plugins in combination, various usage needs in different scenarios can be met, such as conference rooms, sports venues, command centers, exhibition halls, etc.
The underlying technology for service plugin development does not restrict the choice of development technology. You can choose any programming language you are comfortable with. Verified and feasible languages include NodeJS, Go, Java, Python, C/C++, etc. It is important to note that service plugins are not suitable for applications with a GUI; they are intended for programs that provide interfaces externally. The types of interfaces and protocols are not limited, and you can choose HTTP, TCP, UDP, Modbus, MQTT, etc. If it’s a B/S architecture program, you can also provide web services within the program.
⚠️Note:
- Before starting, please prepare the appropriate development tools for the selected language, such as VSCode, WebStorm, GoLand, IDEA, etc., based on your programming habits.
- You can choose a suitable platform for development, such as Windows, Linux, MacOS, etc., with no restrictions.
- If you want your developed plugin to run on multiple platforms, please choose a suitable language that supports cross-platform building.
# Install Service Management
Download the appropriate version of Cyberhub from the Deployment Manual.
# Project Build
Choose the appropriate language to build the project based on the project requirements, ensuring the project can run directly on the target device. If doing cross-platform builds, such as building a Linux program on Windows, ensure that the programming language itself has cross-platform features and prepare the cross-platform build toolchain.
Compile the program into the target output, such as compiling TS into JS, Java into JAR, Go into a binary executable file, and run the program directly on the target device to ensure it operates correctly.
# Description File
Prepare a description file similar to the one below.
# ⚠️Note: The following is just the most basic plugin description information. If you need more detailed content, such as declaring configurable files, declaring update ignore items, declaring interface information, etc., please refer to Service Plugin - Plugin Specification.
Description for Cross-Platform Languages:
{
  "interpreter": "node",
  "path": "./app.js",
  "pkg": "com.sansi.demo",
  "version": "1.0.0",
  "icon": "icon.png",
  "name": "Test Program",
  "description": "Description Information",
  "port": 8888,
  "port_type": "HTTP",
  "homepage": "http://{{currentIp}}:{{currentPort}}",
  "os": "",
  "arch": ""
}
Description for Non-Cross-Platform Languages:
{
  "interpreter": "",
  "path": "./app",
  "pkg": "com.sansi.demo",
  "version": "1.0.0",
  "icon": "icon.png",
  "name": "Test Program",
  "description": "Description Information",
  "port": 8888,
  "port_type": "HTTP",
  "homepage": "http://{{currentIp}}:{{currentPort}}",
  "os": "linux",
  "arch": "amd64"
}
# Package the Program
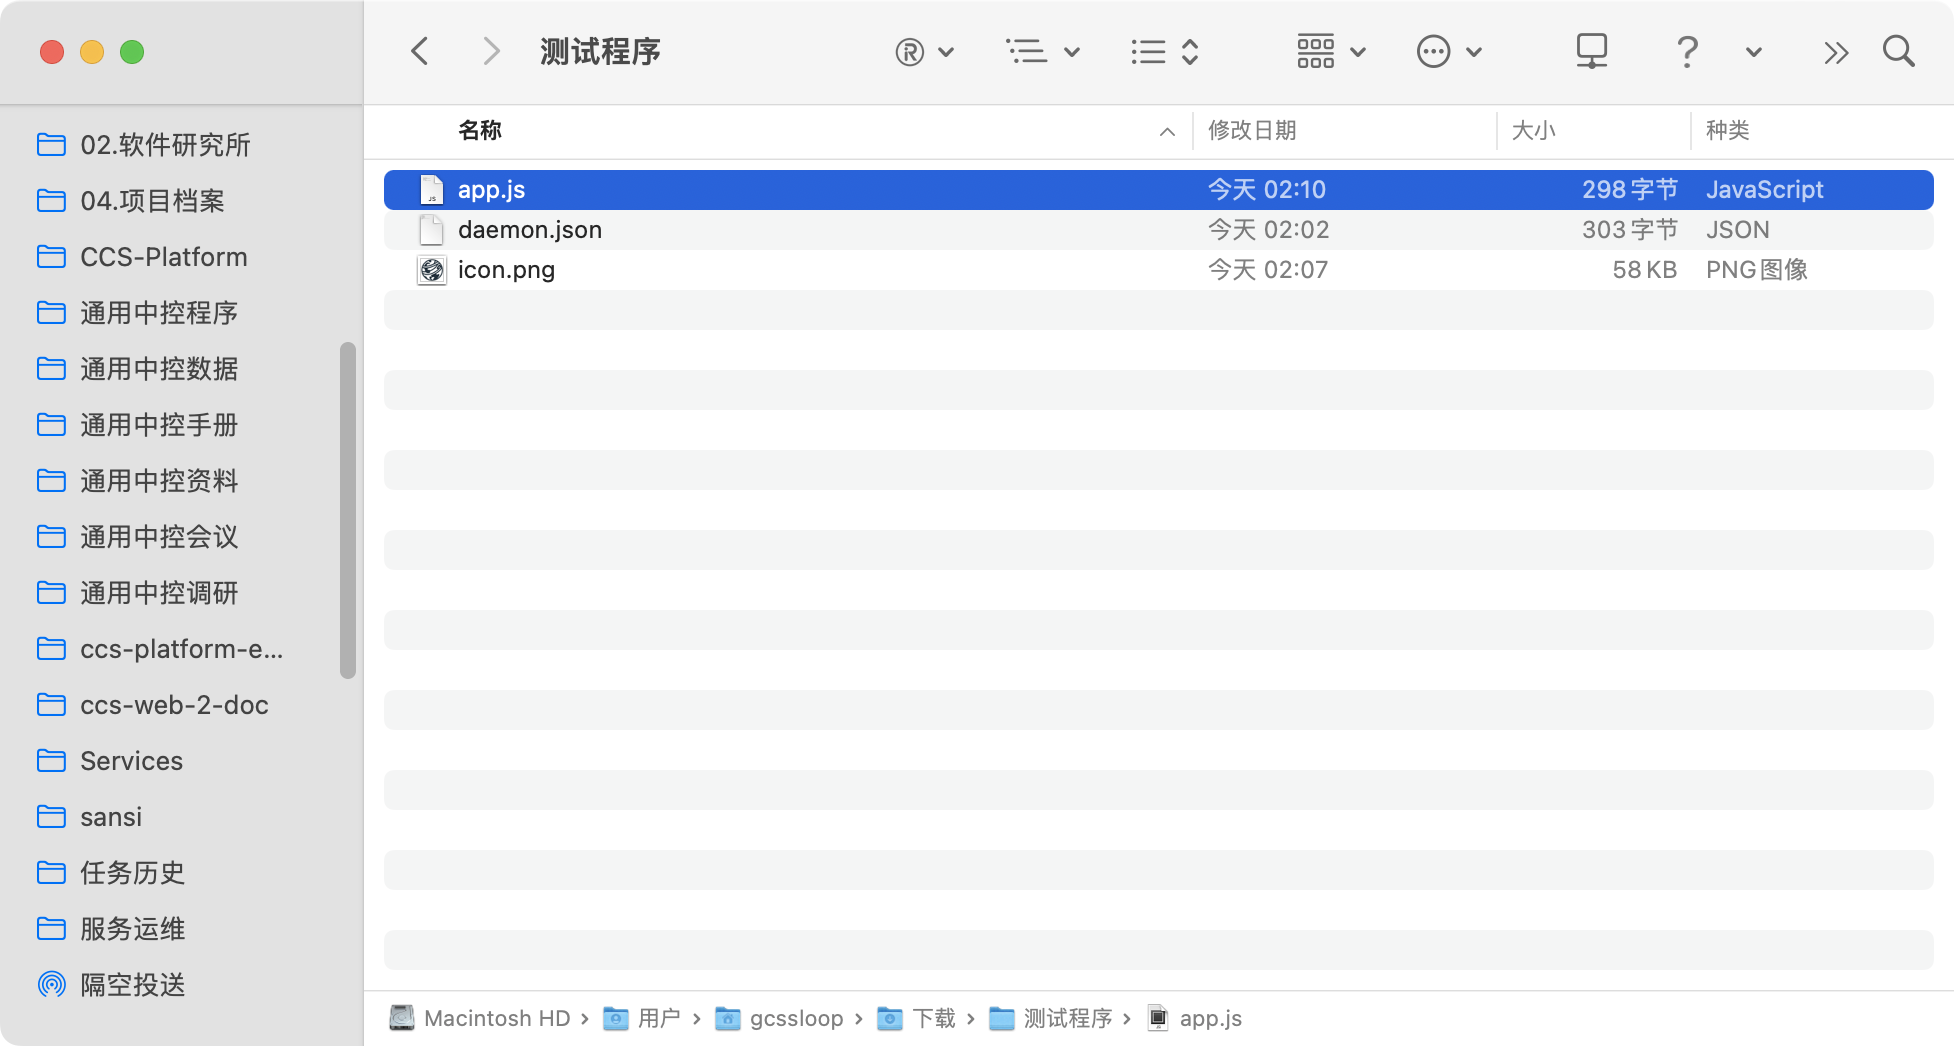
Assuming we have a Node.js program with the following directory structure:
├── app.js      (Main Program)
├── daemon.json (Description File)
└── icon.png    (Project Icon)
app.js
const http = require('http');

const server = http.createServer((req, res) => {
  res.statusCode = 200;
  res.setHeader('Content-Type', 'text/plain');
  res.end('Hello World\n');
});

const PORT = 8888;
server.listen(PORT, () => {
  console.log(`Server running at http://localhost:${PORT}/`);
});
daemon.json
{
  "interpreter": "node",
  "path": "./app.js",
  "pkg": "com.sansi.demo",
  "version": "1.0.0",
  "icon": "icon.png",
  "name": "Test Program",
  "description": "Description Information",
  "port": 8888,
  "port_type": "HTTP",
  "homepage": "http://{{currentIp}}:{{currentPort}}",
  "os": "",
  "arch": ""
}
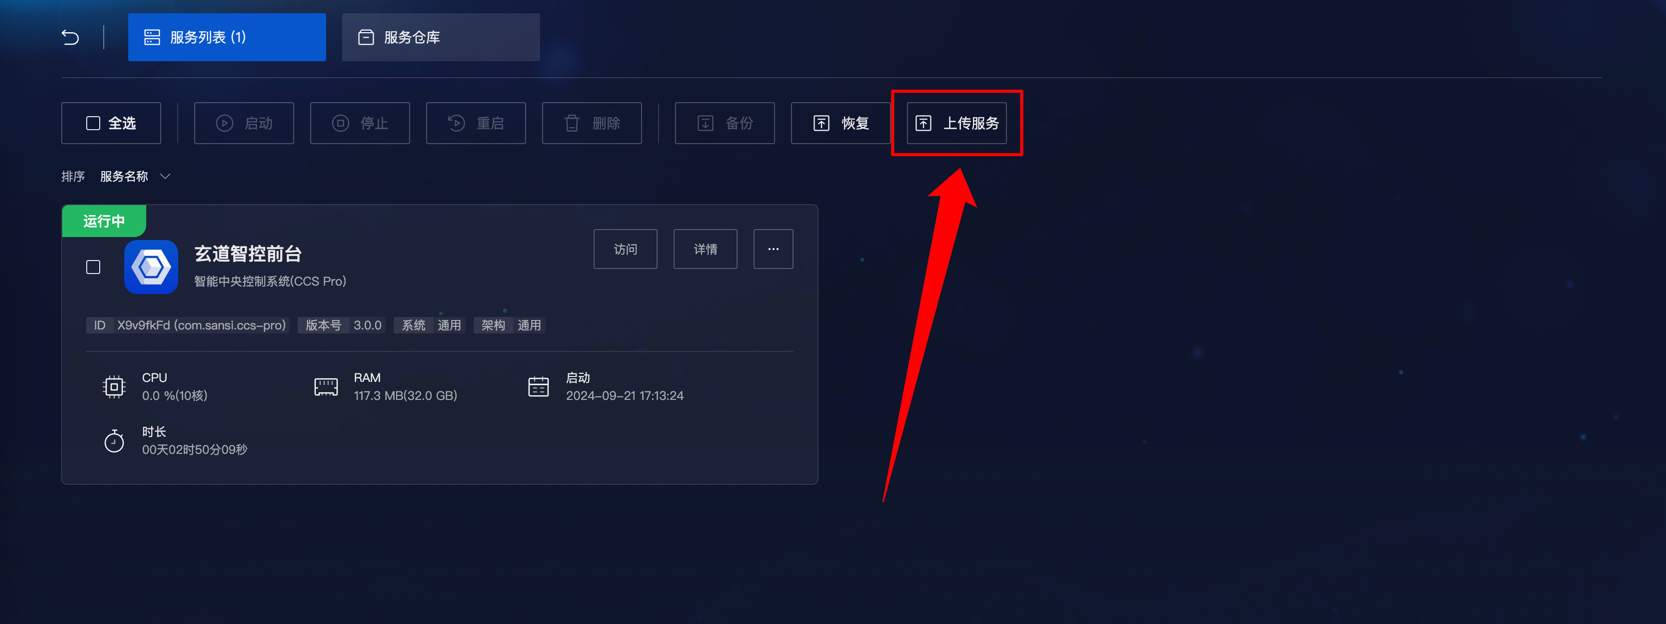
Place the program and description file together, compress them into a zip format, and rename the file extension to .msvc.
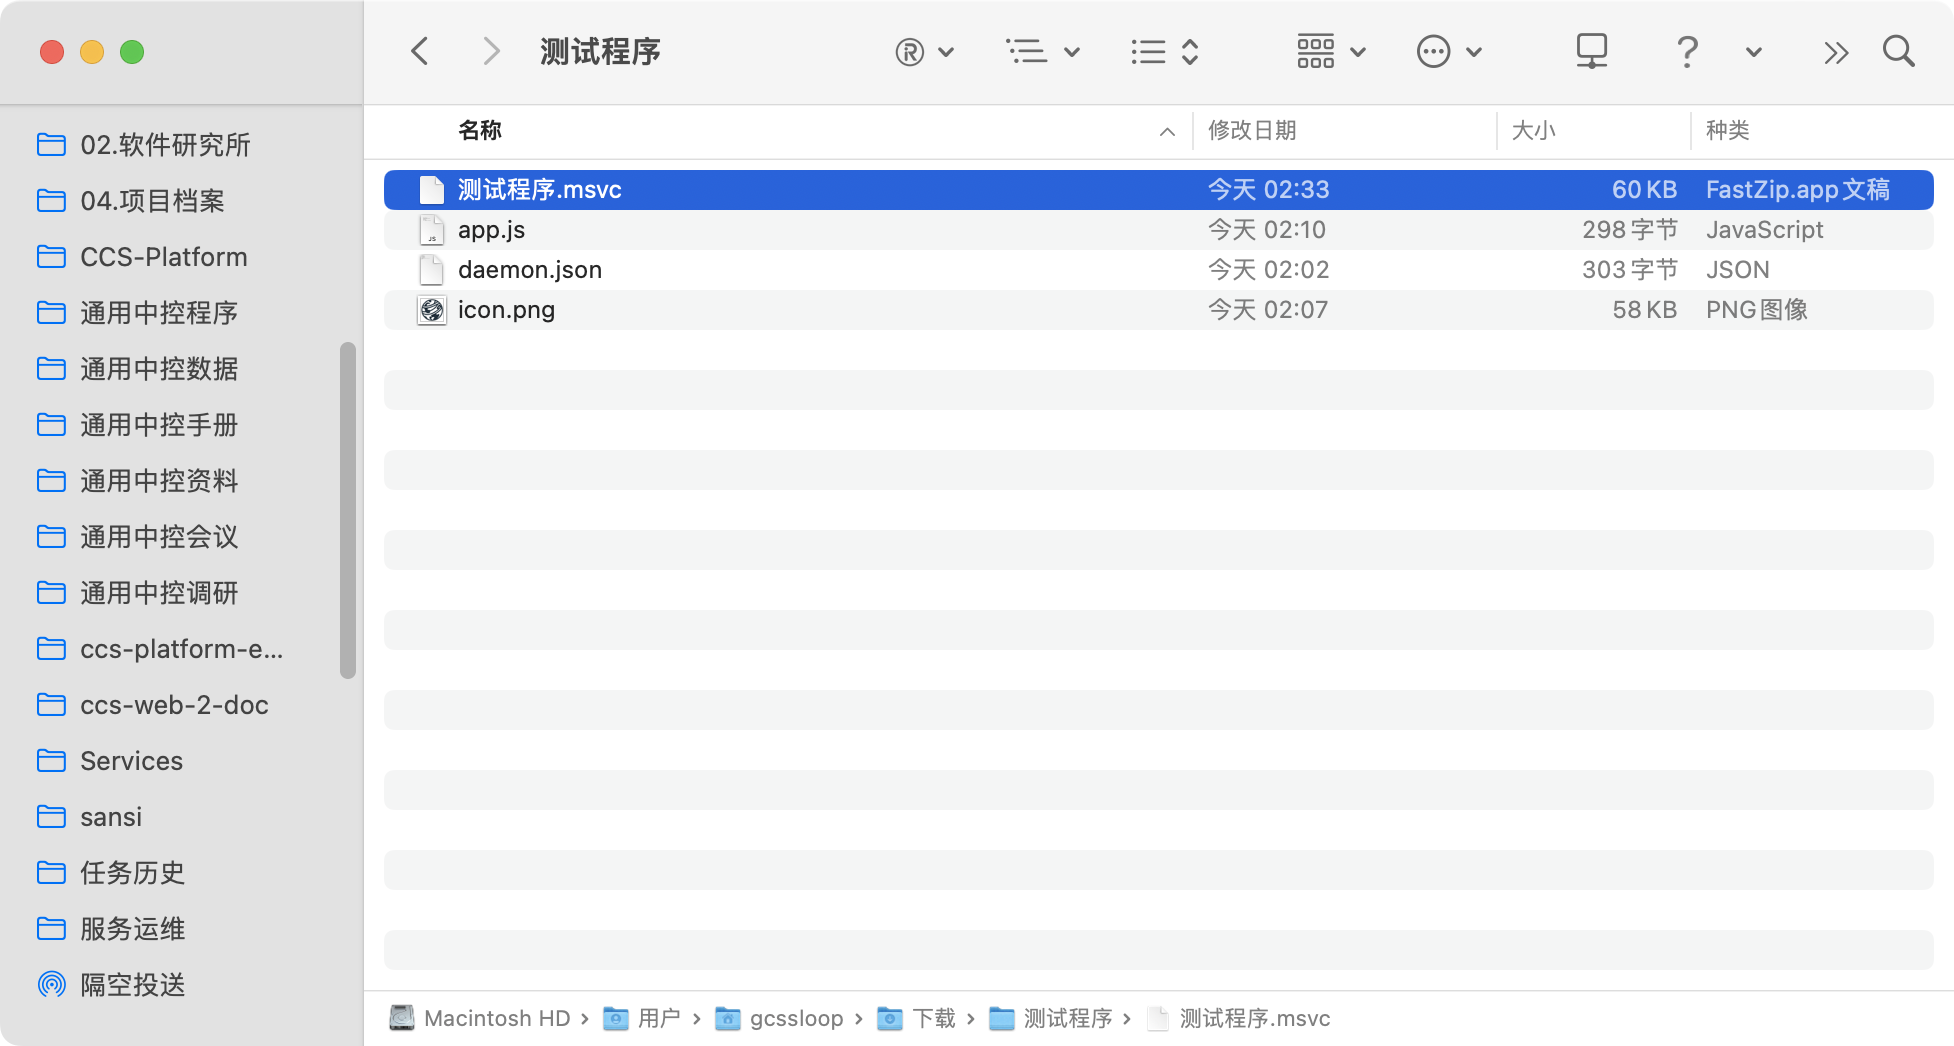
Then upload the file to service management, and after uploading, you will see the service.
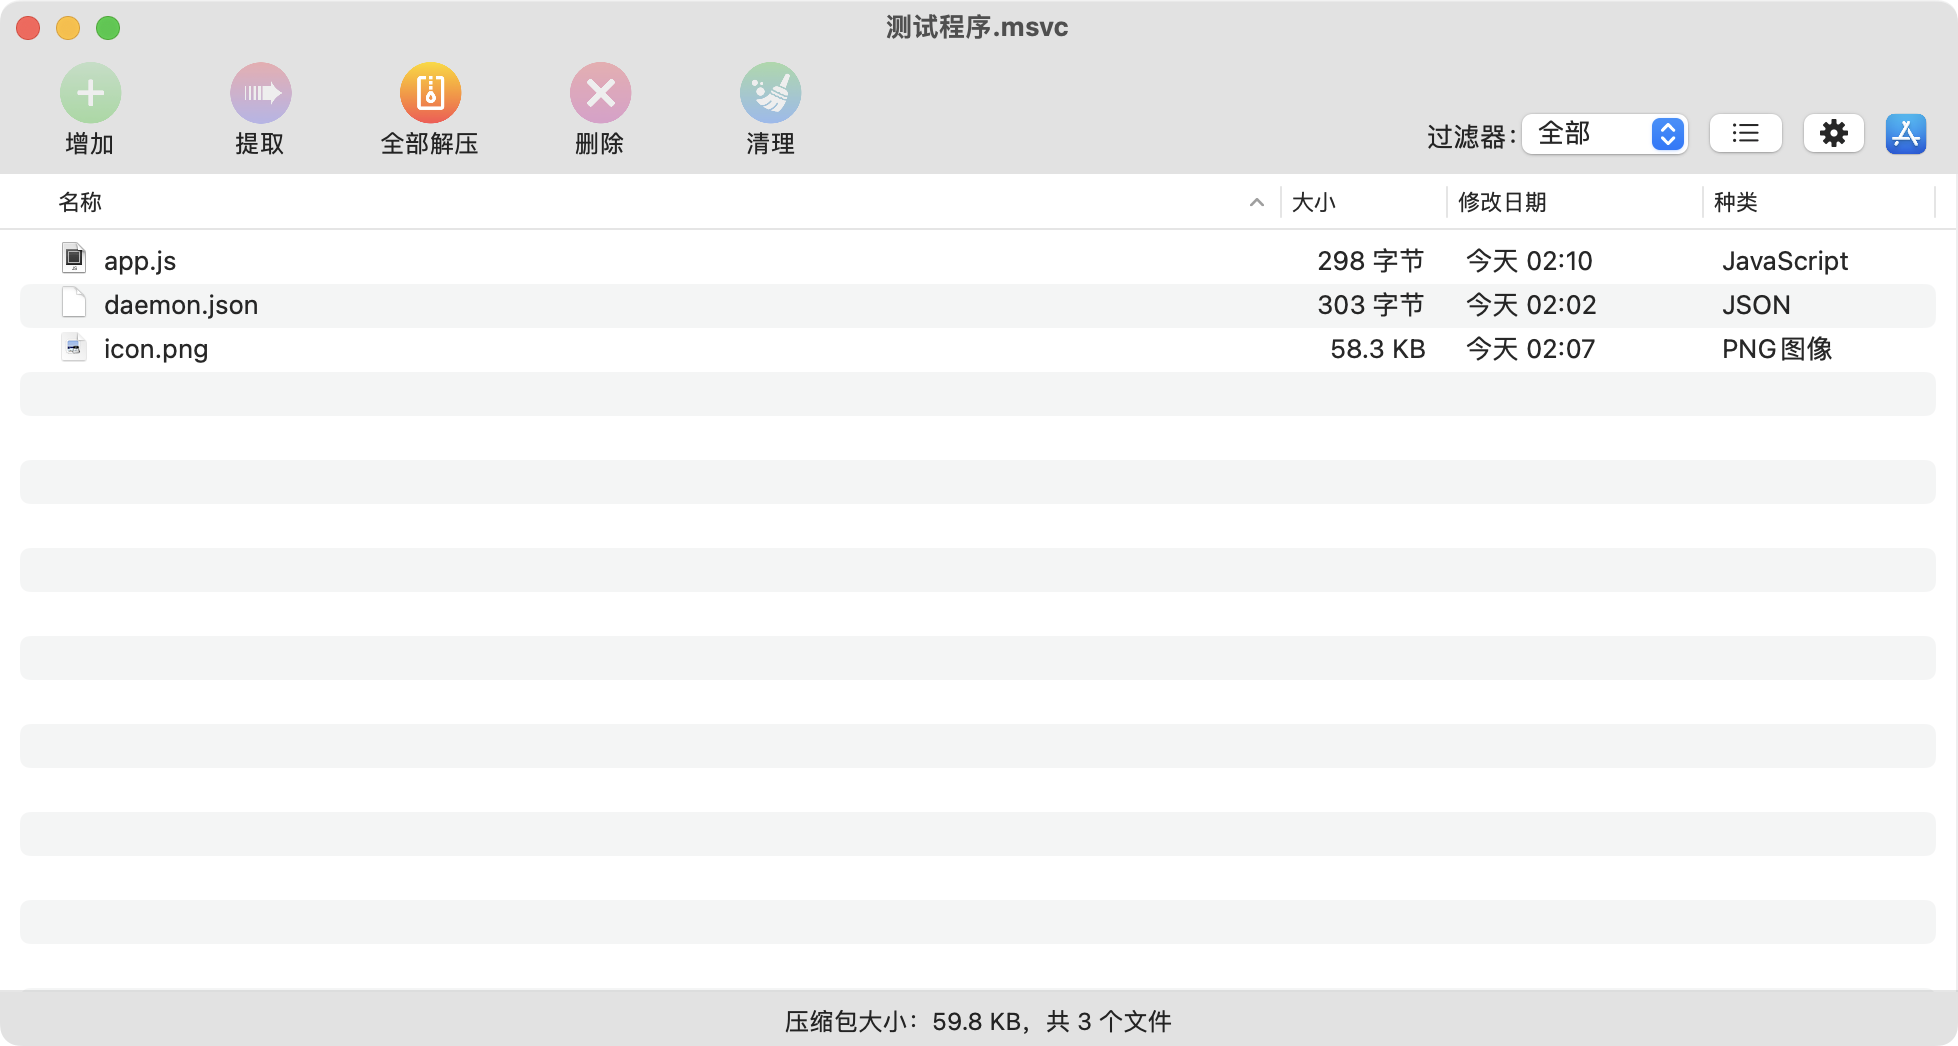
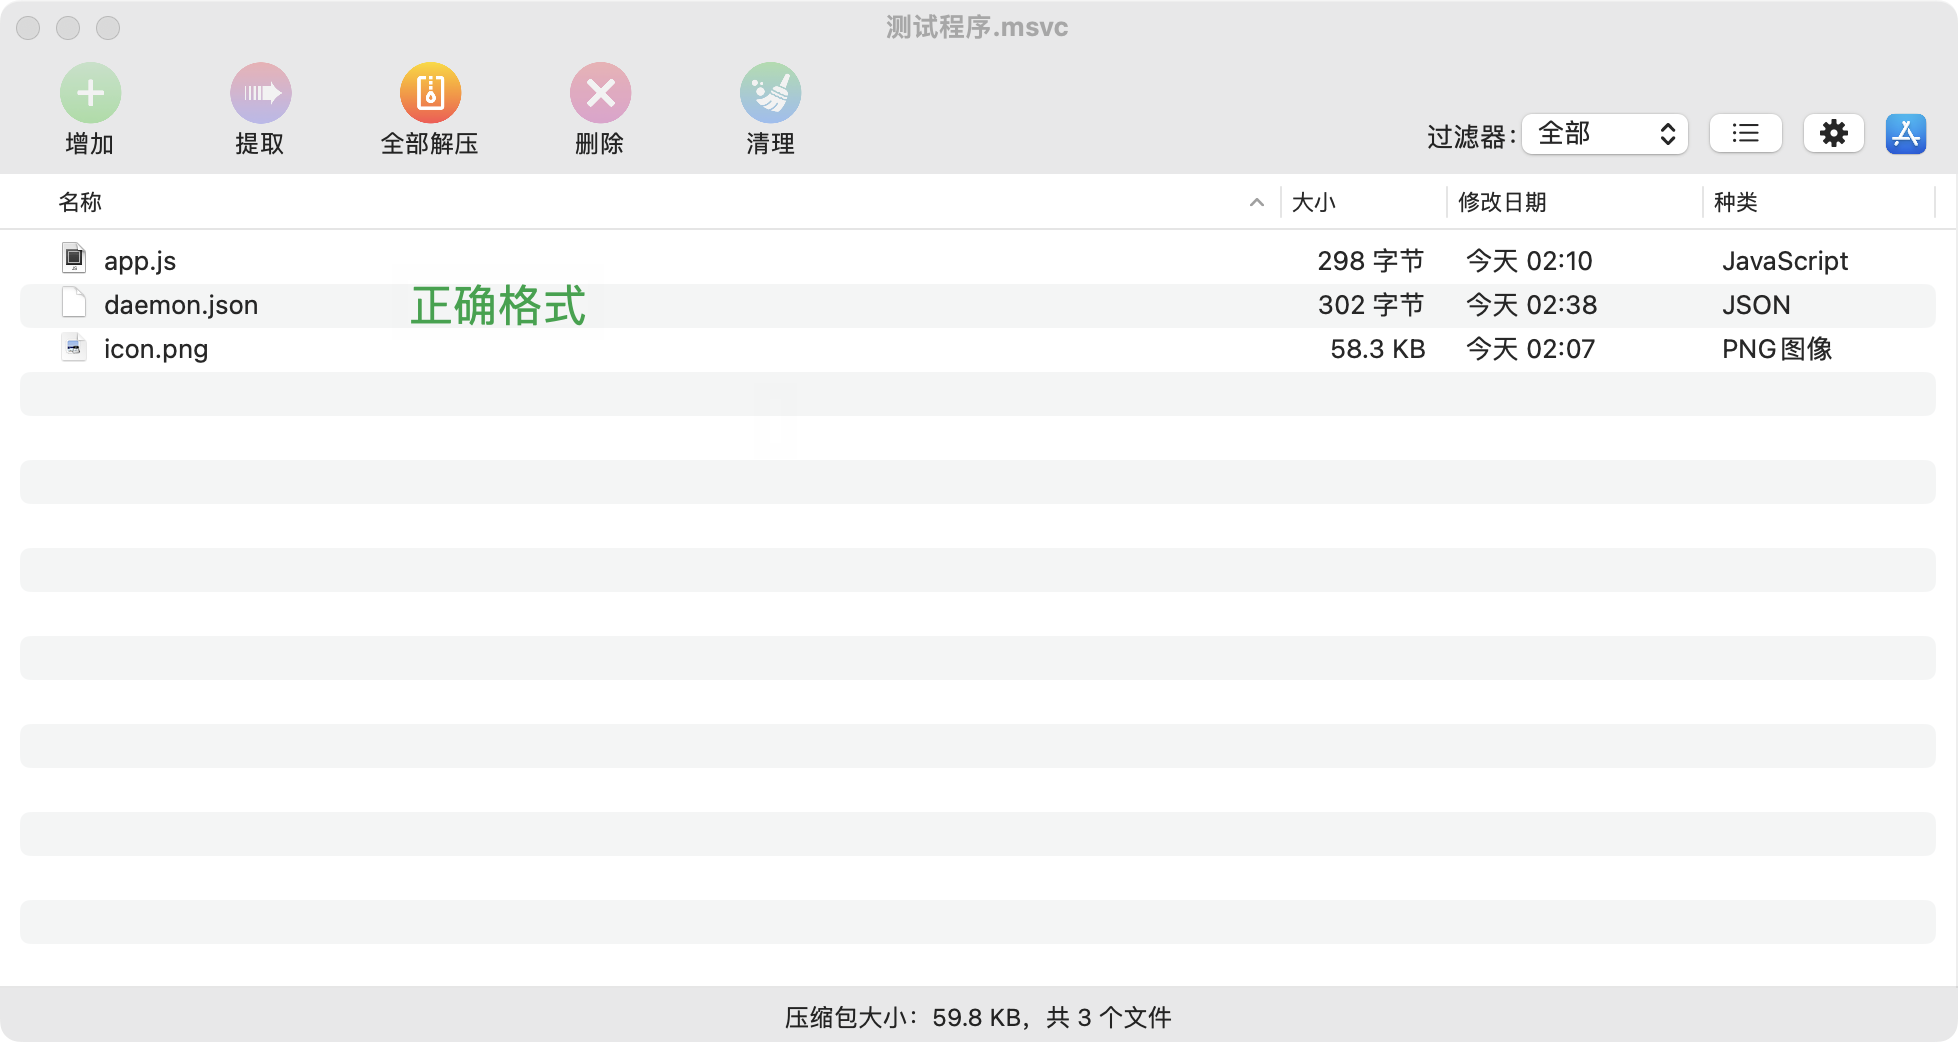
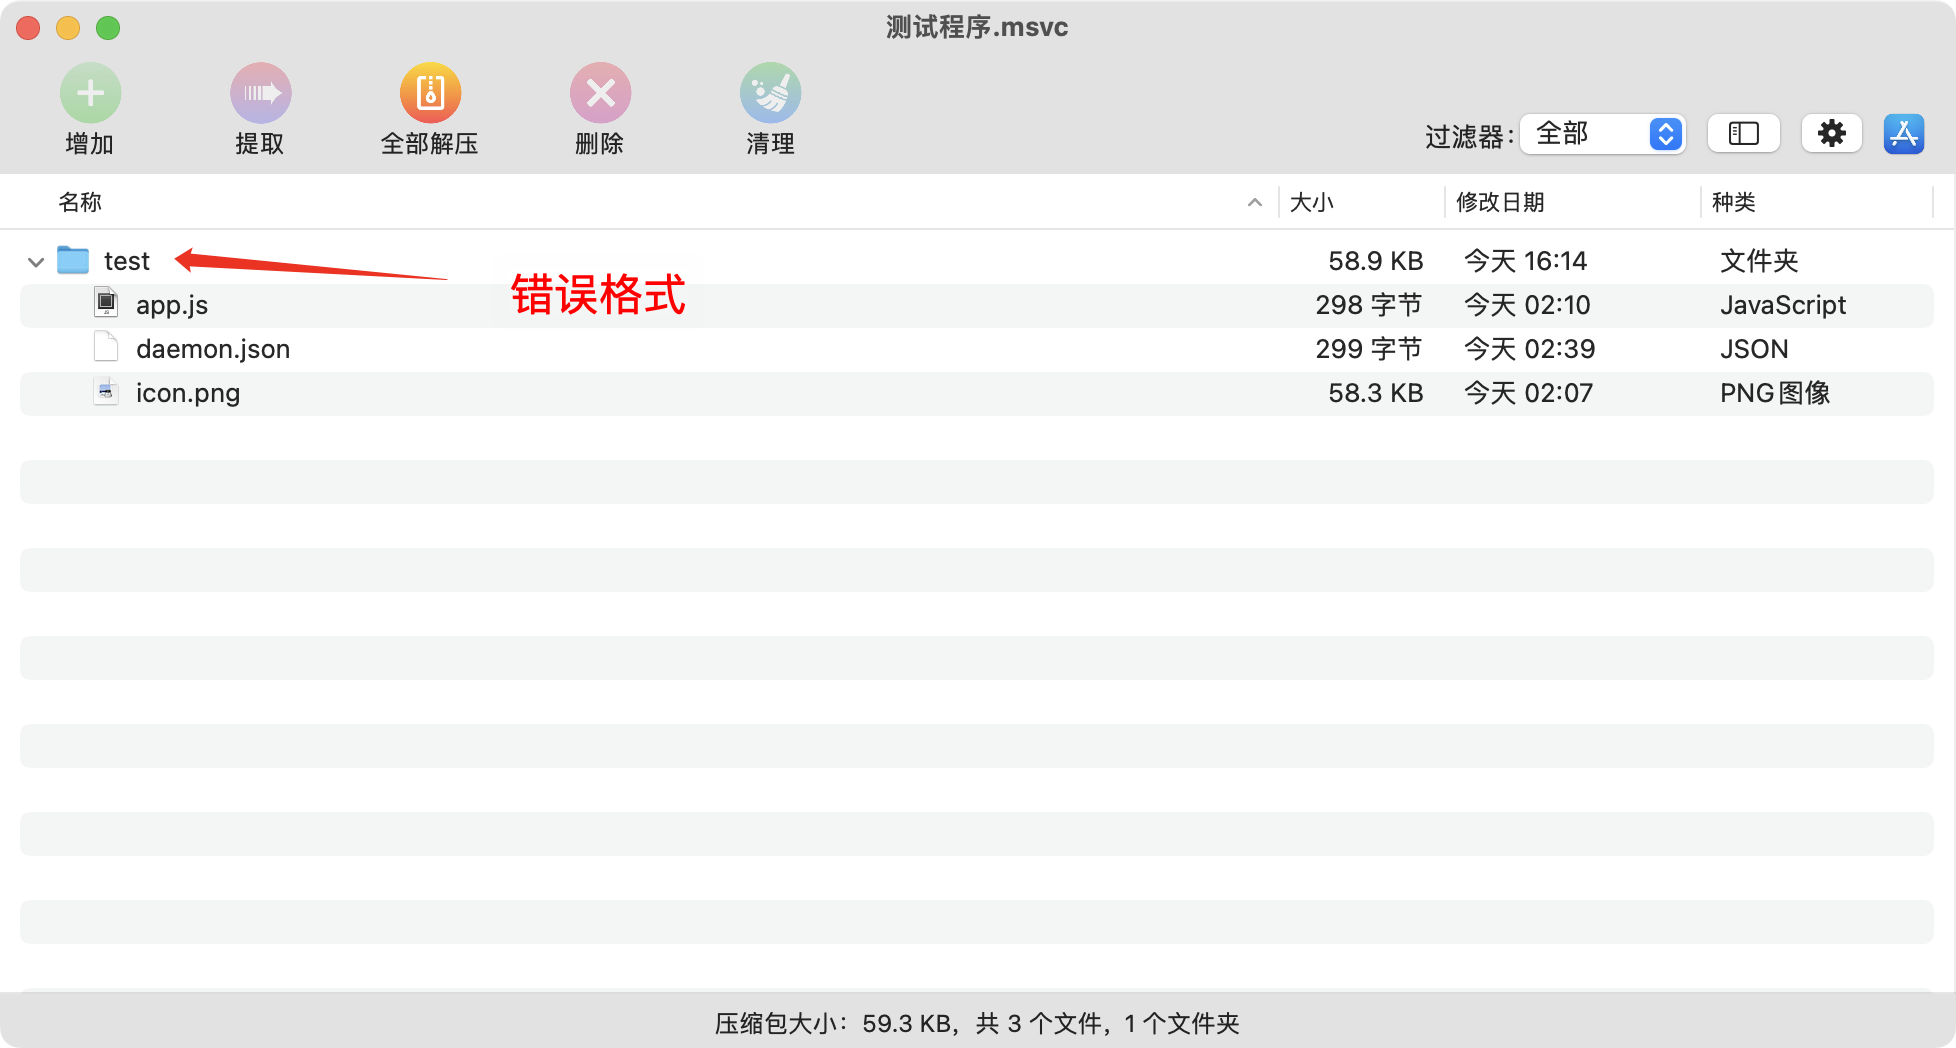
# ⚠️Note
When compressing the file, ensure that the daemon.json file is placed in the root directory of the compressed file. The compressed file should not contain folders; one typical error is shown below, where the compressed file includes a directory and daemon.json is not in the root directory.
# Publish Plugin
The published plugins will be stored on the Sansi configuration platform, where they can be downloaded and updated in the plugin repository.
# Local Publishing
Install Node.js, recommended version 18 or higher. After installation, use the command
node -vto verify.Install the publishing tool by running the command
npm install spub -gto install the plugin publishing tool. If you don't use npm, you can also use yarn or cnpm.Apply for a token needed for publication on theSansi Cloud Platform (opens new window)
Add the environment variable SANSI_CLOUD_PLUGIN_TOKEN in your environment variables, with the value being the token string obtained.
Run
spub -f xxxx.msvc --opento publish the plugin to the cloud platform.
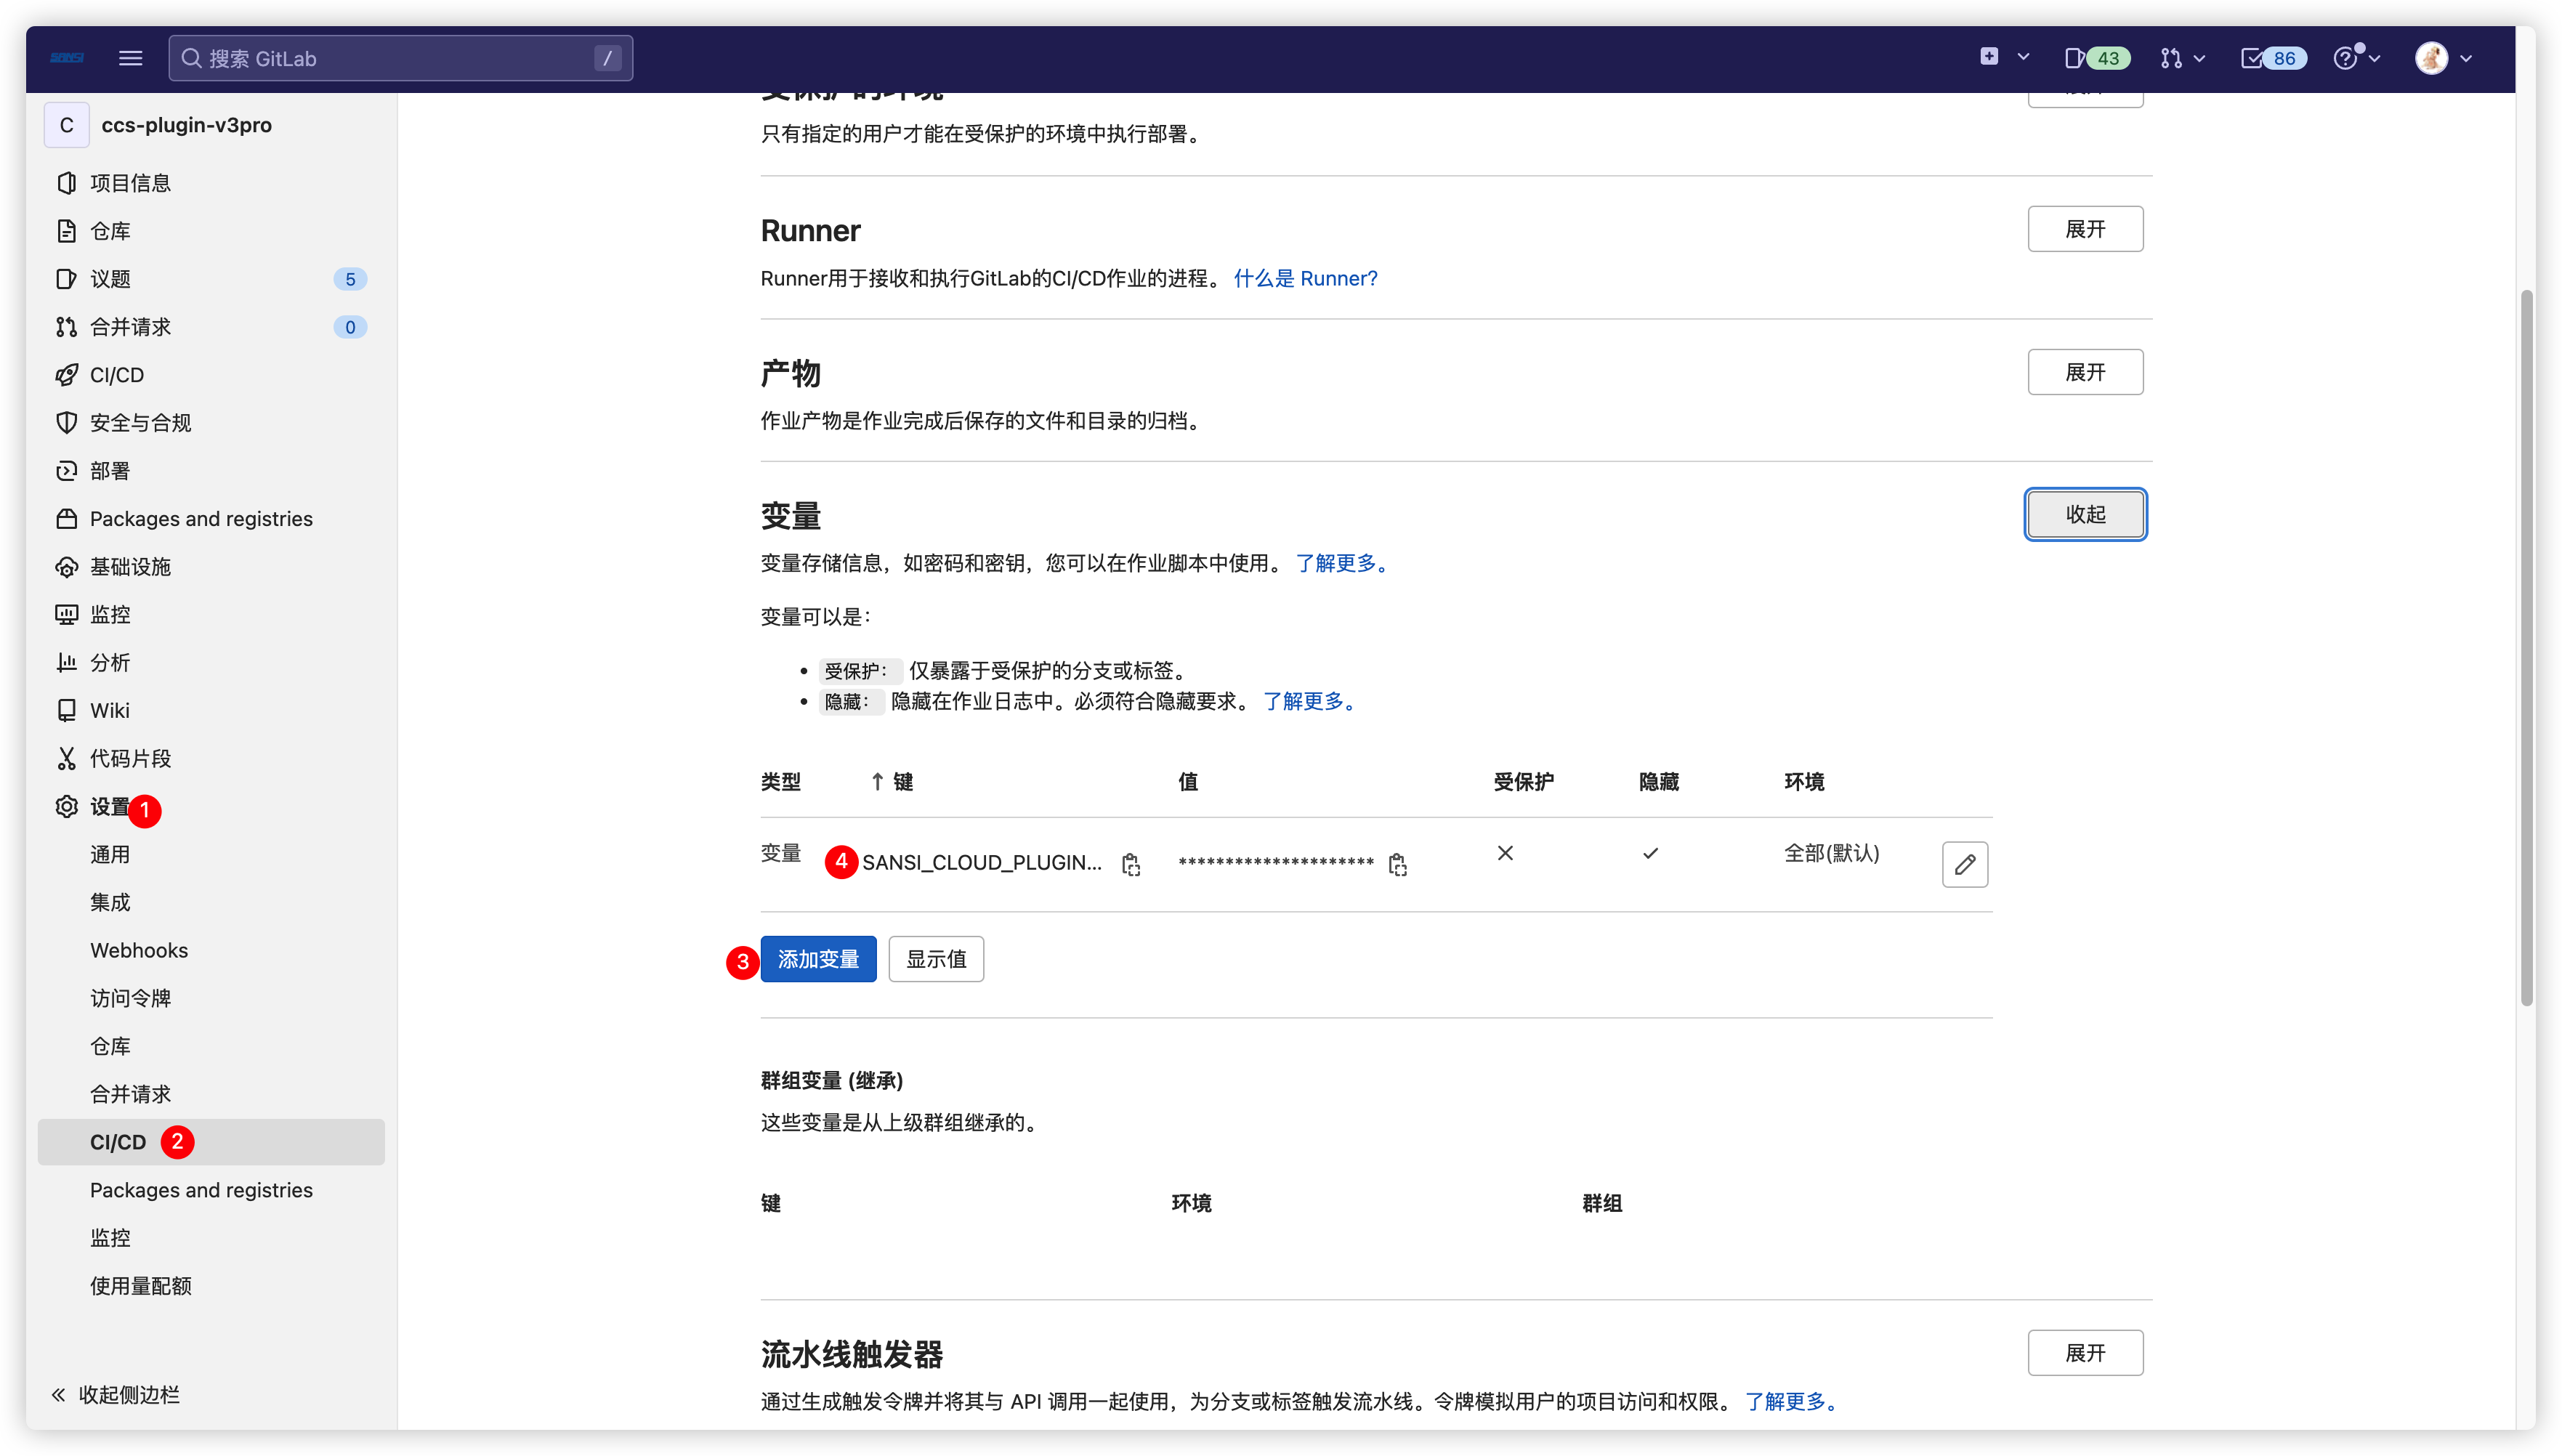
# CI Publishing
- Apply for a token on the cloud platform.
- Add the environment variable SANSI_CLOUD_PLUGIN_TOKEN in your GitLab repository's environment variables, with the value being the token string obtained.
- Complete the program's compilation build in the CI process, automating the packaging into a .msvc file through scripts.
- In the CI process, add
spub -f xxxx.msvc --openfor publishing.
⚠Note:
--openindicates a public release. To cancel the--openparameter, usespub -f xxx, or declare it as not publicly released withspub -f xxx --open false. Non-publicly released versions cannot be directly searched for in the online plugins of the central control system; you need to log in to the cloud platform to view and download them or download them via a shared link, and then load them locally.
Apply for Token 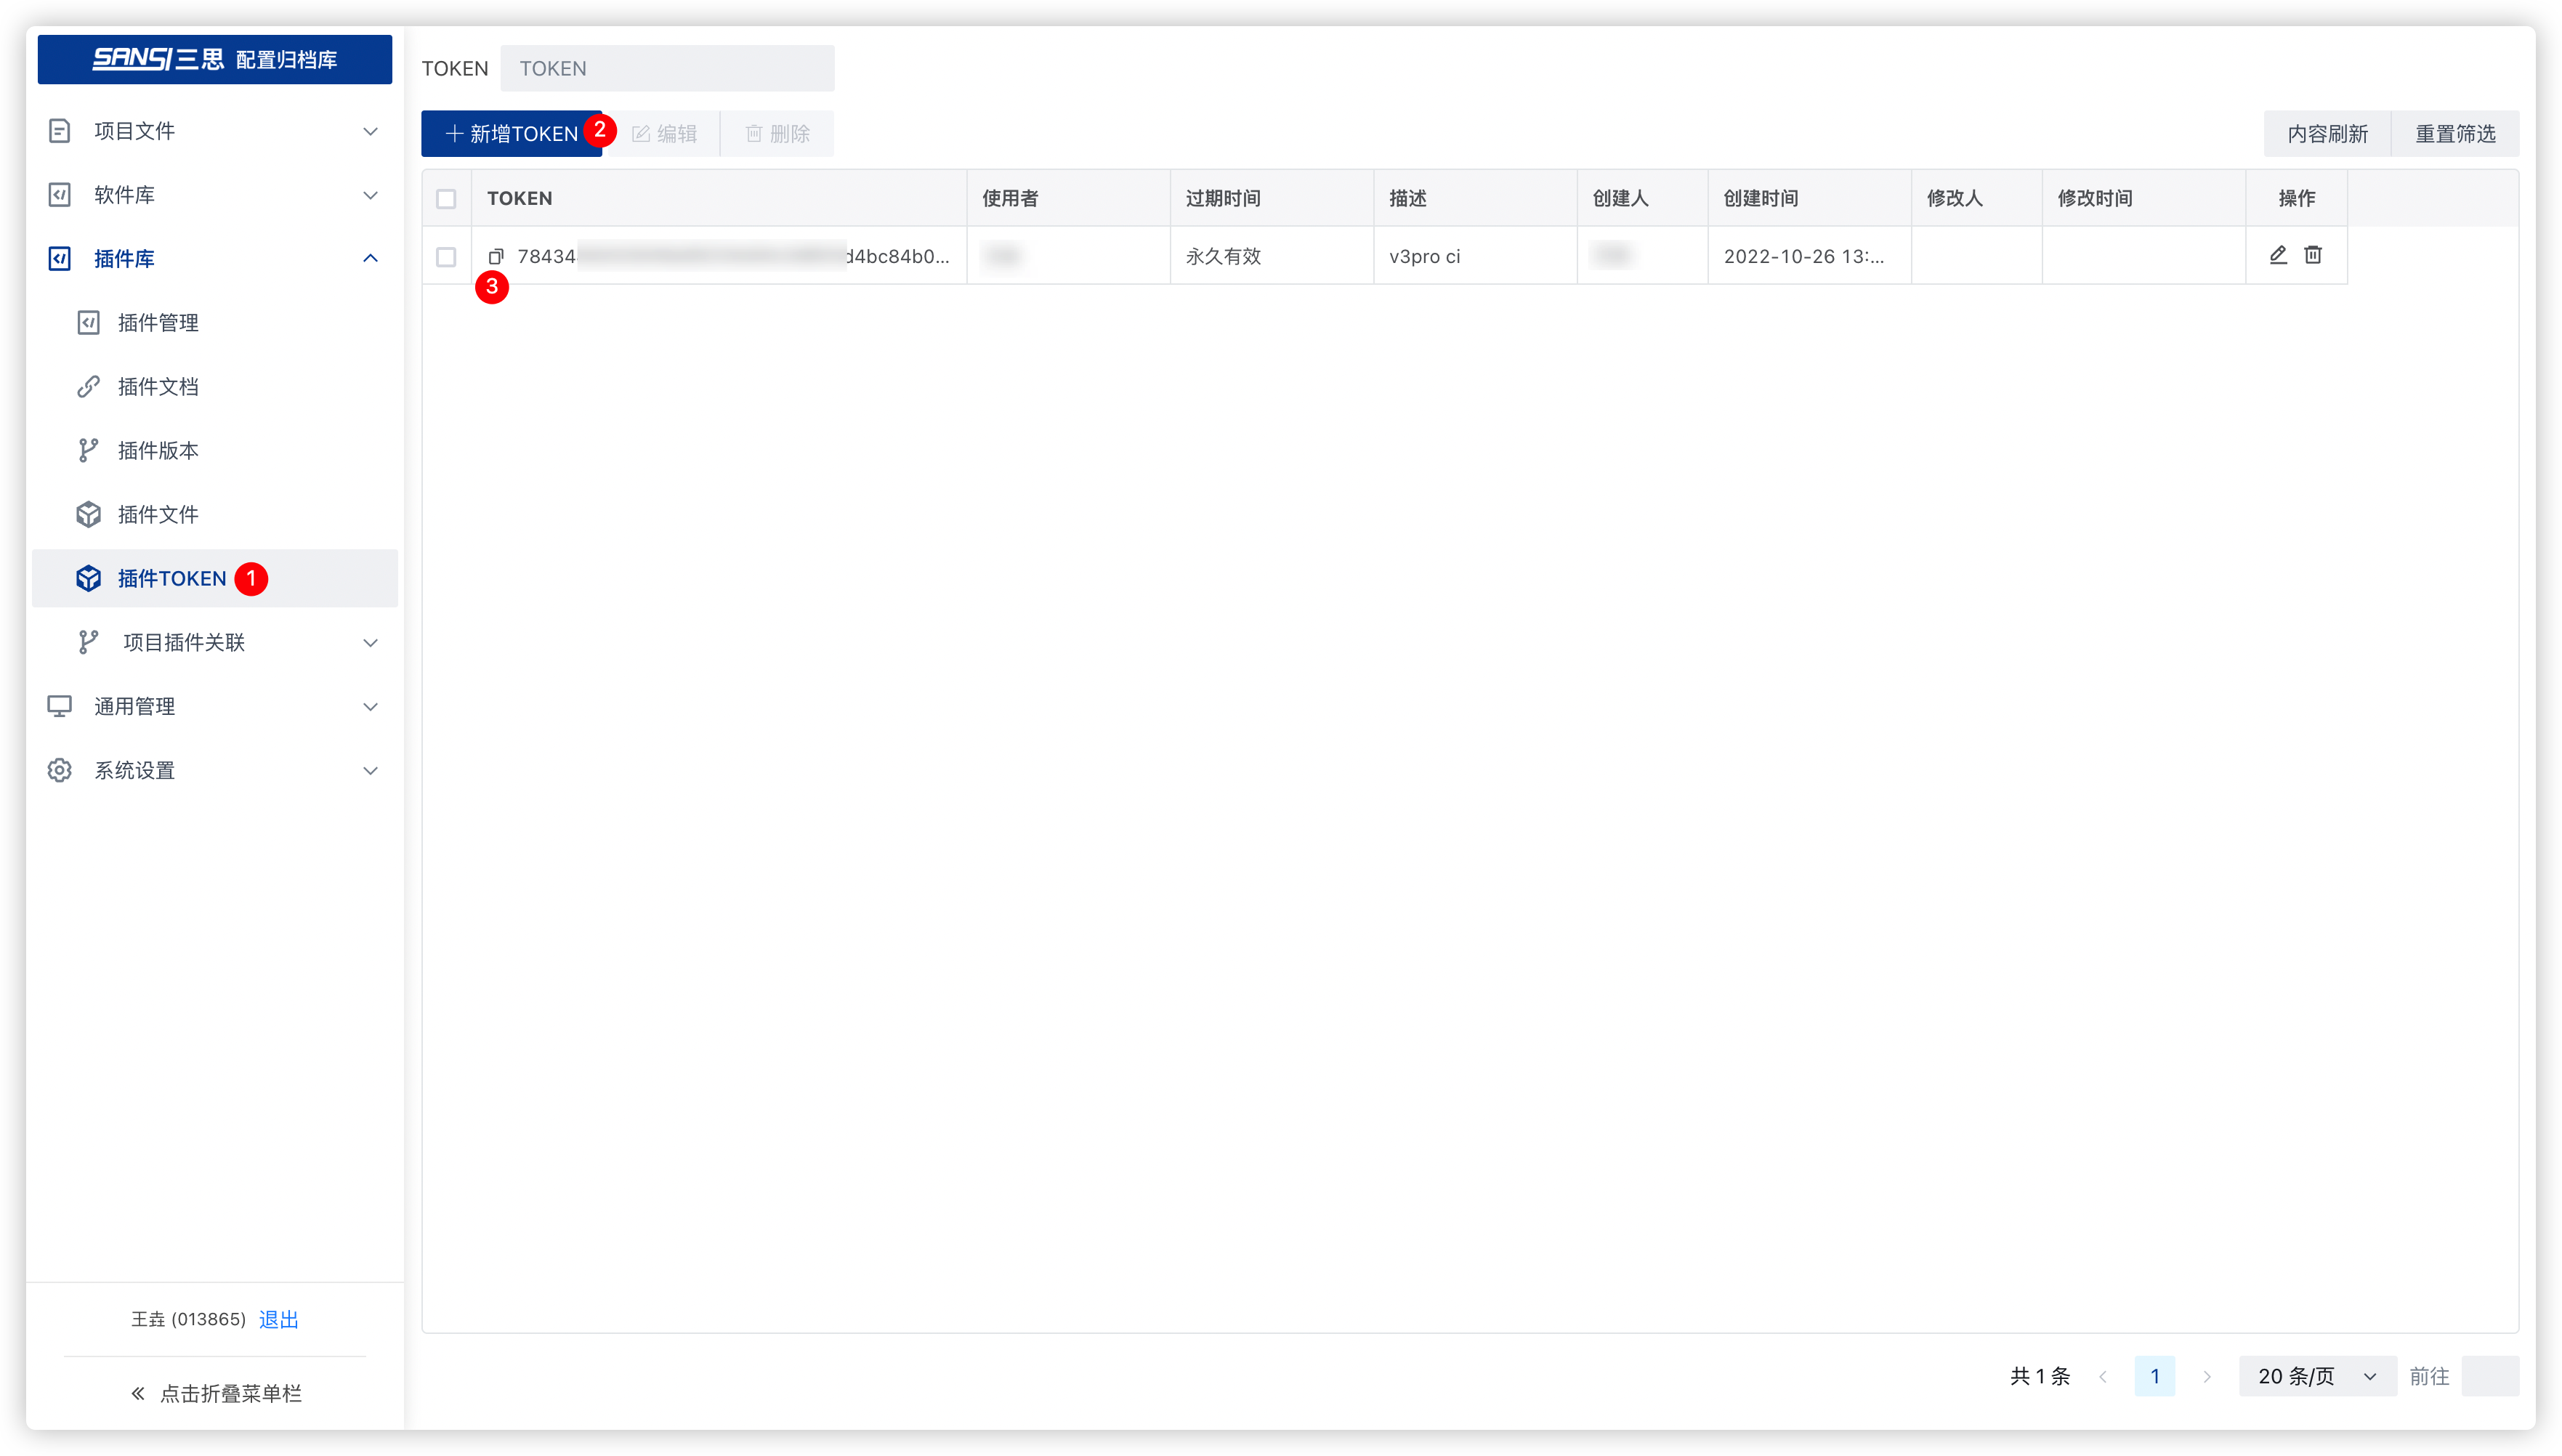
Configure CI Variables