# PLC Control User Manual
| Document Version | ontent Revision | Revised By | Revision Date |
|---|---|---|---|
| V1.0 | Draft | Shao Shouchun | 2024-03-19 |
# Table of Contents
# I. PLC Application Scenarios
- Source of Demand
Some small projects require only independent control of the PLC's power on and off functions without needing to control sending boxes or other screen-related devices. In such cases, installing a v3pro is too resource-intensive. Therefore, a small program is needed to solely control the PLC switch functionality.
- Supported Functions
- Independently control each channel in the PLC.
- Control multiple PLCs simultaneously.
- Schedule timed on/off operations.
- Notices
- This program cannot be used simultaneously with v3pro, as they utilize similar methods for controlling the PLC, which may result in channel occupation conflicts.
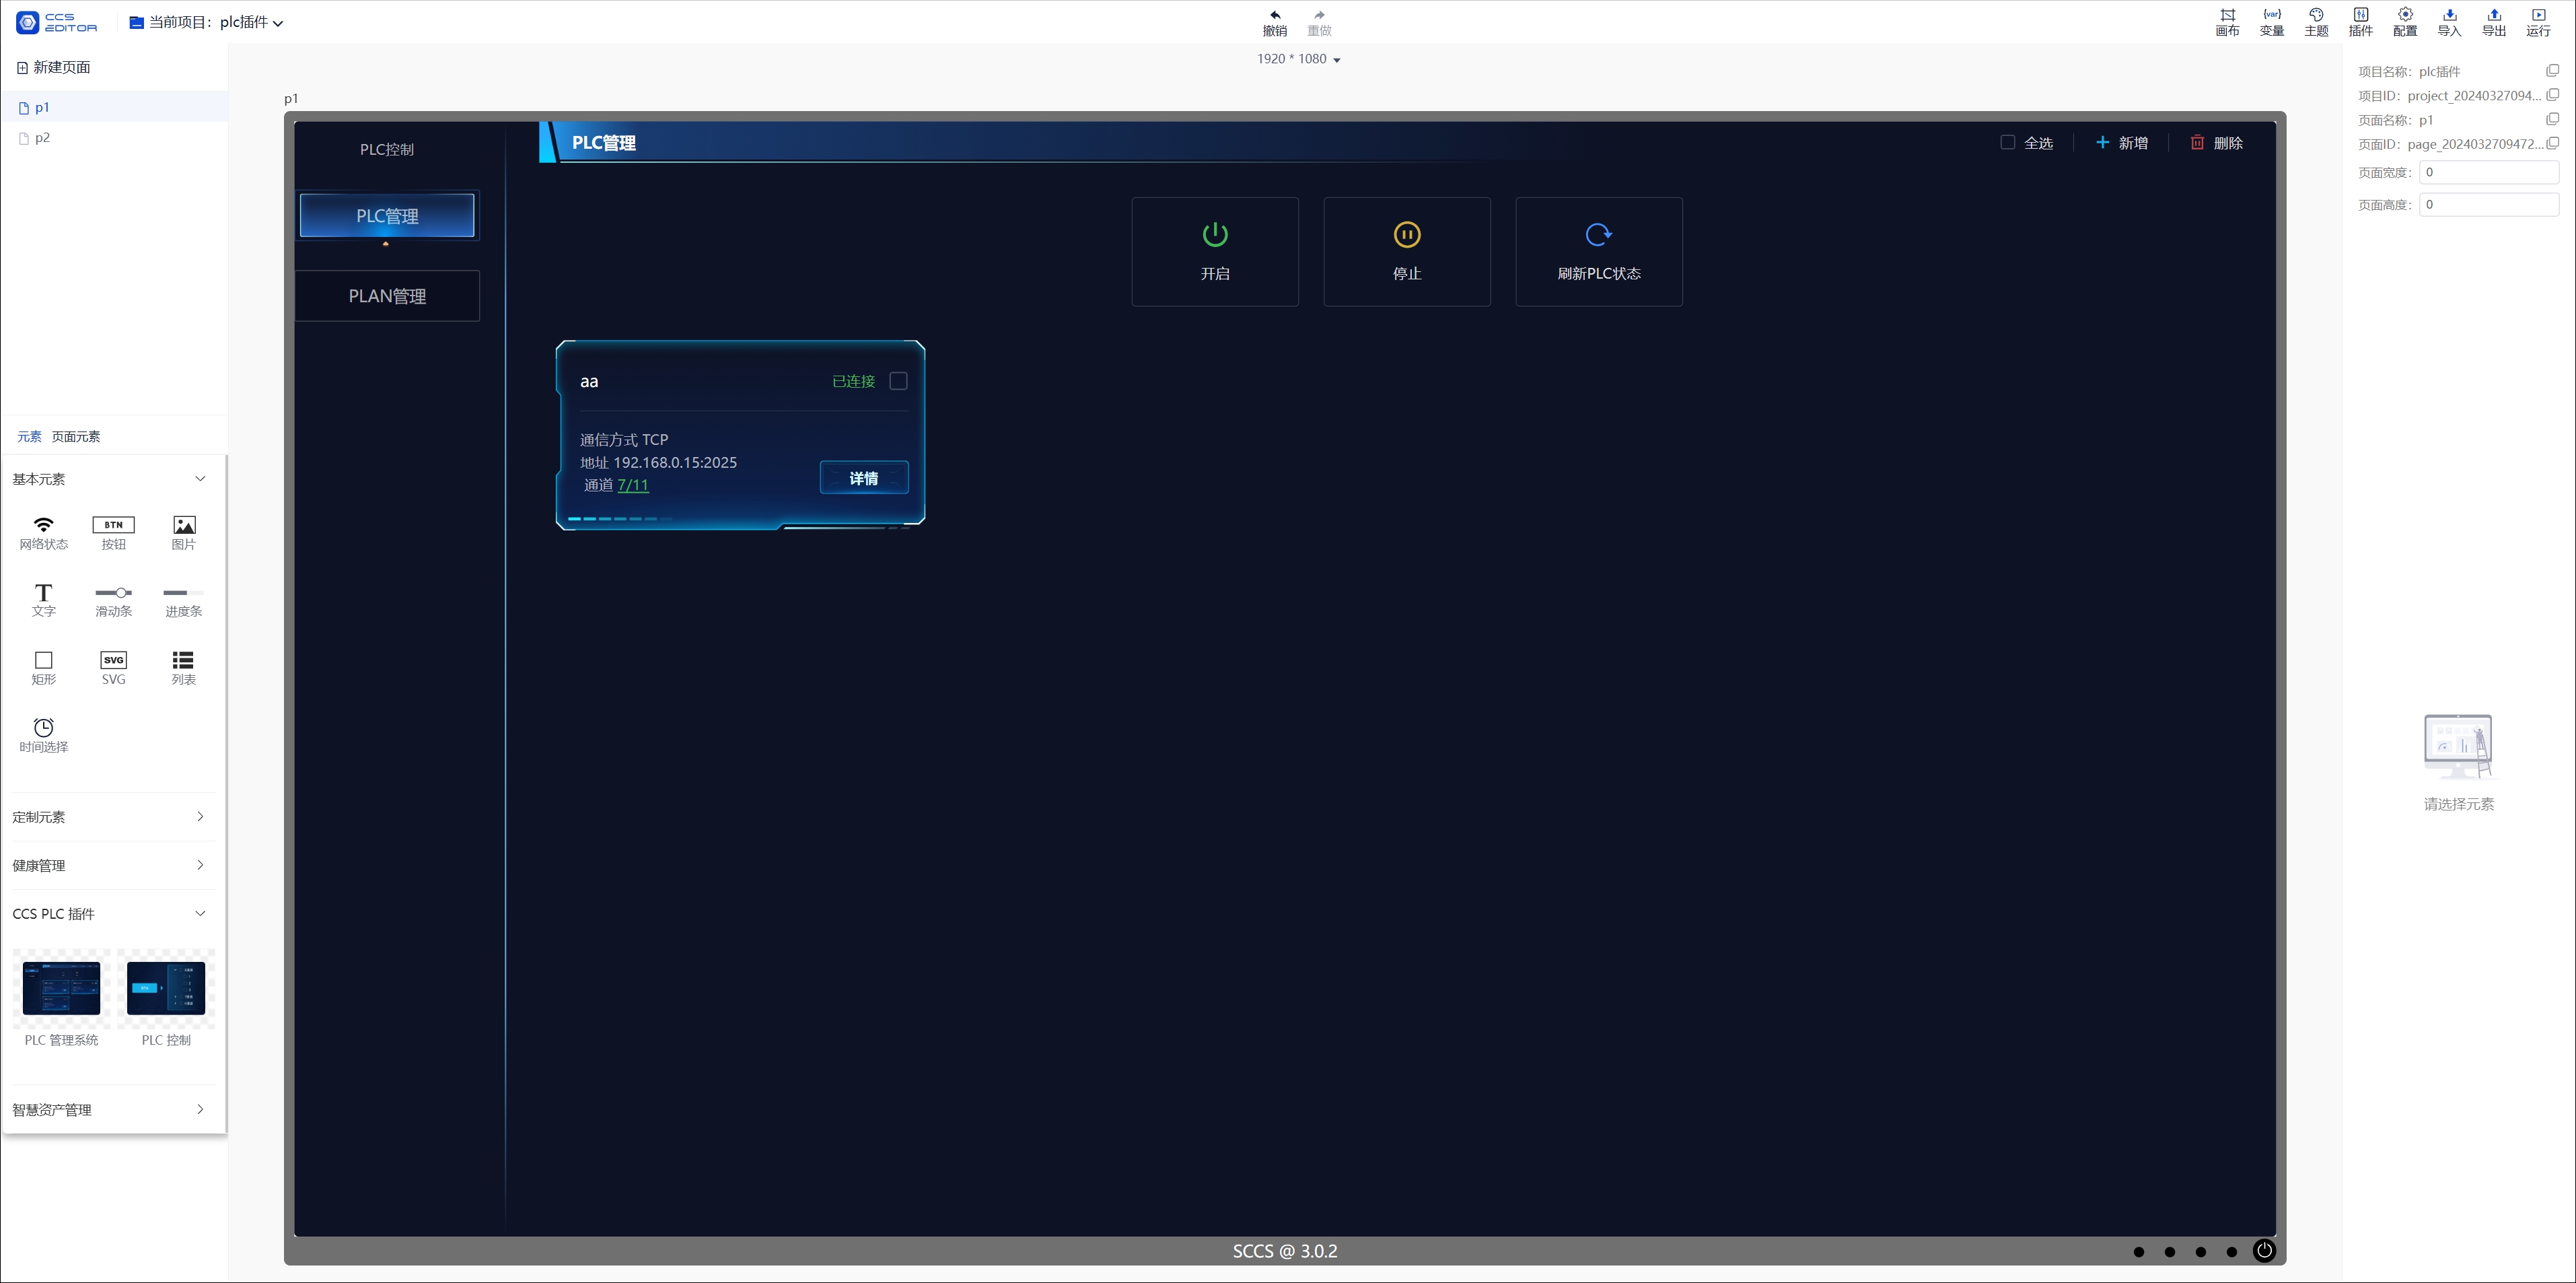
# II. PLC Management
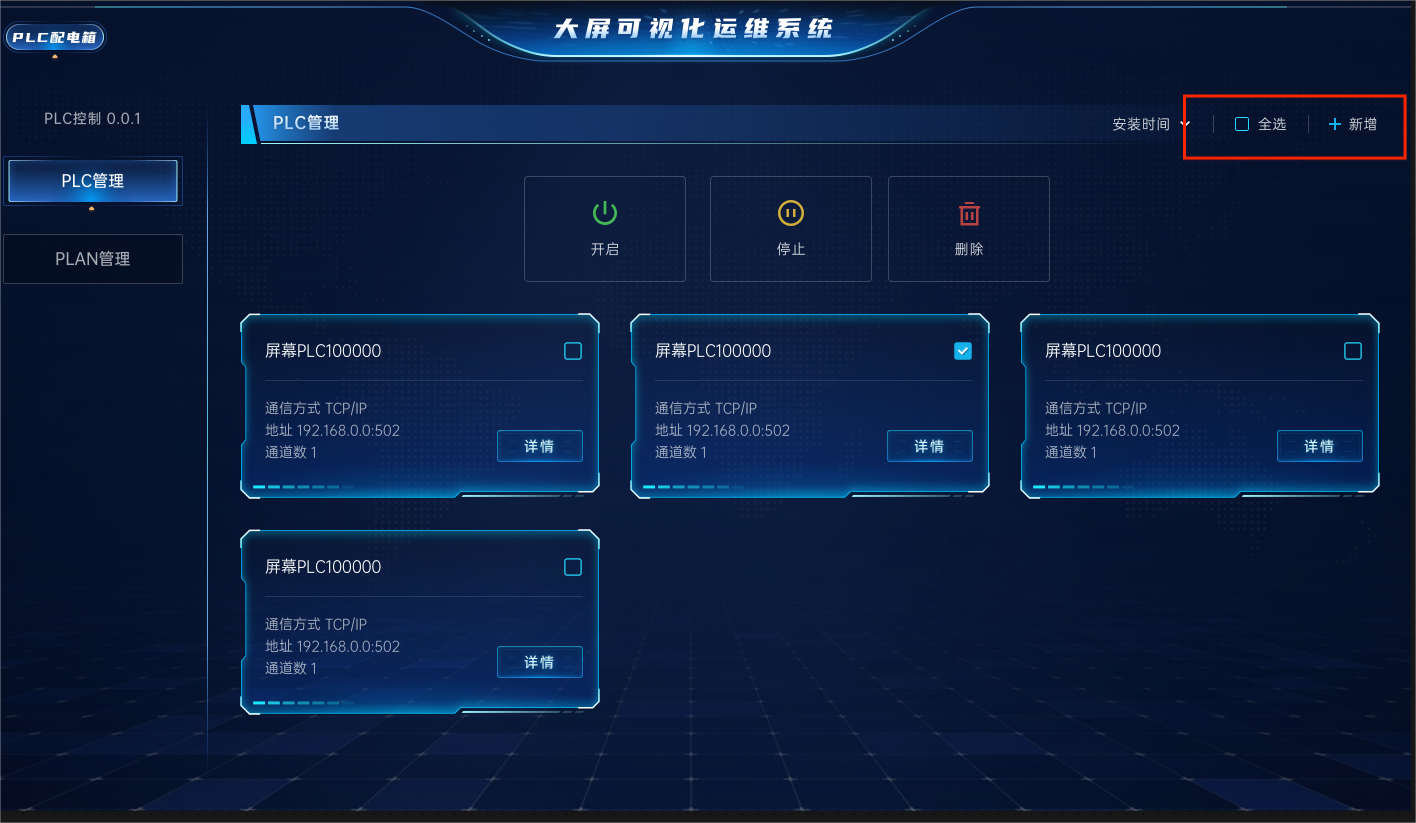
- Enter the PLC management section, which displays a list of all PLCs by default.
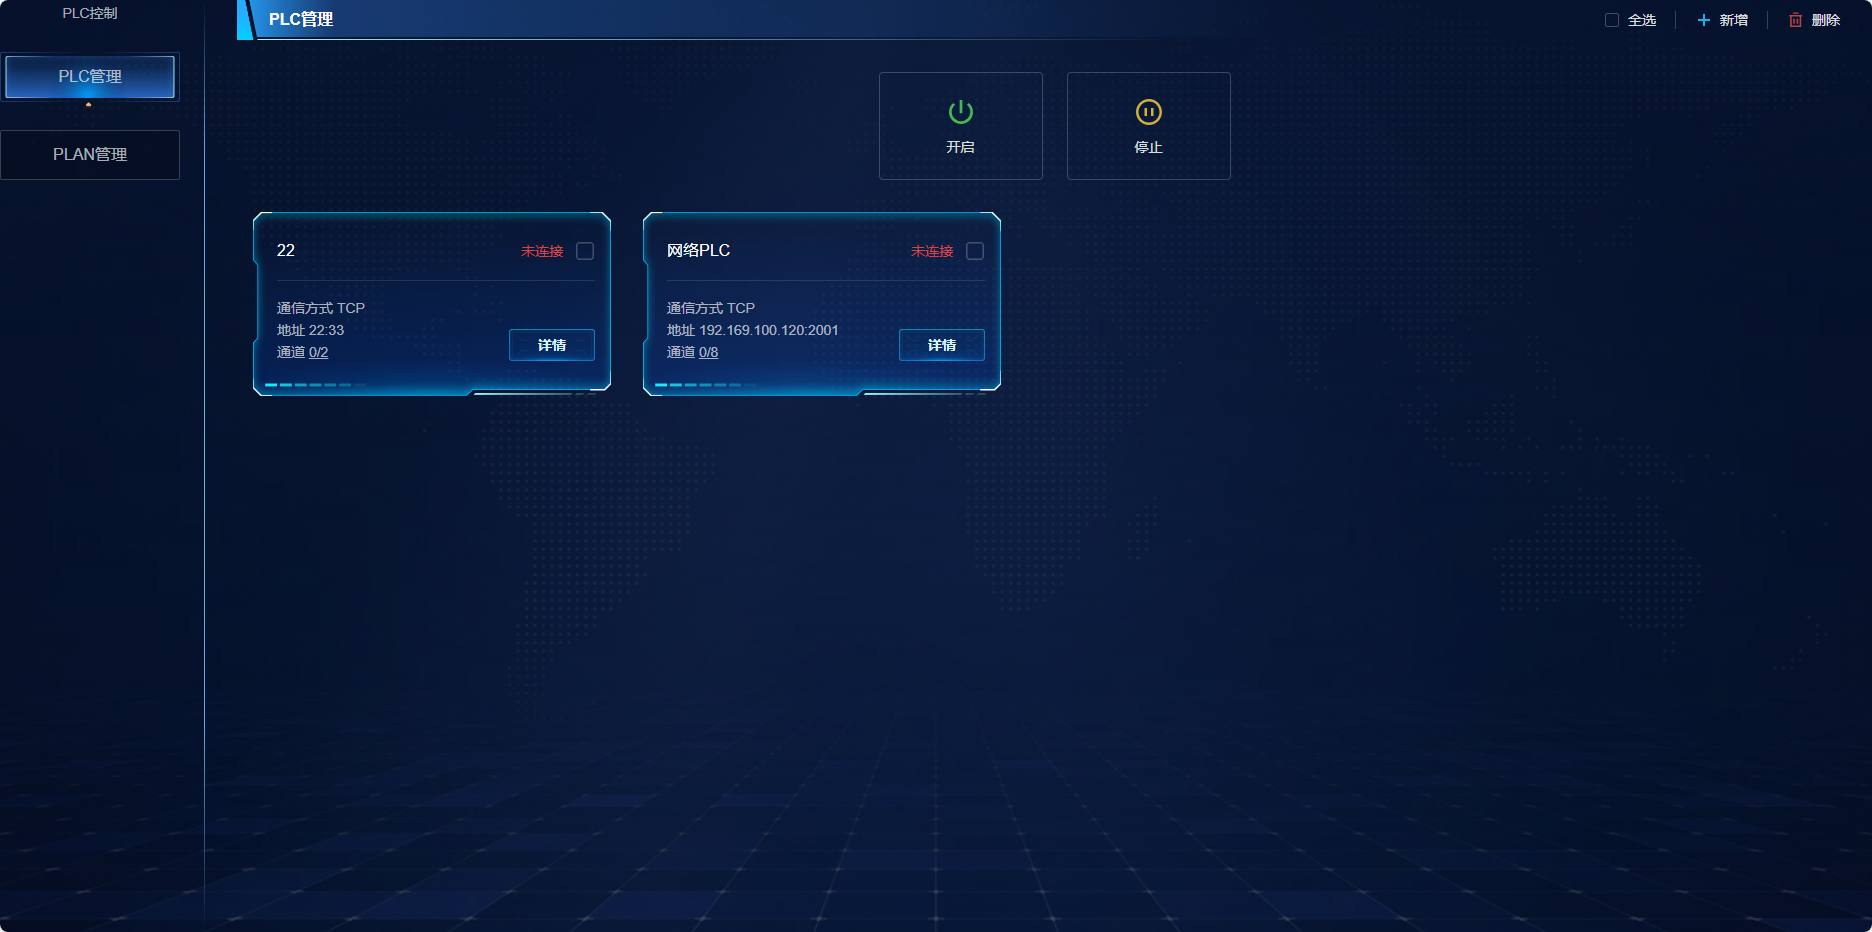
- Each PLC has a checkbox in the upper right corner for selecting PLCs, allowing for multiple selections.

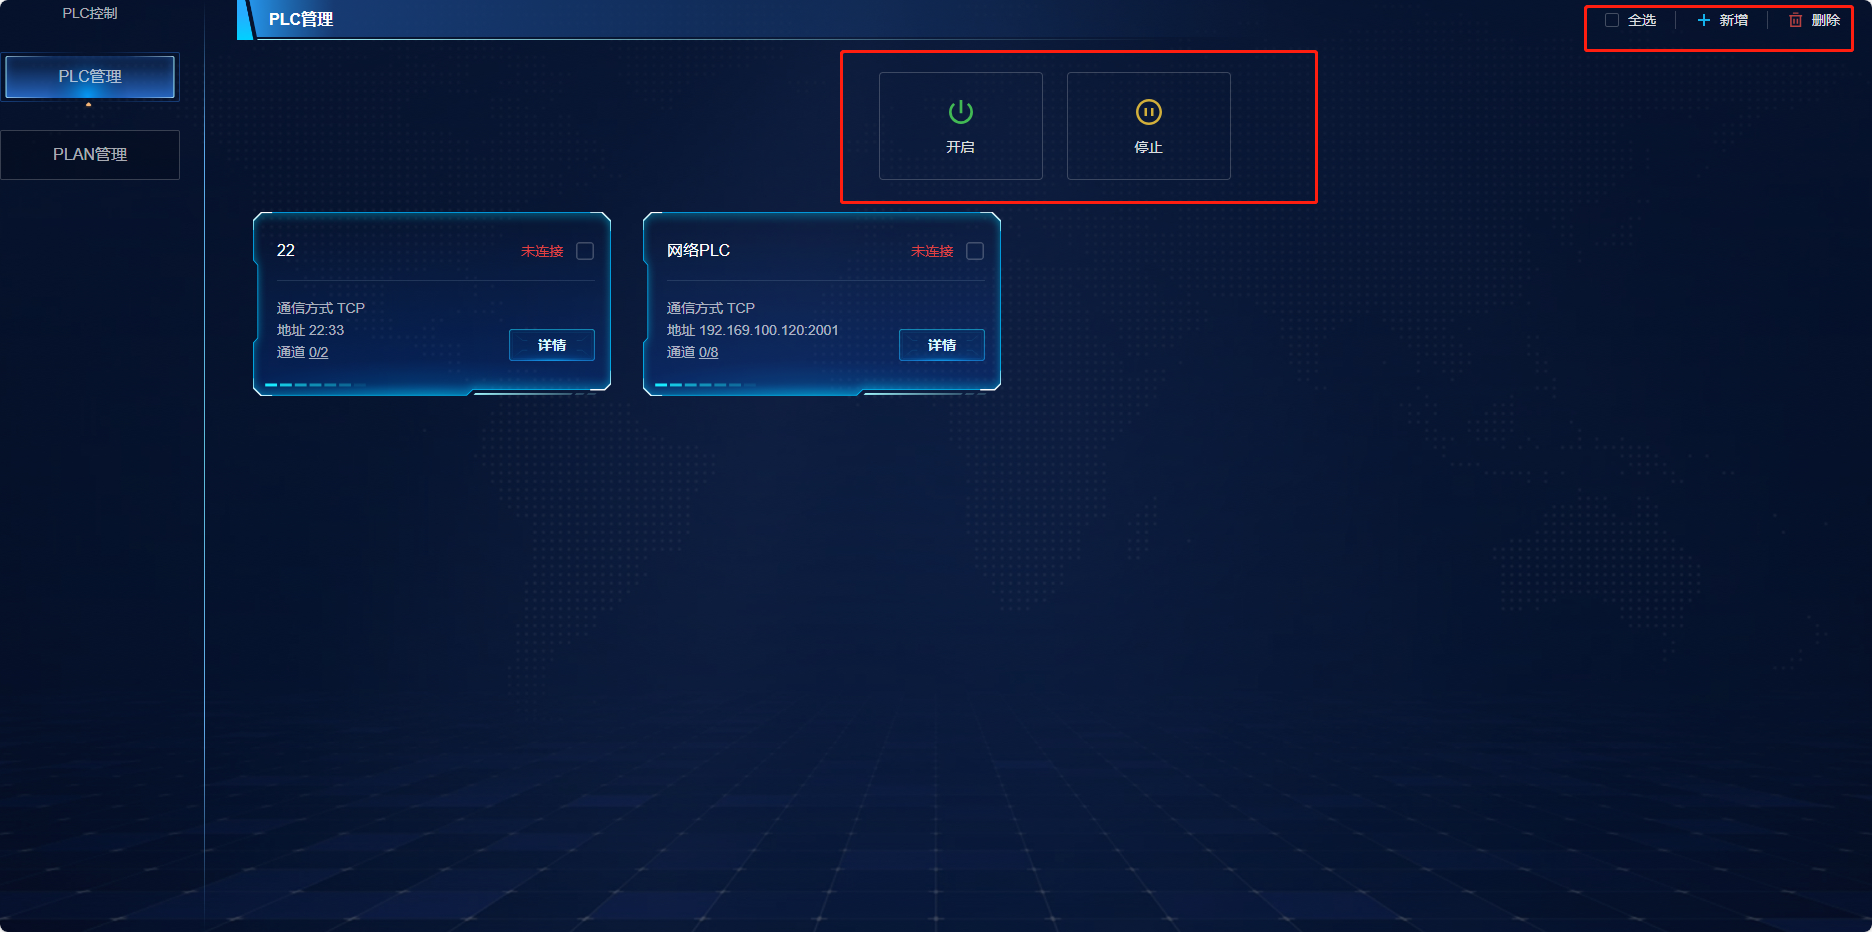
- Once PLCs are selected, you can perform PLC operations (start, stop, delete) or click the "Select All" option in the upper right corner for mass selection.
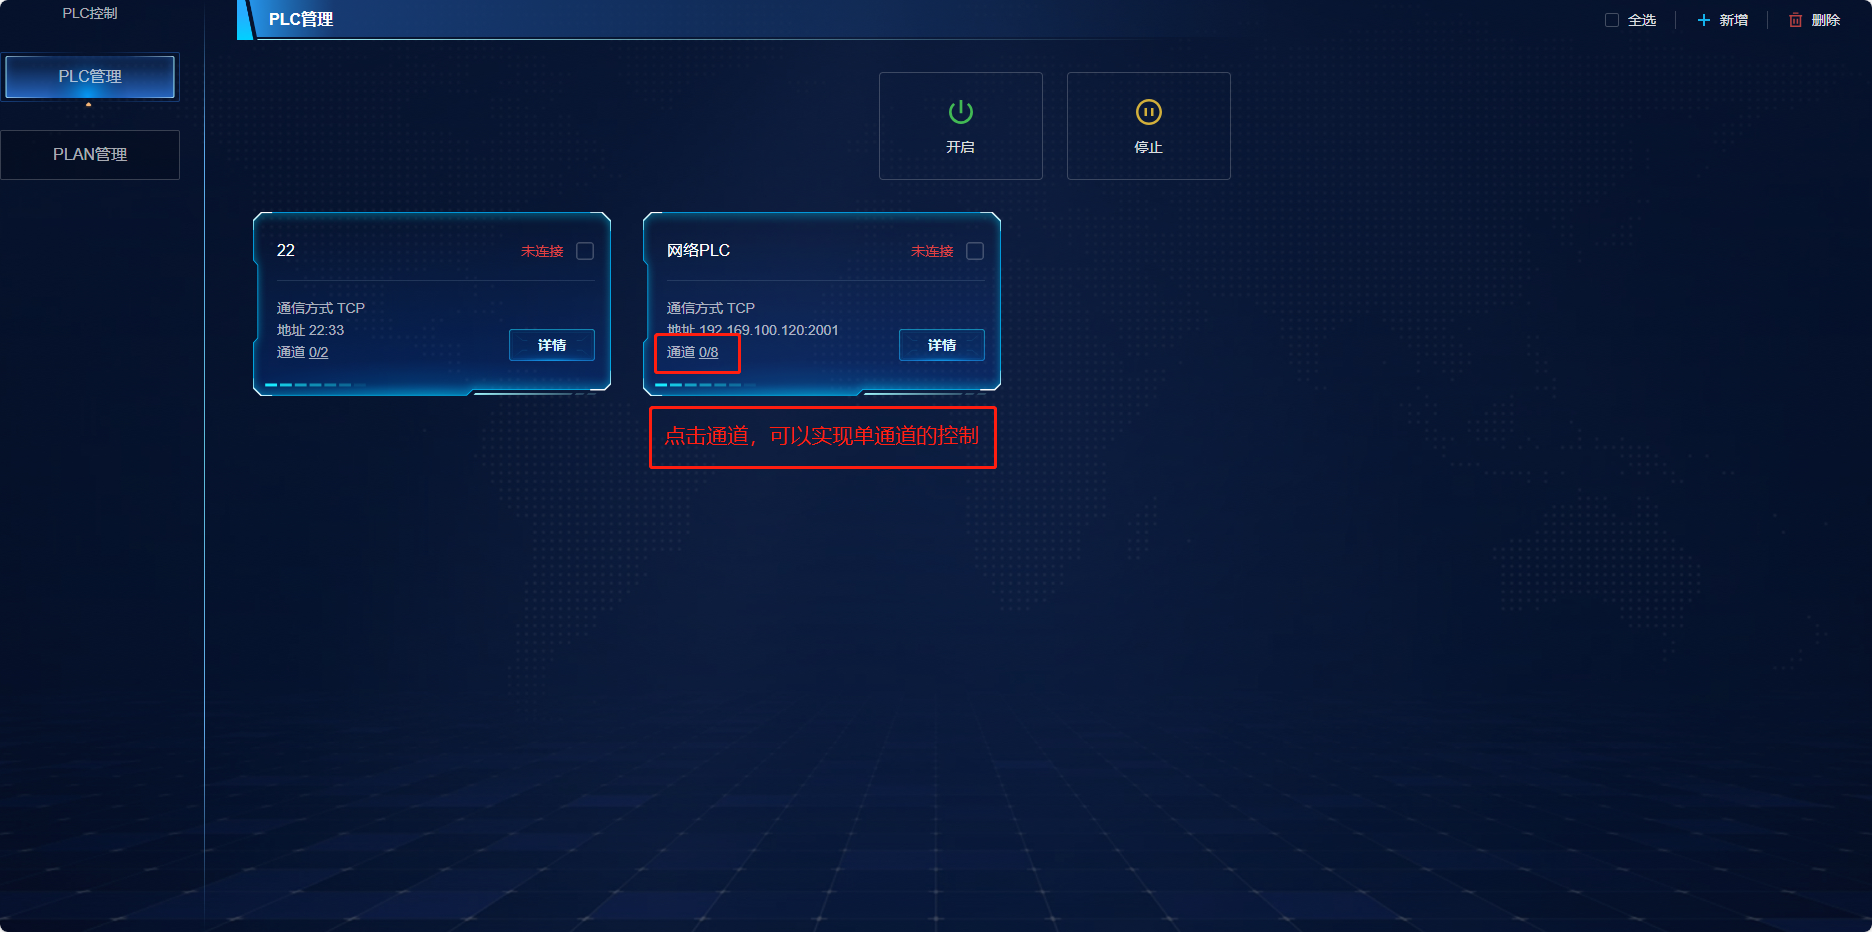
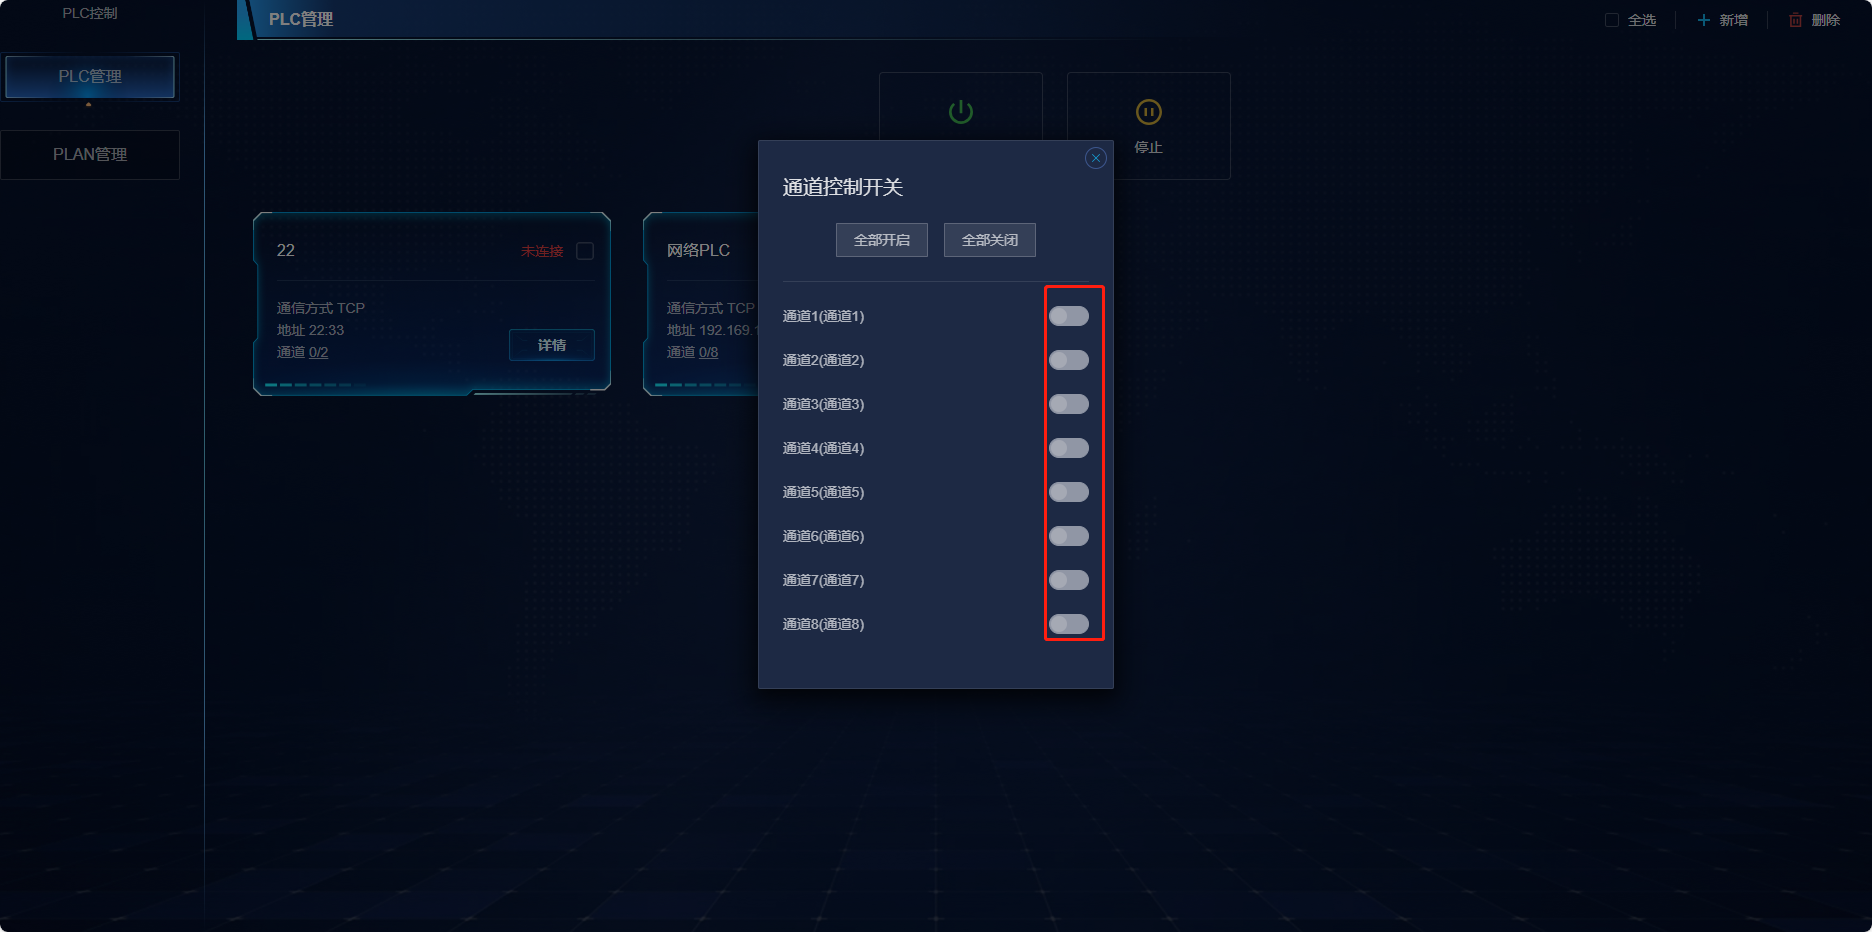
- Clicking on a channel allows for single-channel operations (on/off).
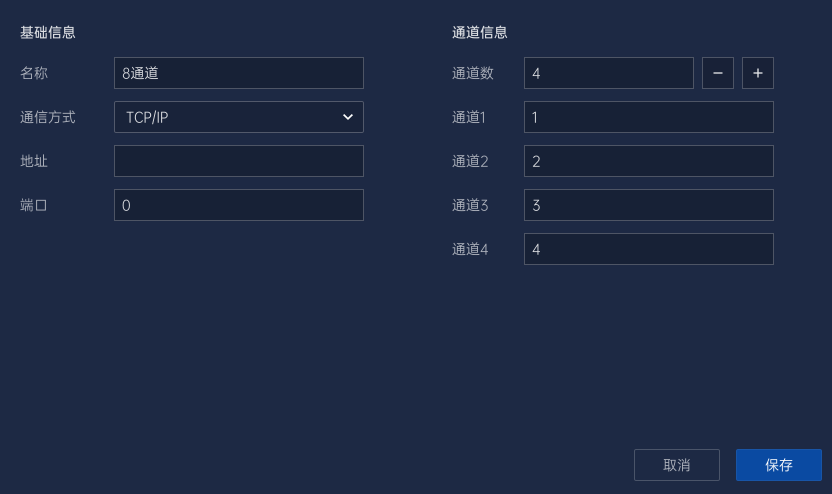
- To add a PLC, click the plus icon in the upper right corner.
The information required includes PLC name, communication method (TCP or serial), IP address (for serial, use the port number), and port number (baud rate). Channel information should include the channel name.
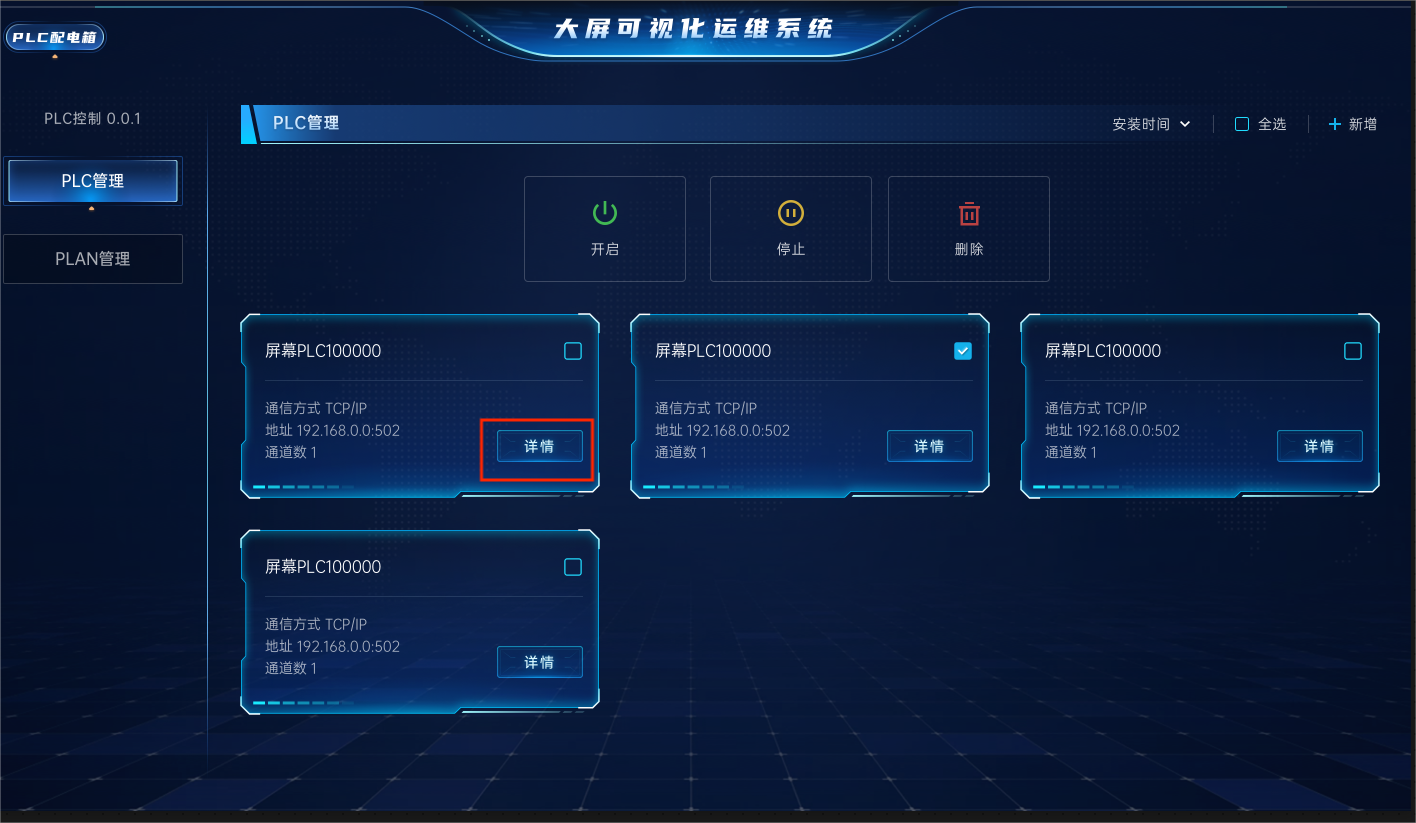
- Edit PLC Details
Clicking on the details takes you to the PLC's detail interface.
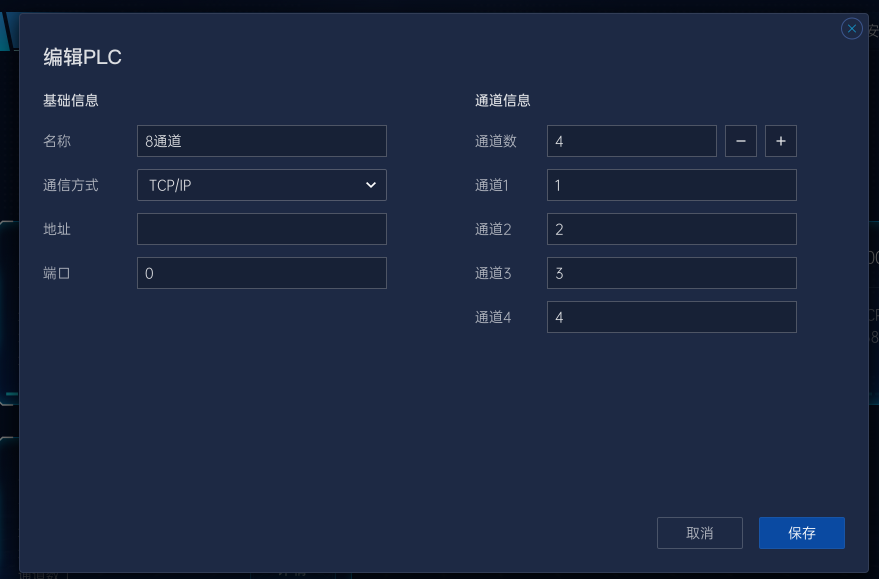
After modifying the information, click save to apply changes.
# III. Schedule Management
- Enter the plan management interface.
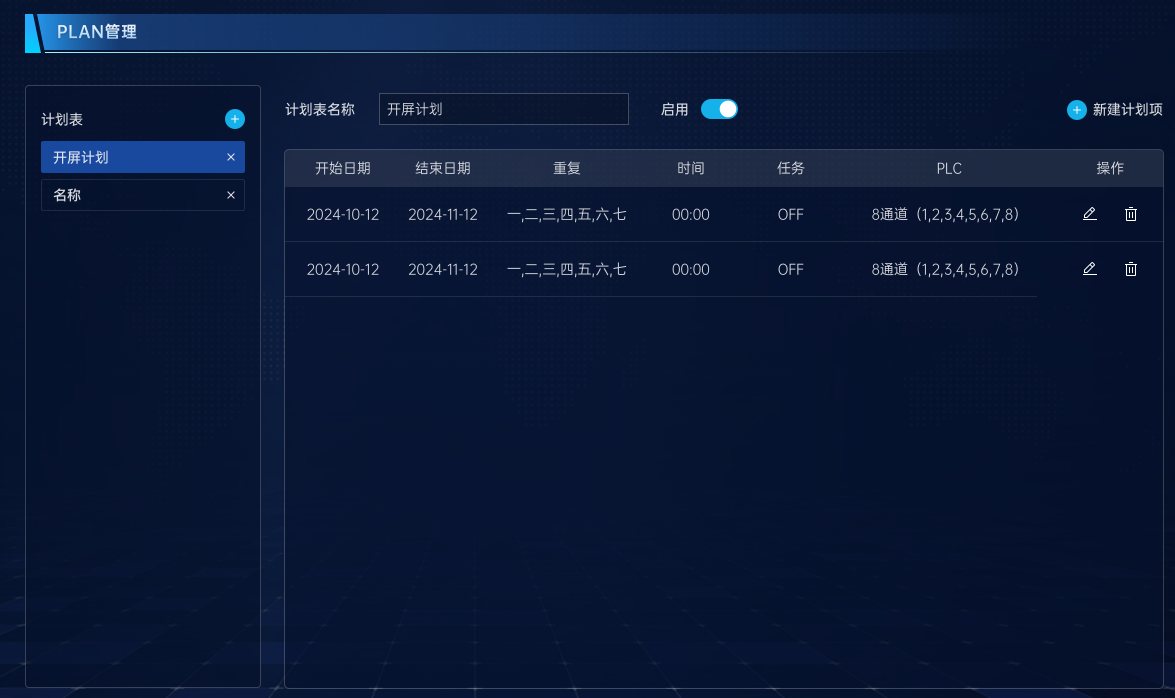
- Click to add a new schedule.
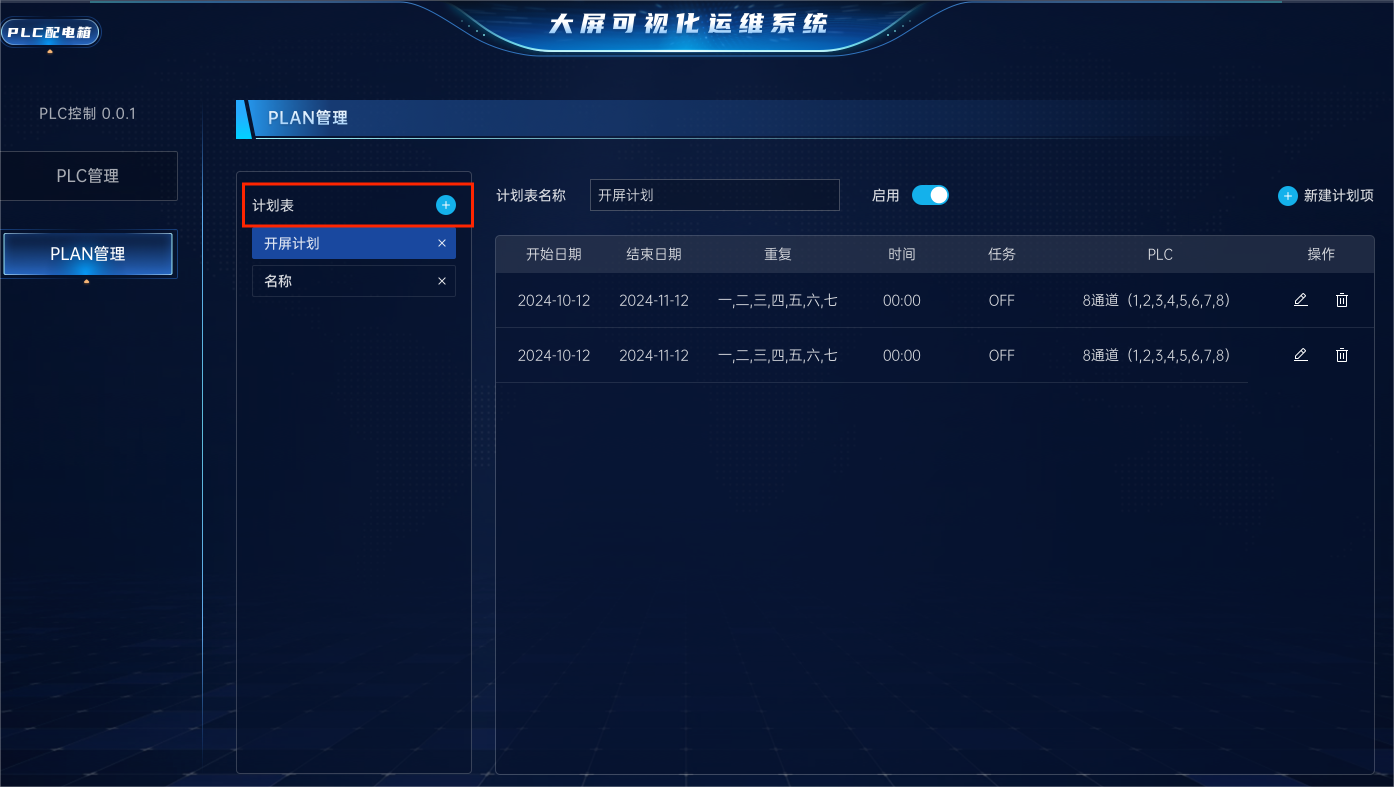
Define the name of the schedule.
Note: The schedule must be enabled to be effective

- Click to add a schedule item.
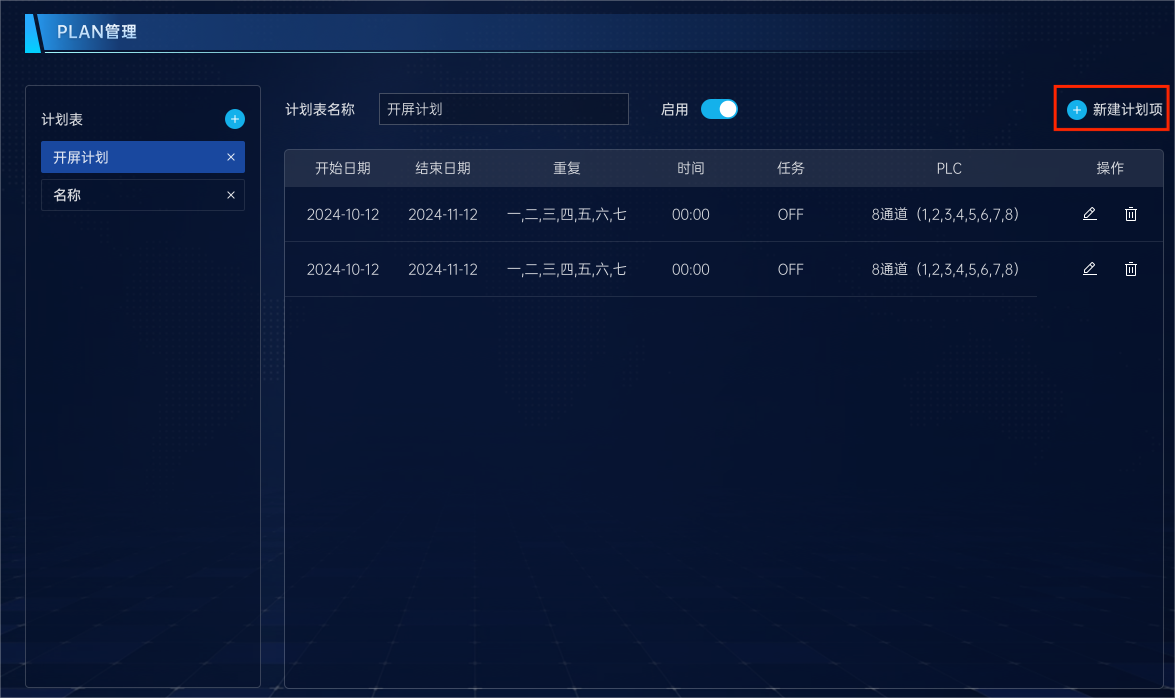
Add tasks based on the scheduled time; tasks can include closing or opening the PLC. You can select the PLC name and PLC channel.
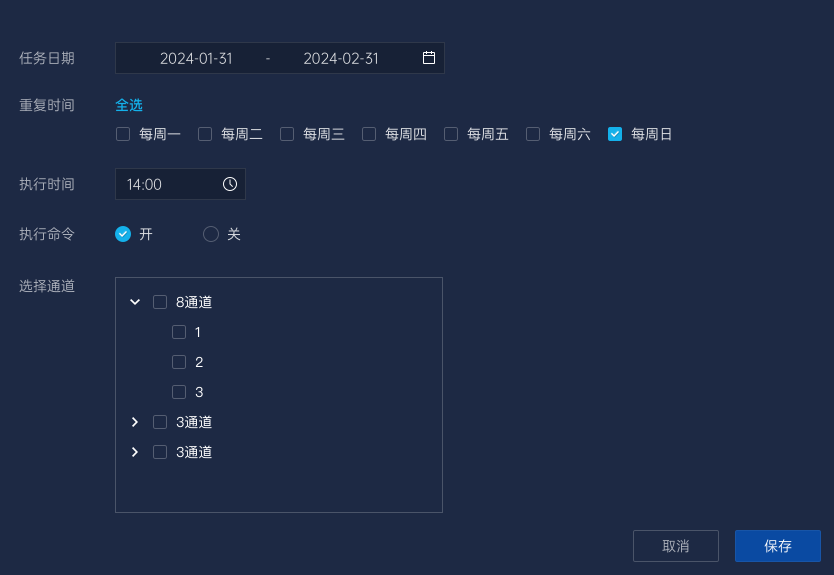
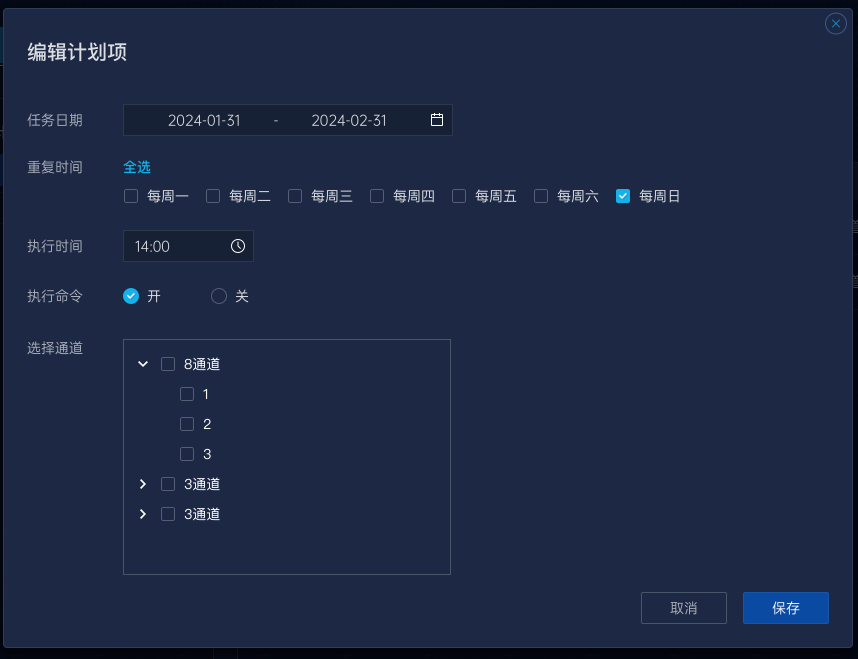
- Edit Schedule Item
To edit a schedule item, redefine the time and tasks according to your modifications. Finally, click save to apply the configuration.
# Four: how to use PLC plug-ins
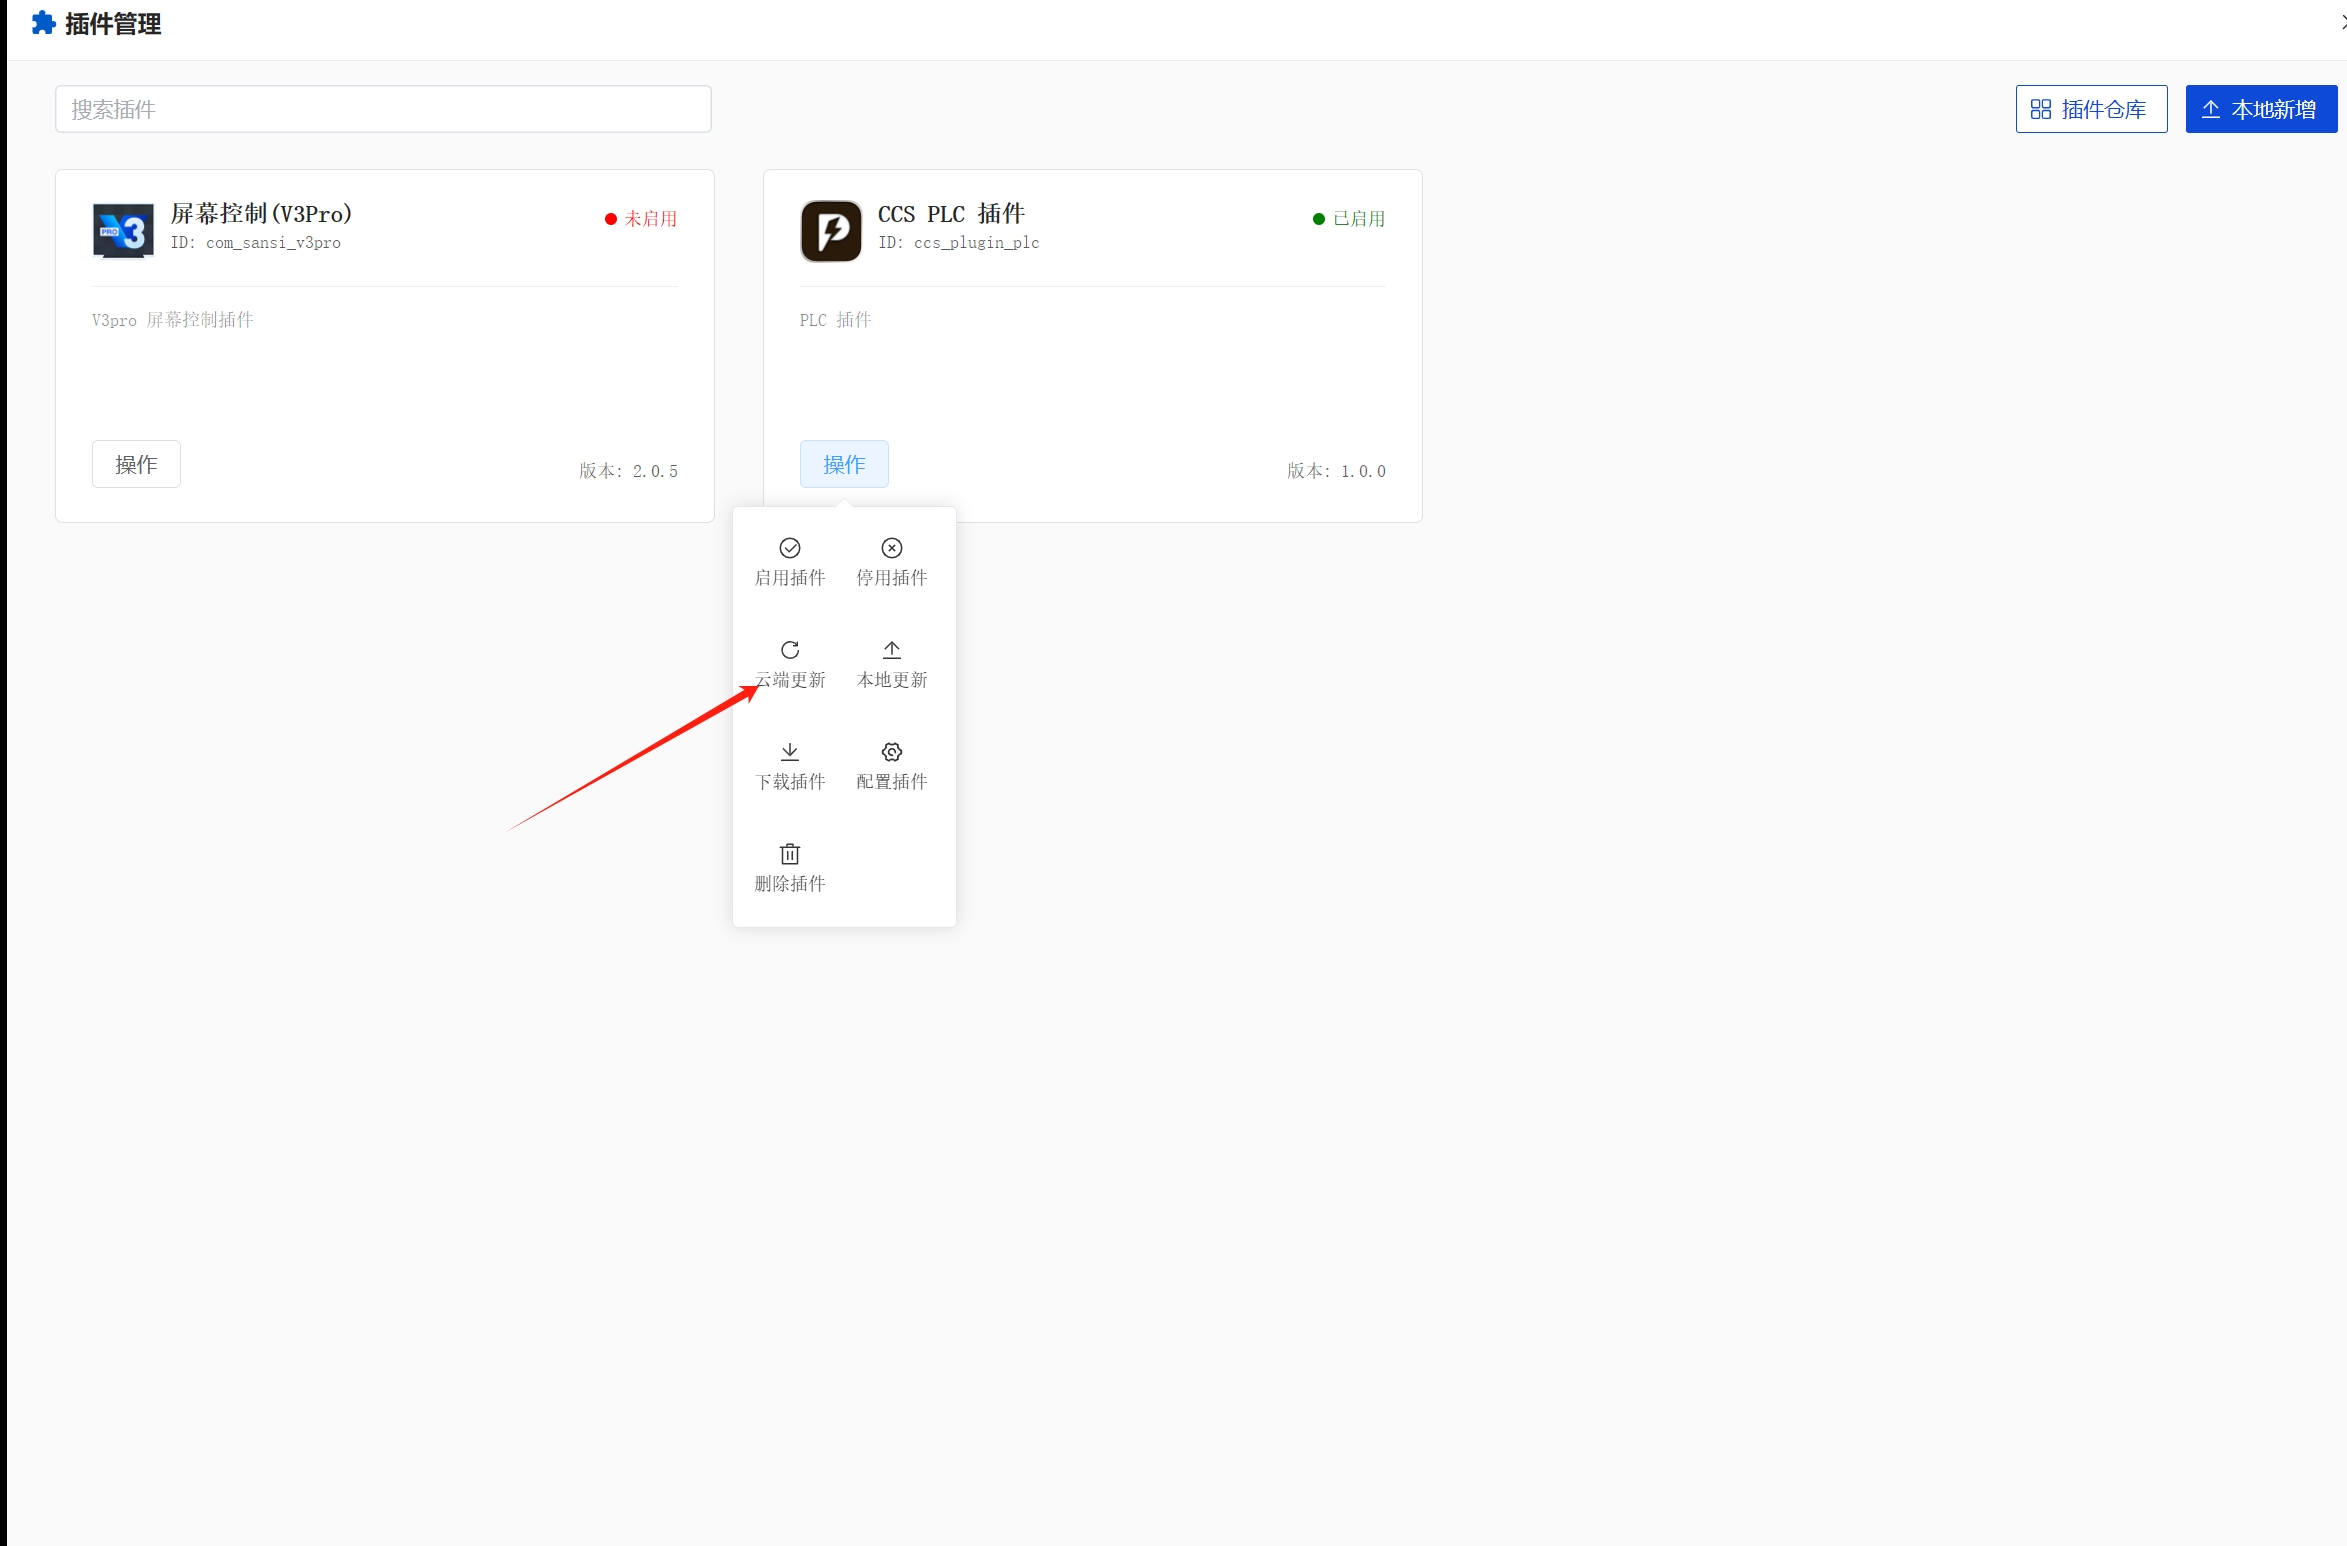
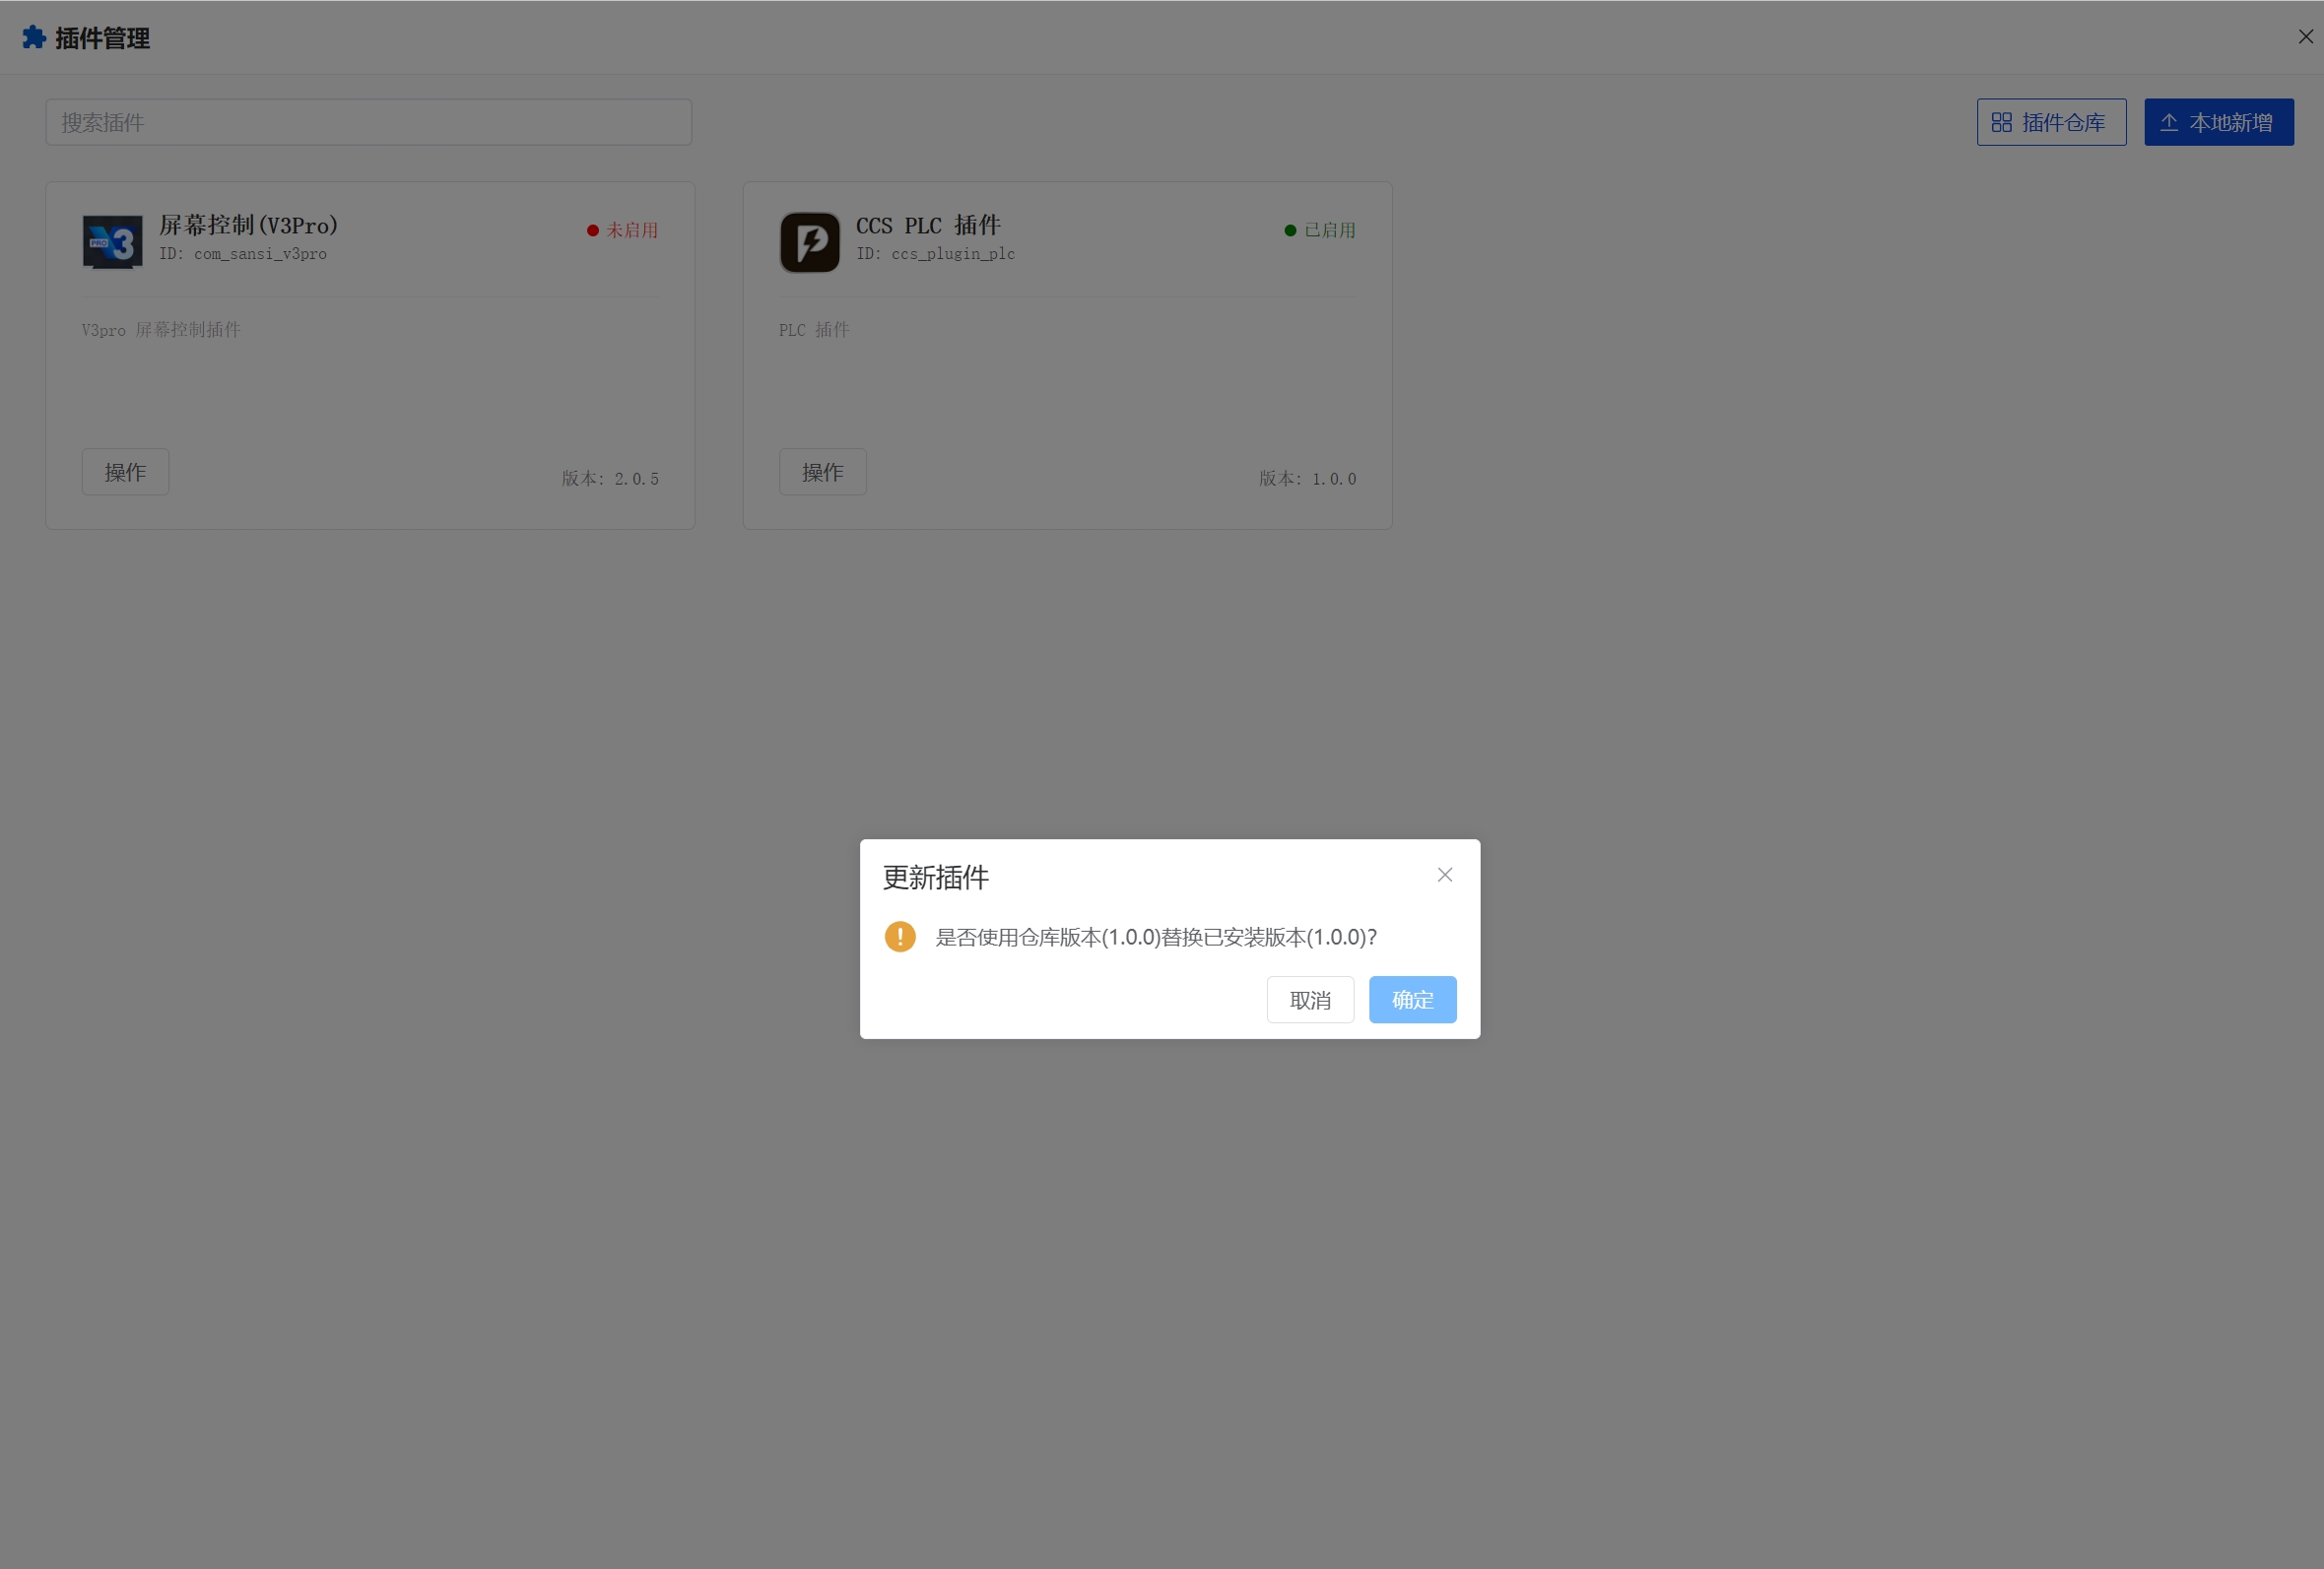
- Click on the plug-in, and the plug-in repository searches for PLC plug-ins or cloud-updated plug-ins
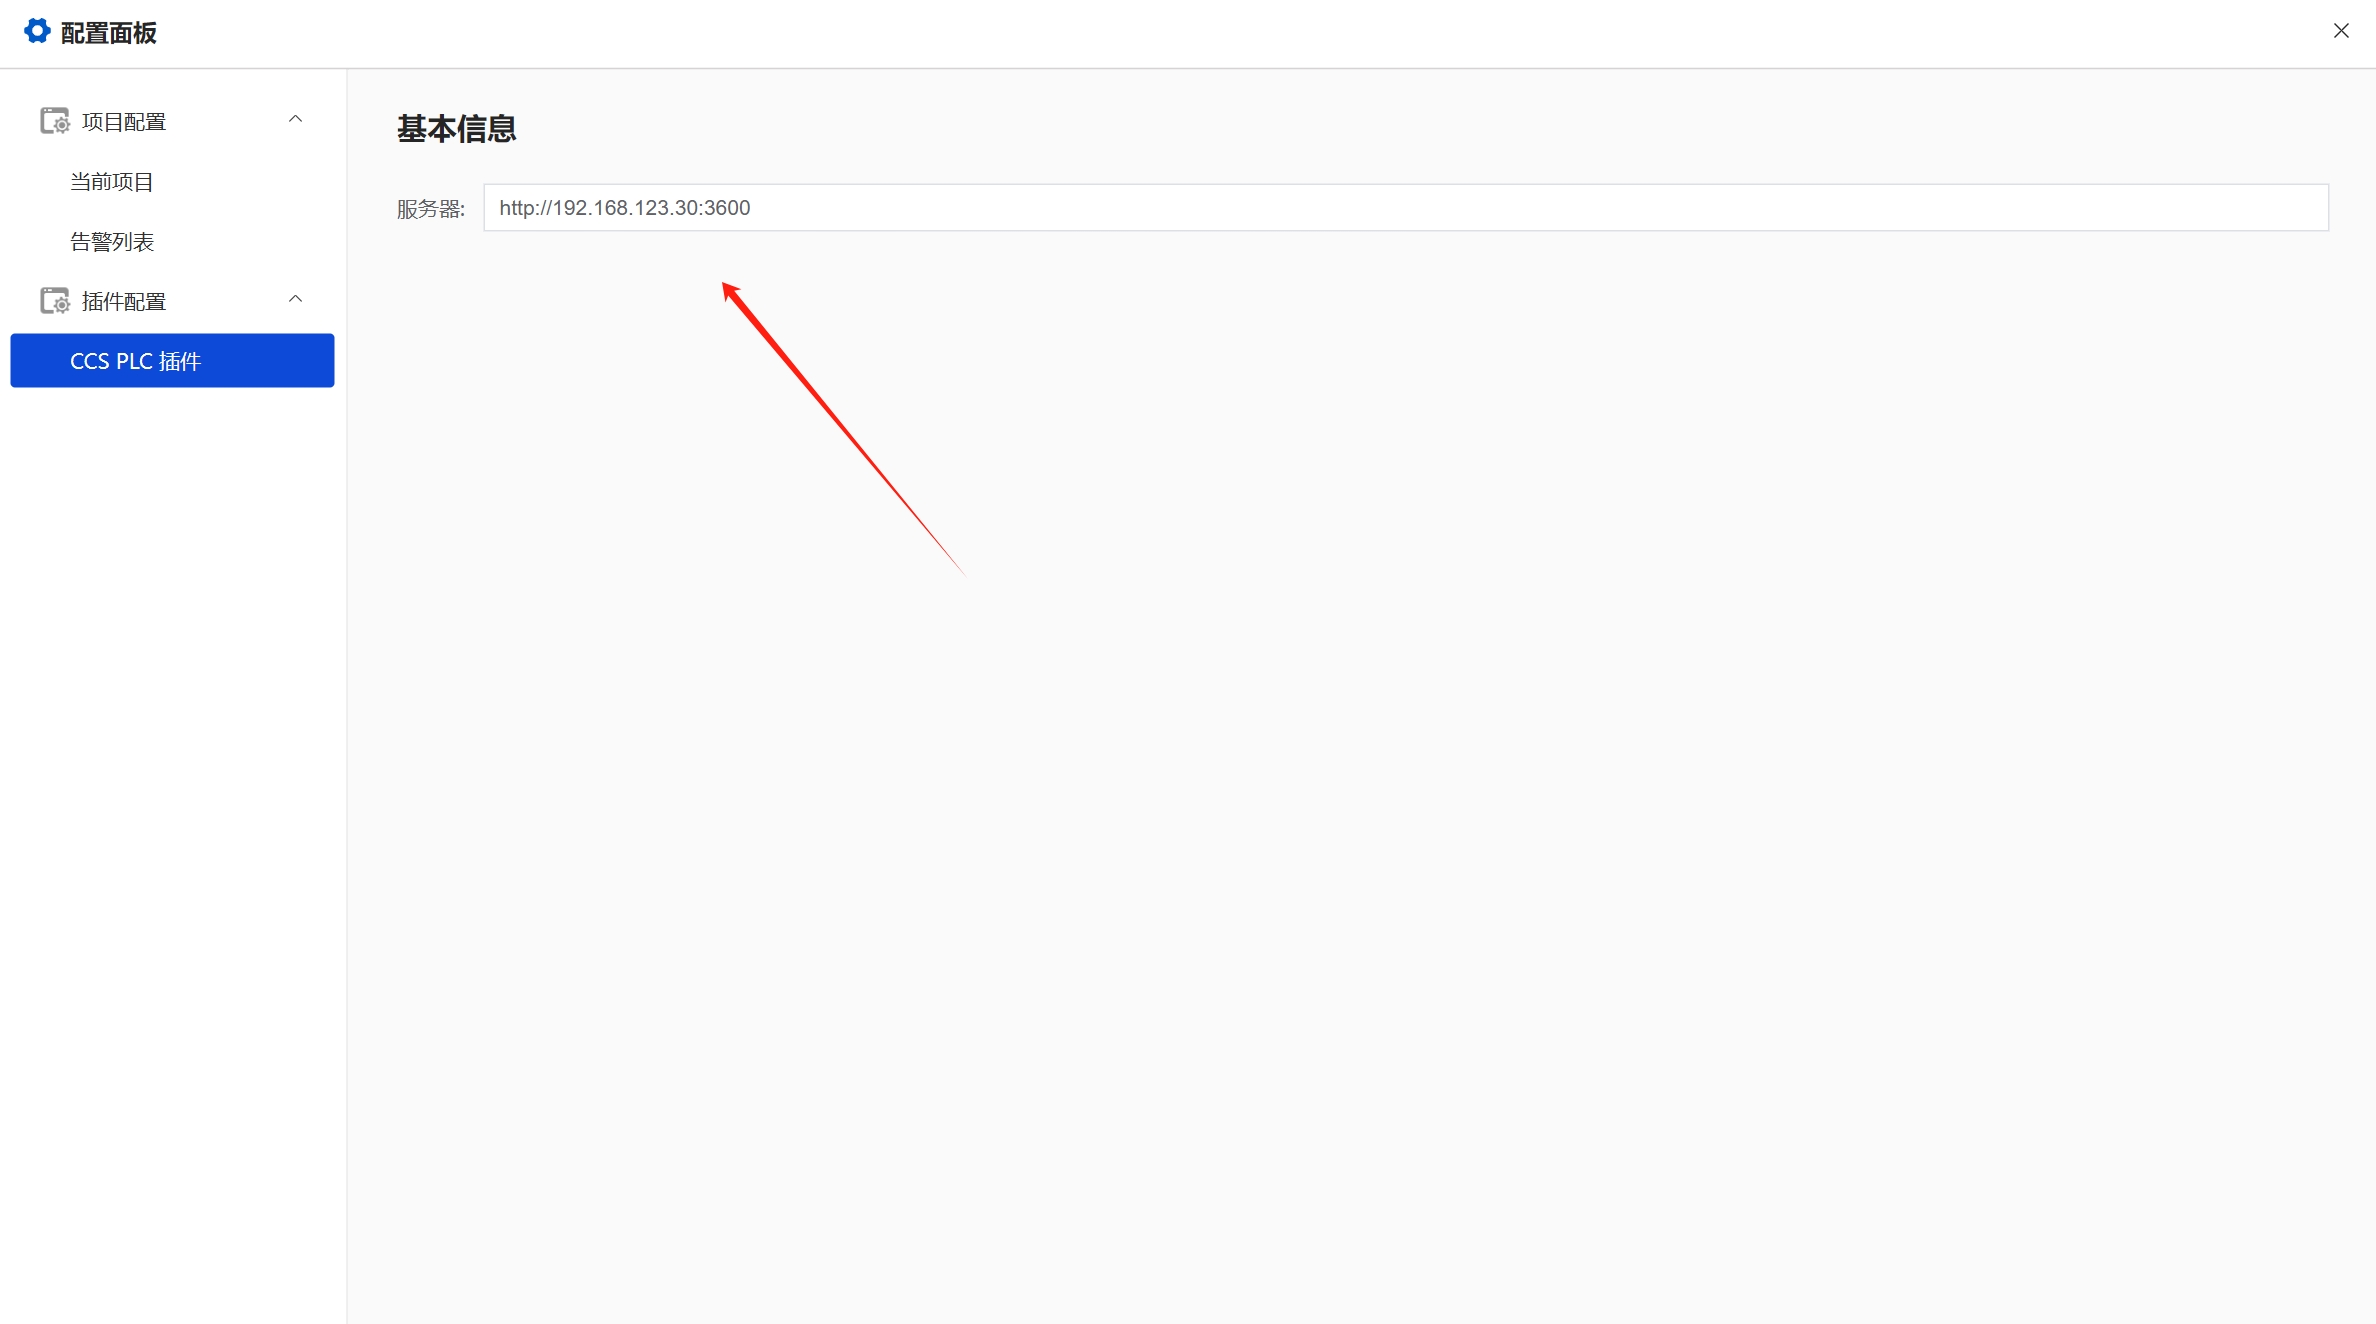
- In the upper right corner, configure the project information and enter the server address
- Drag in the component and run
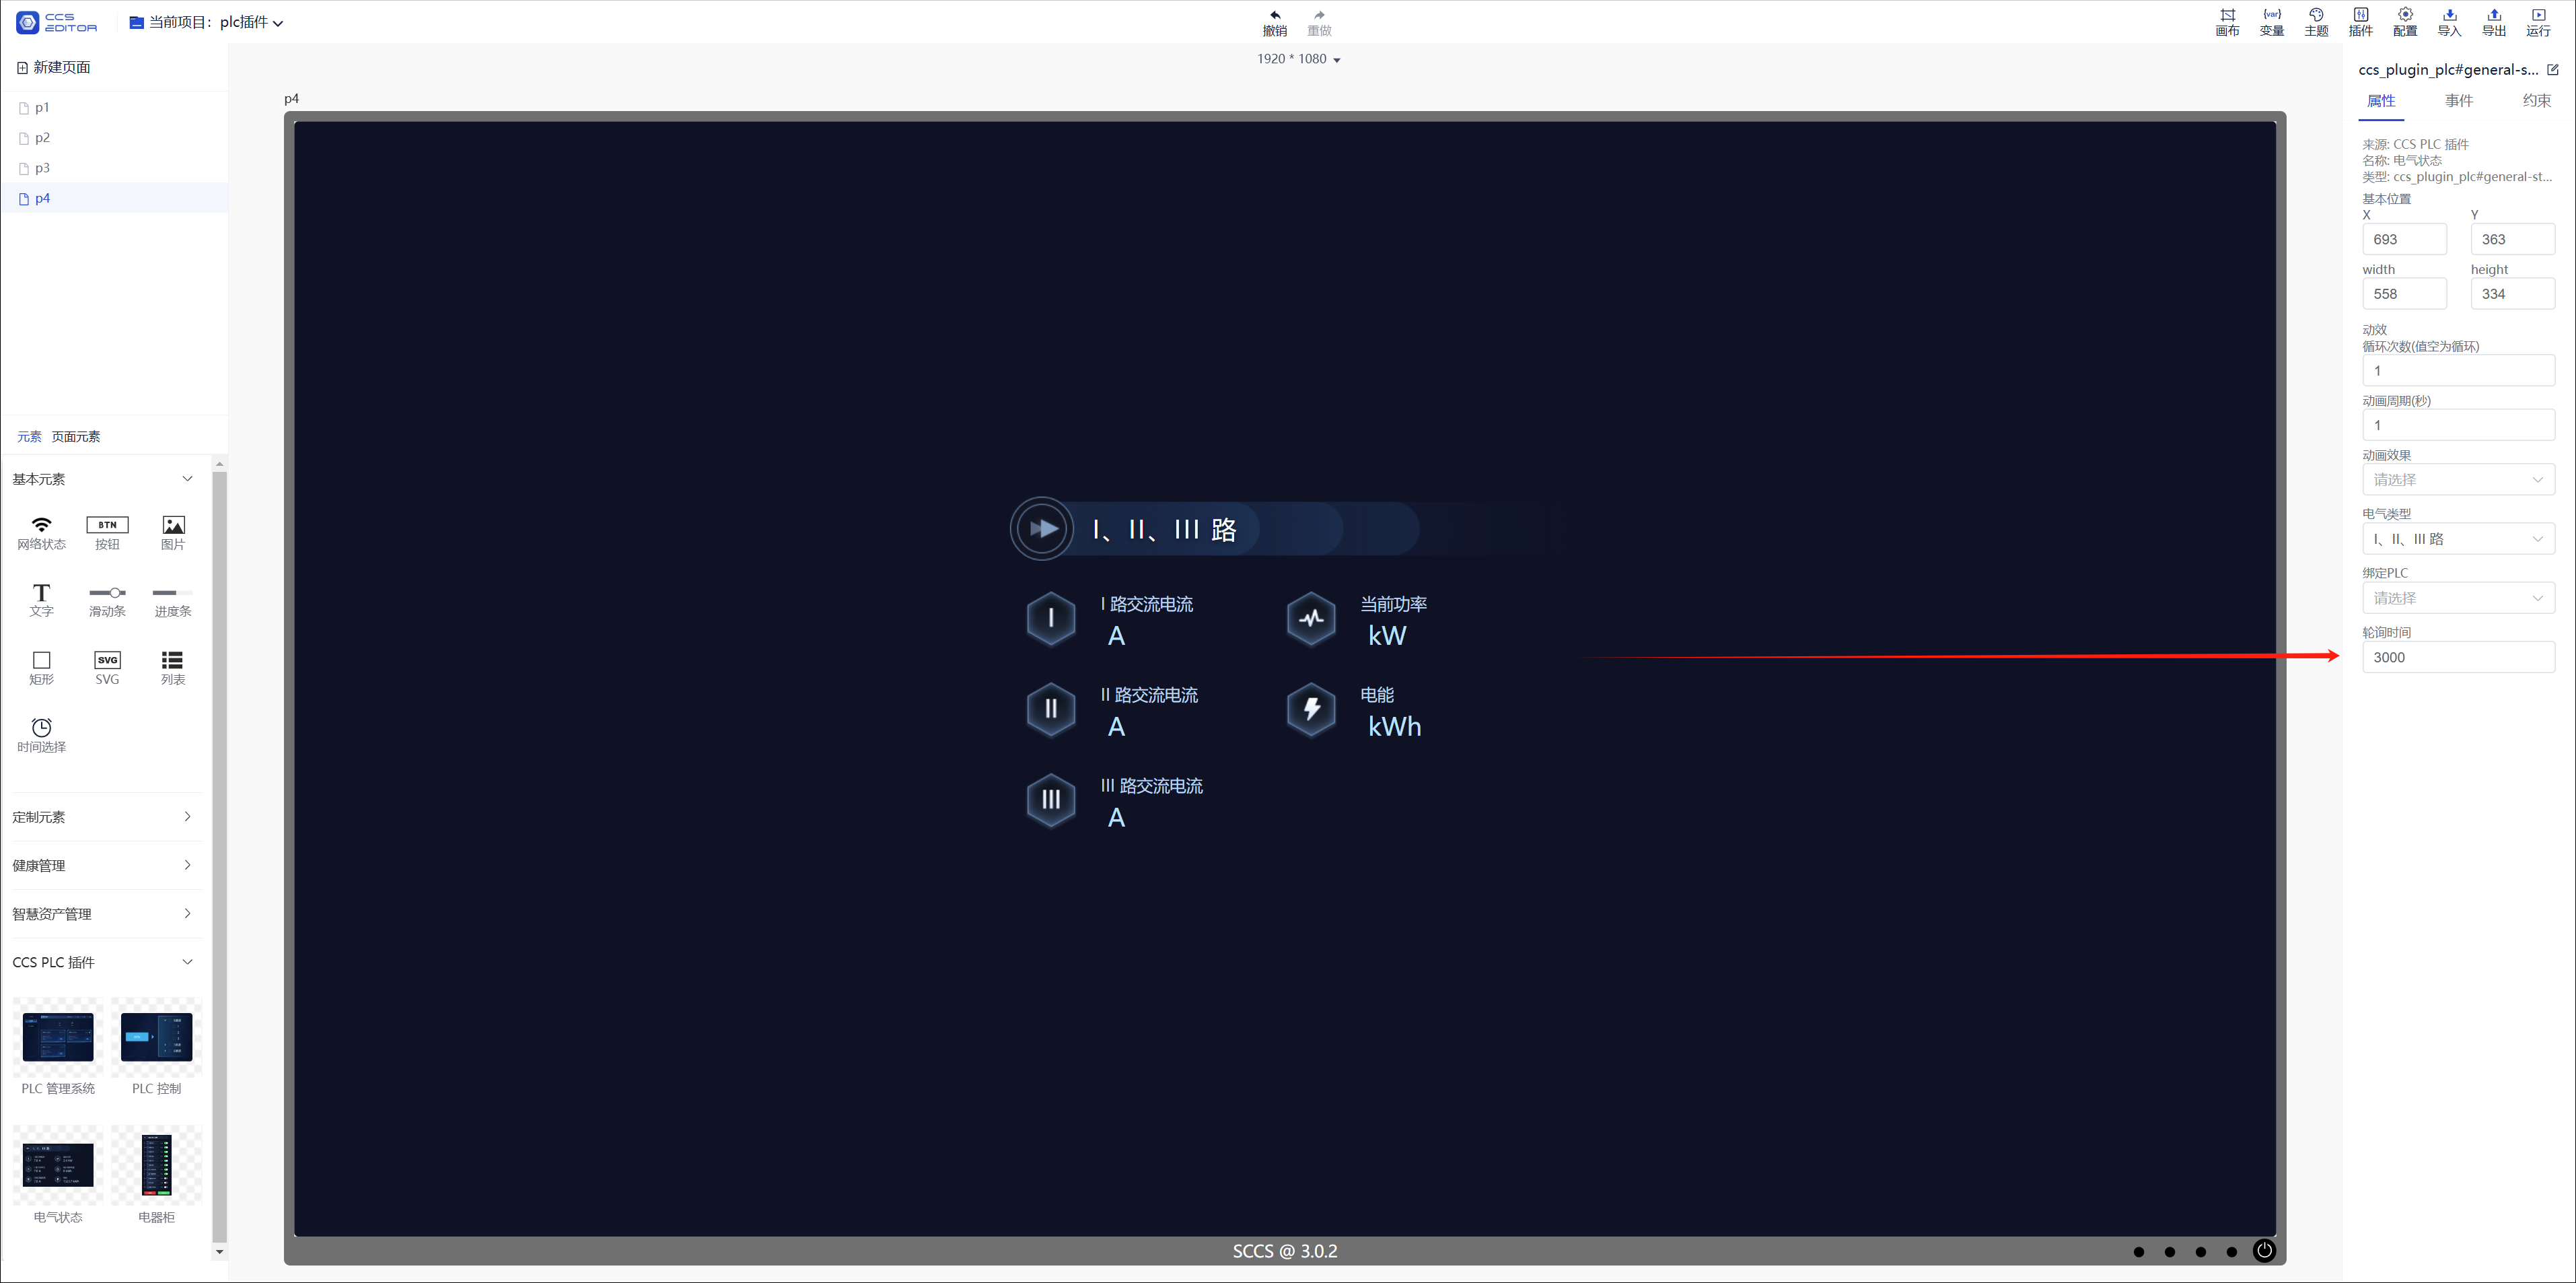
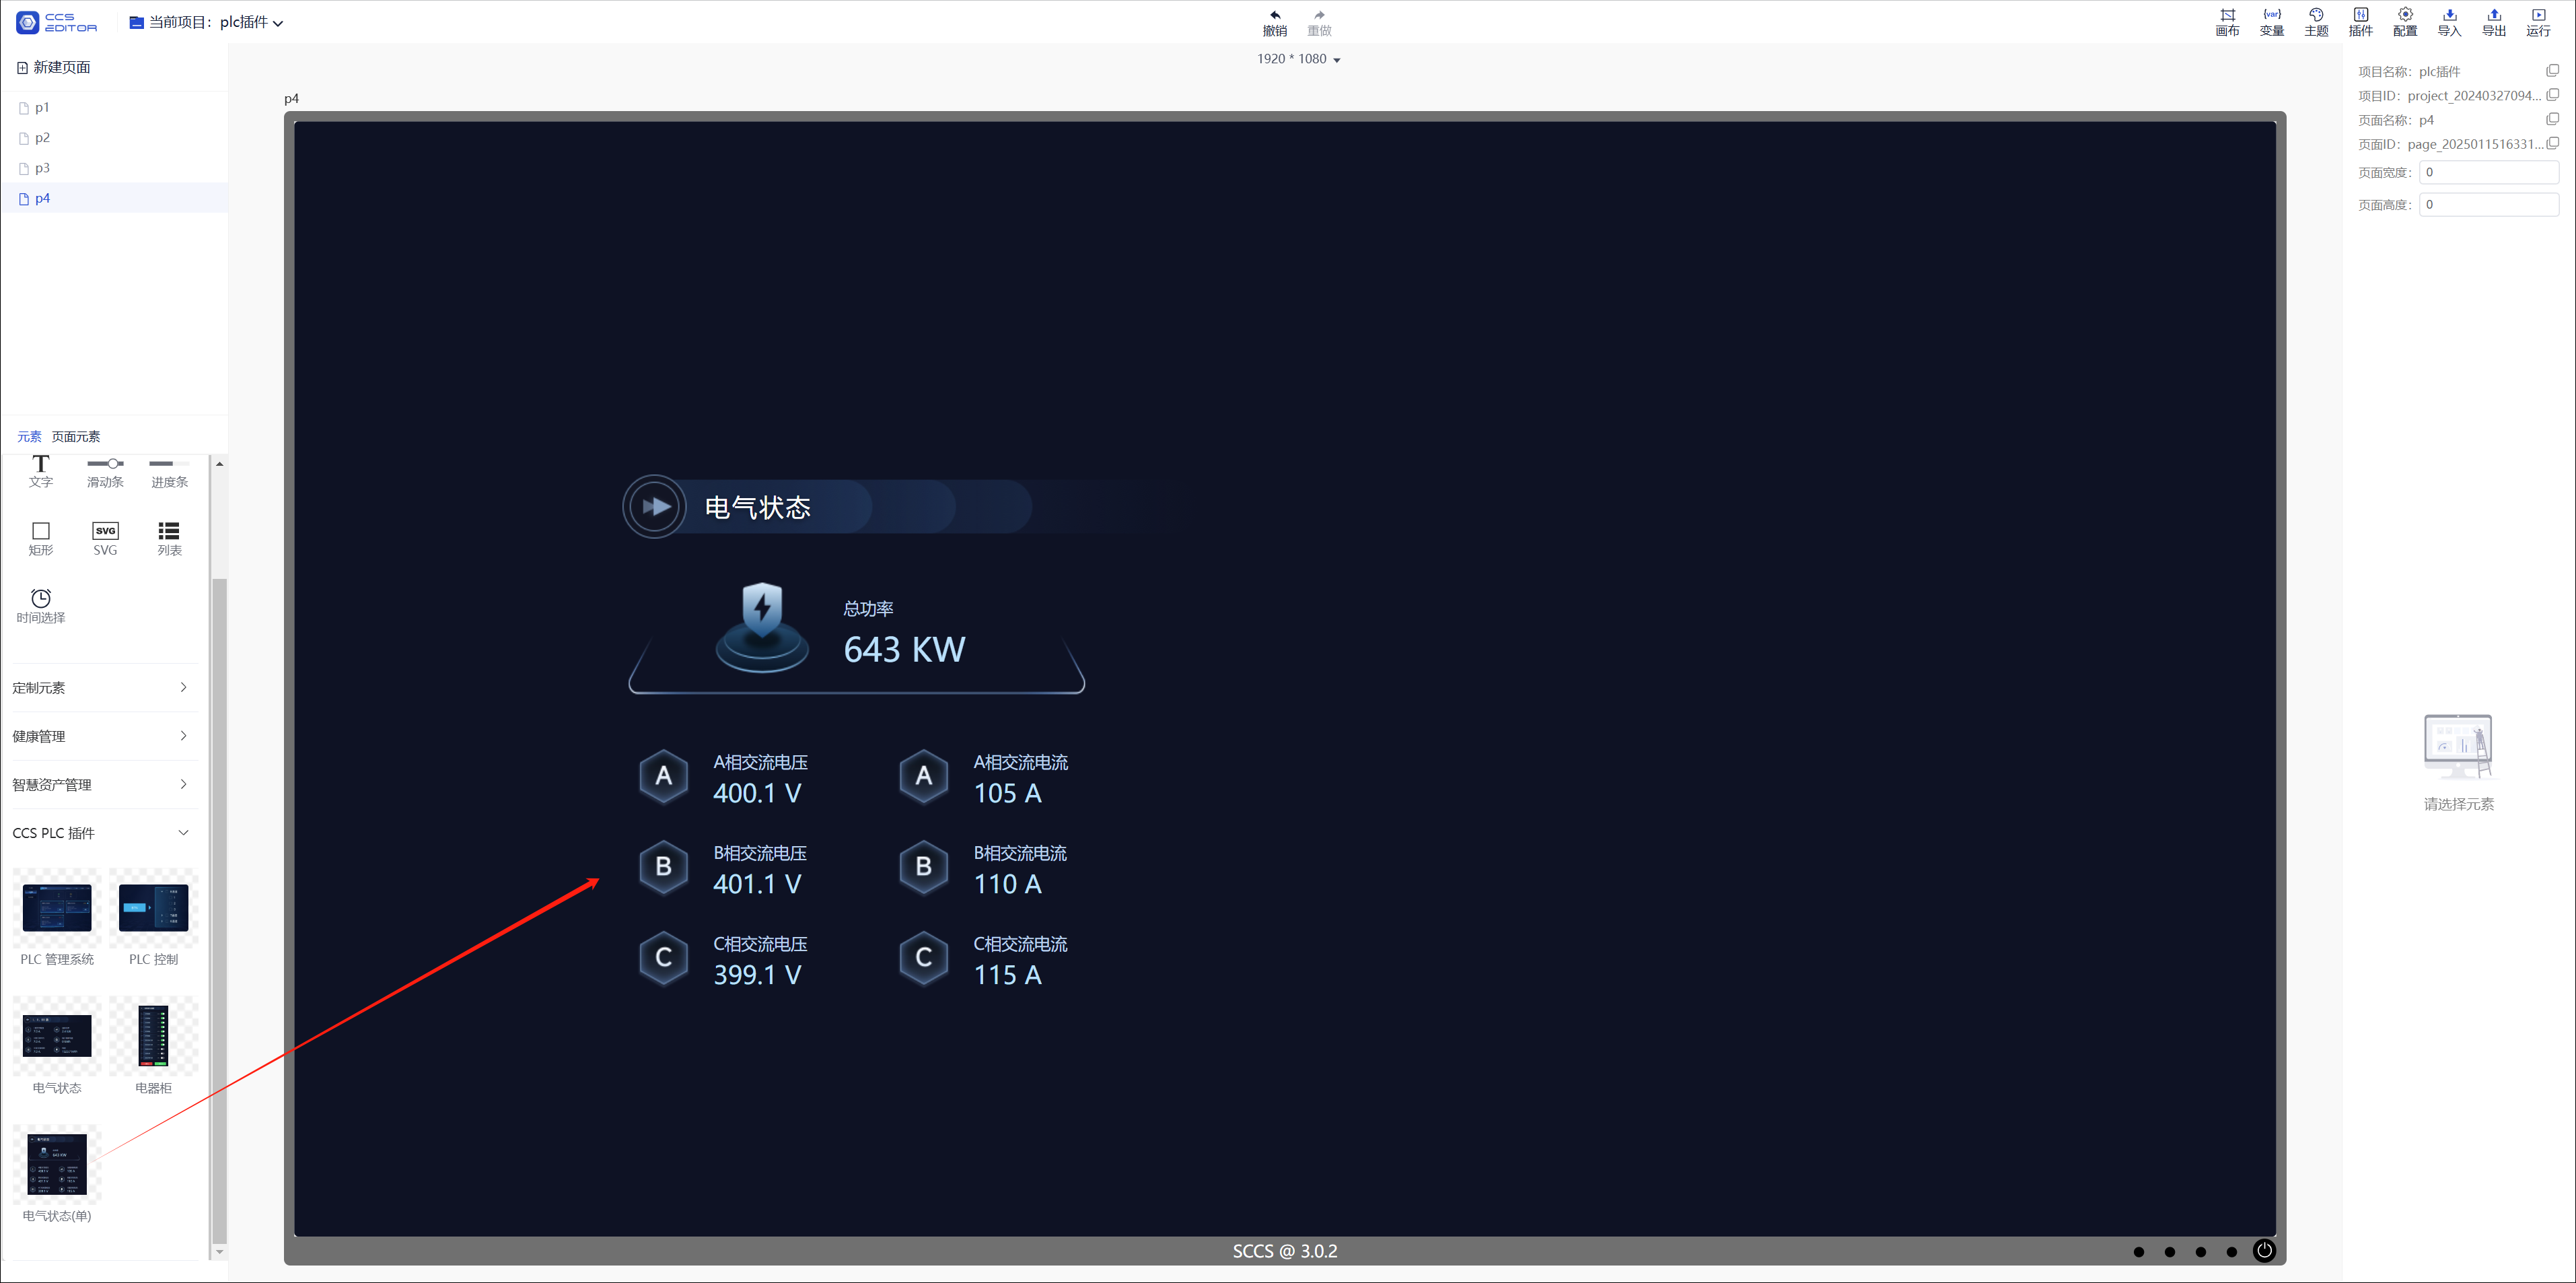
- Drag in the electrical status component
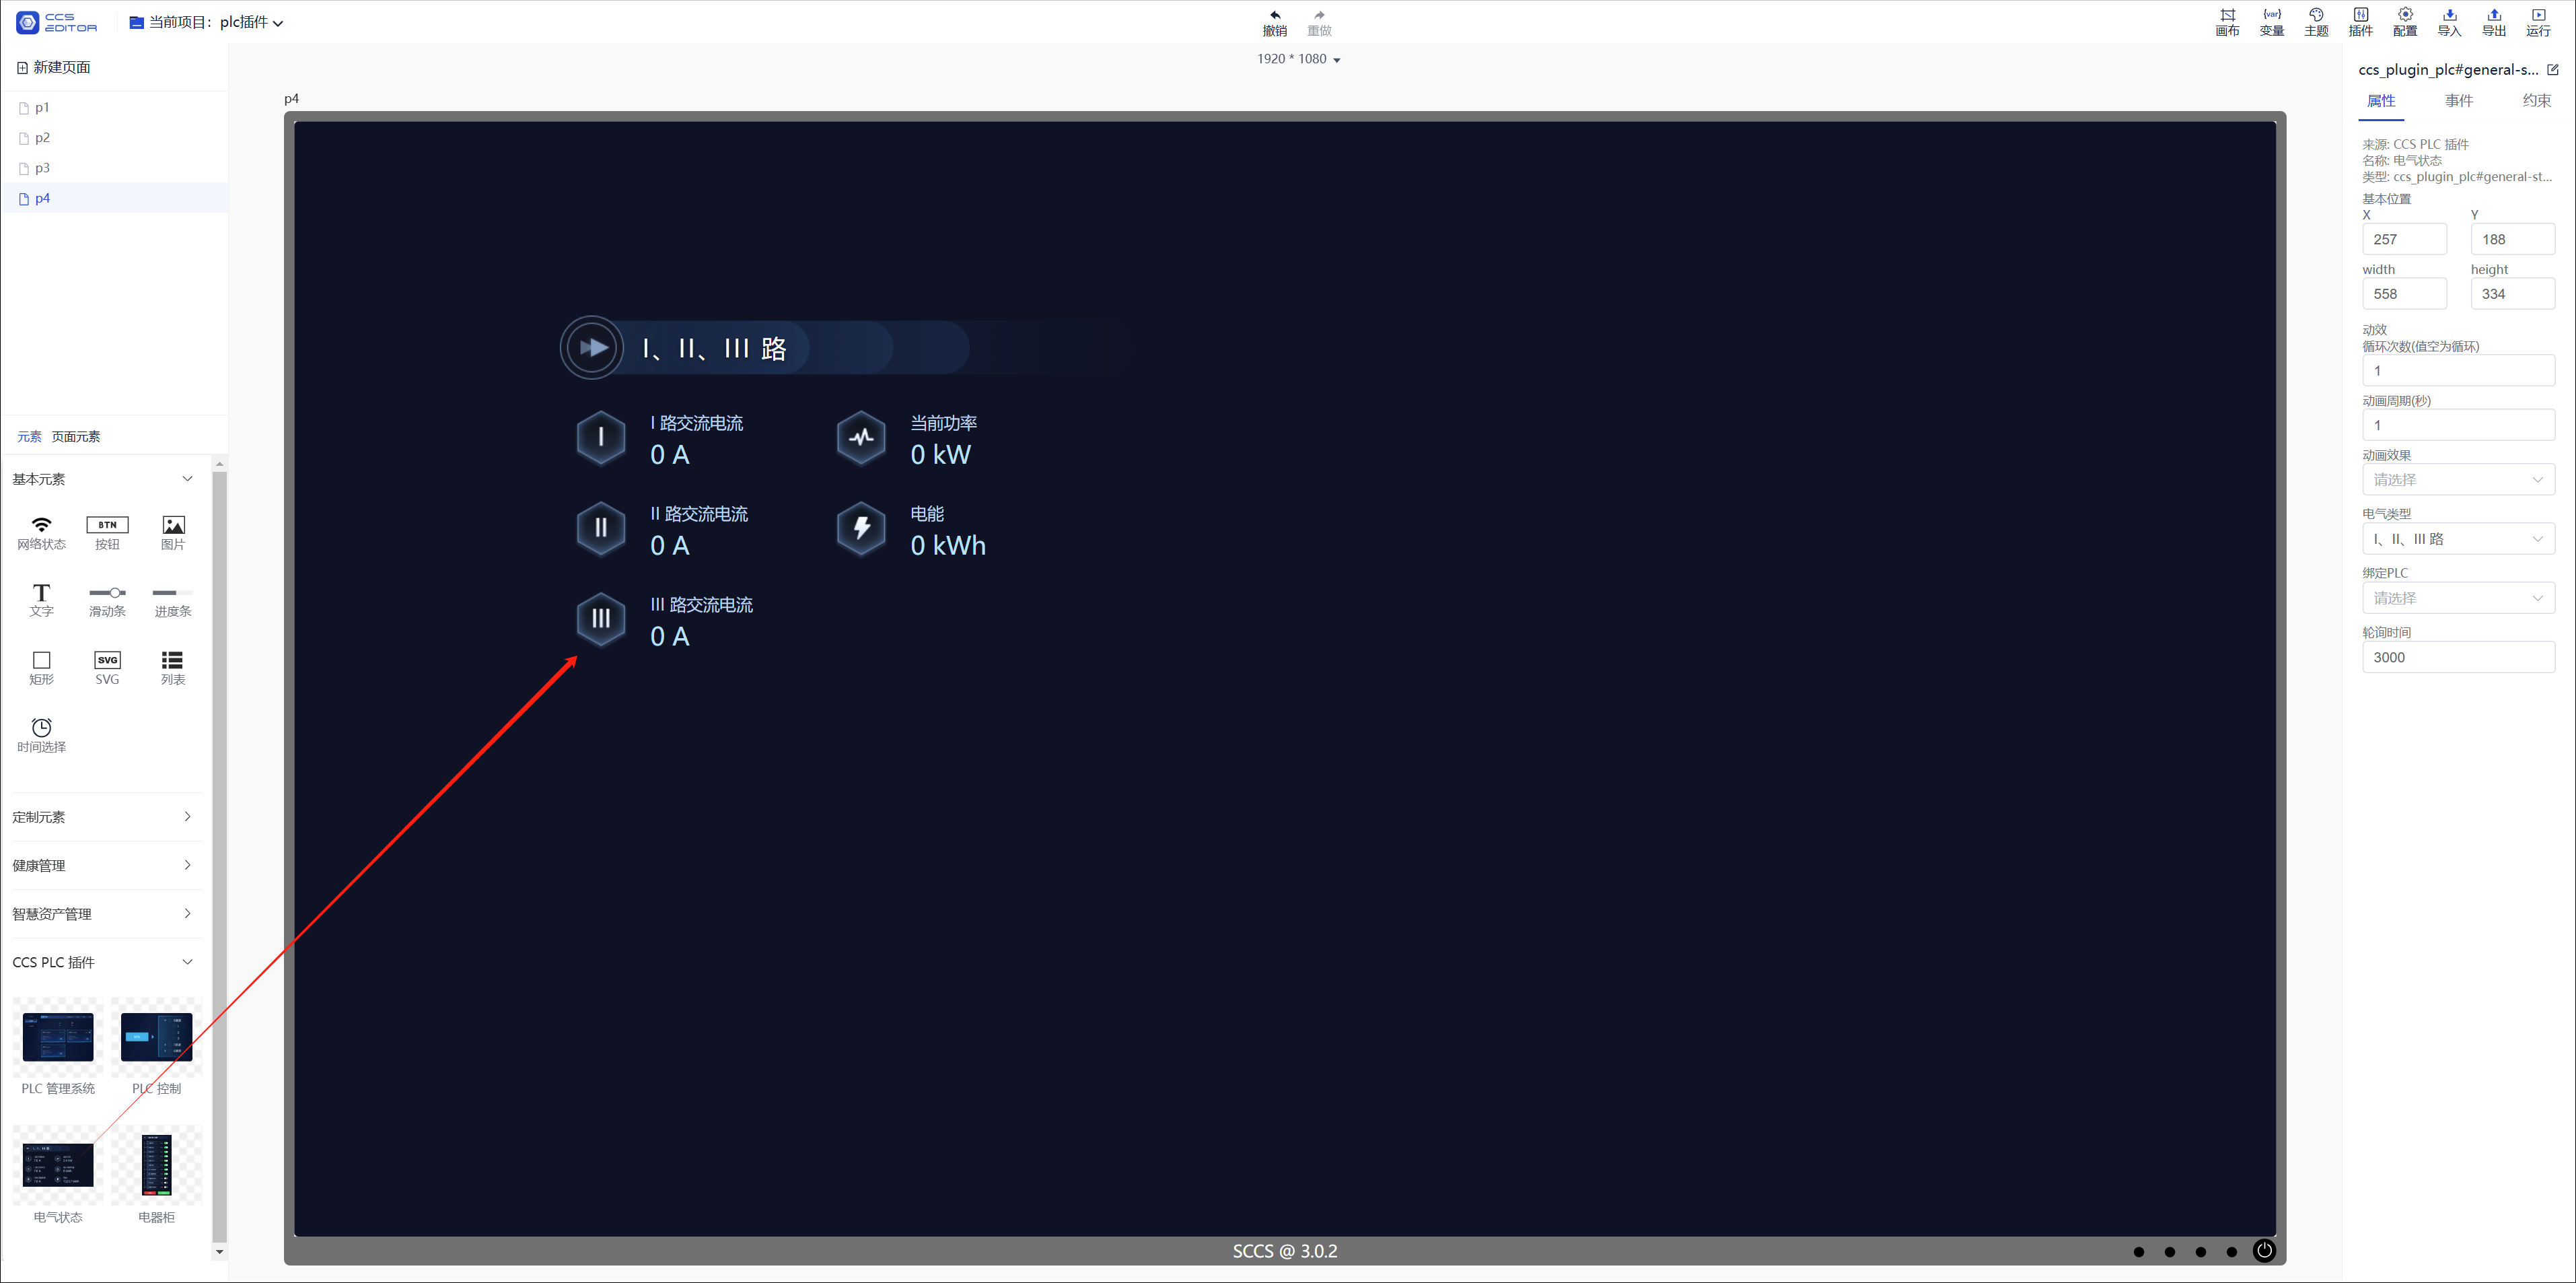
- Select the electrical type
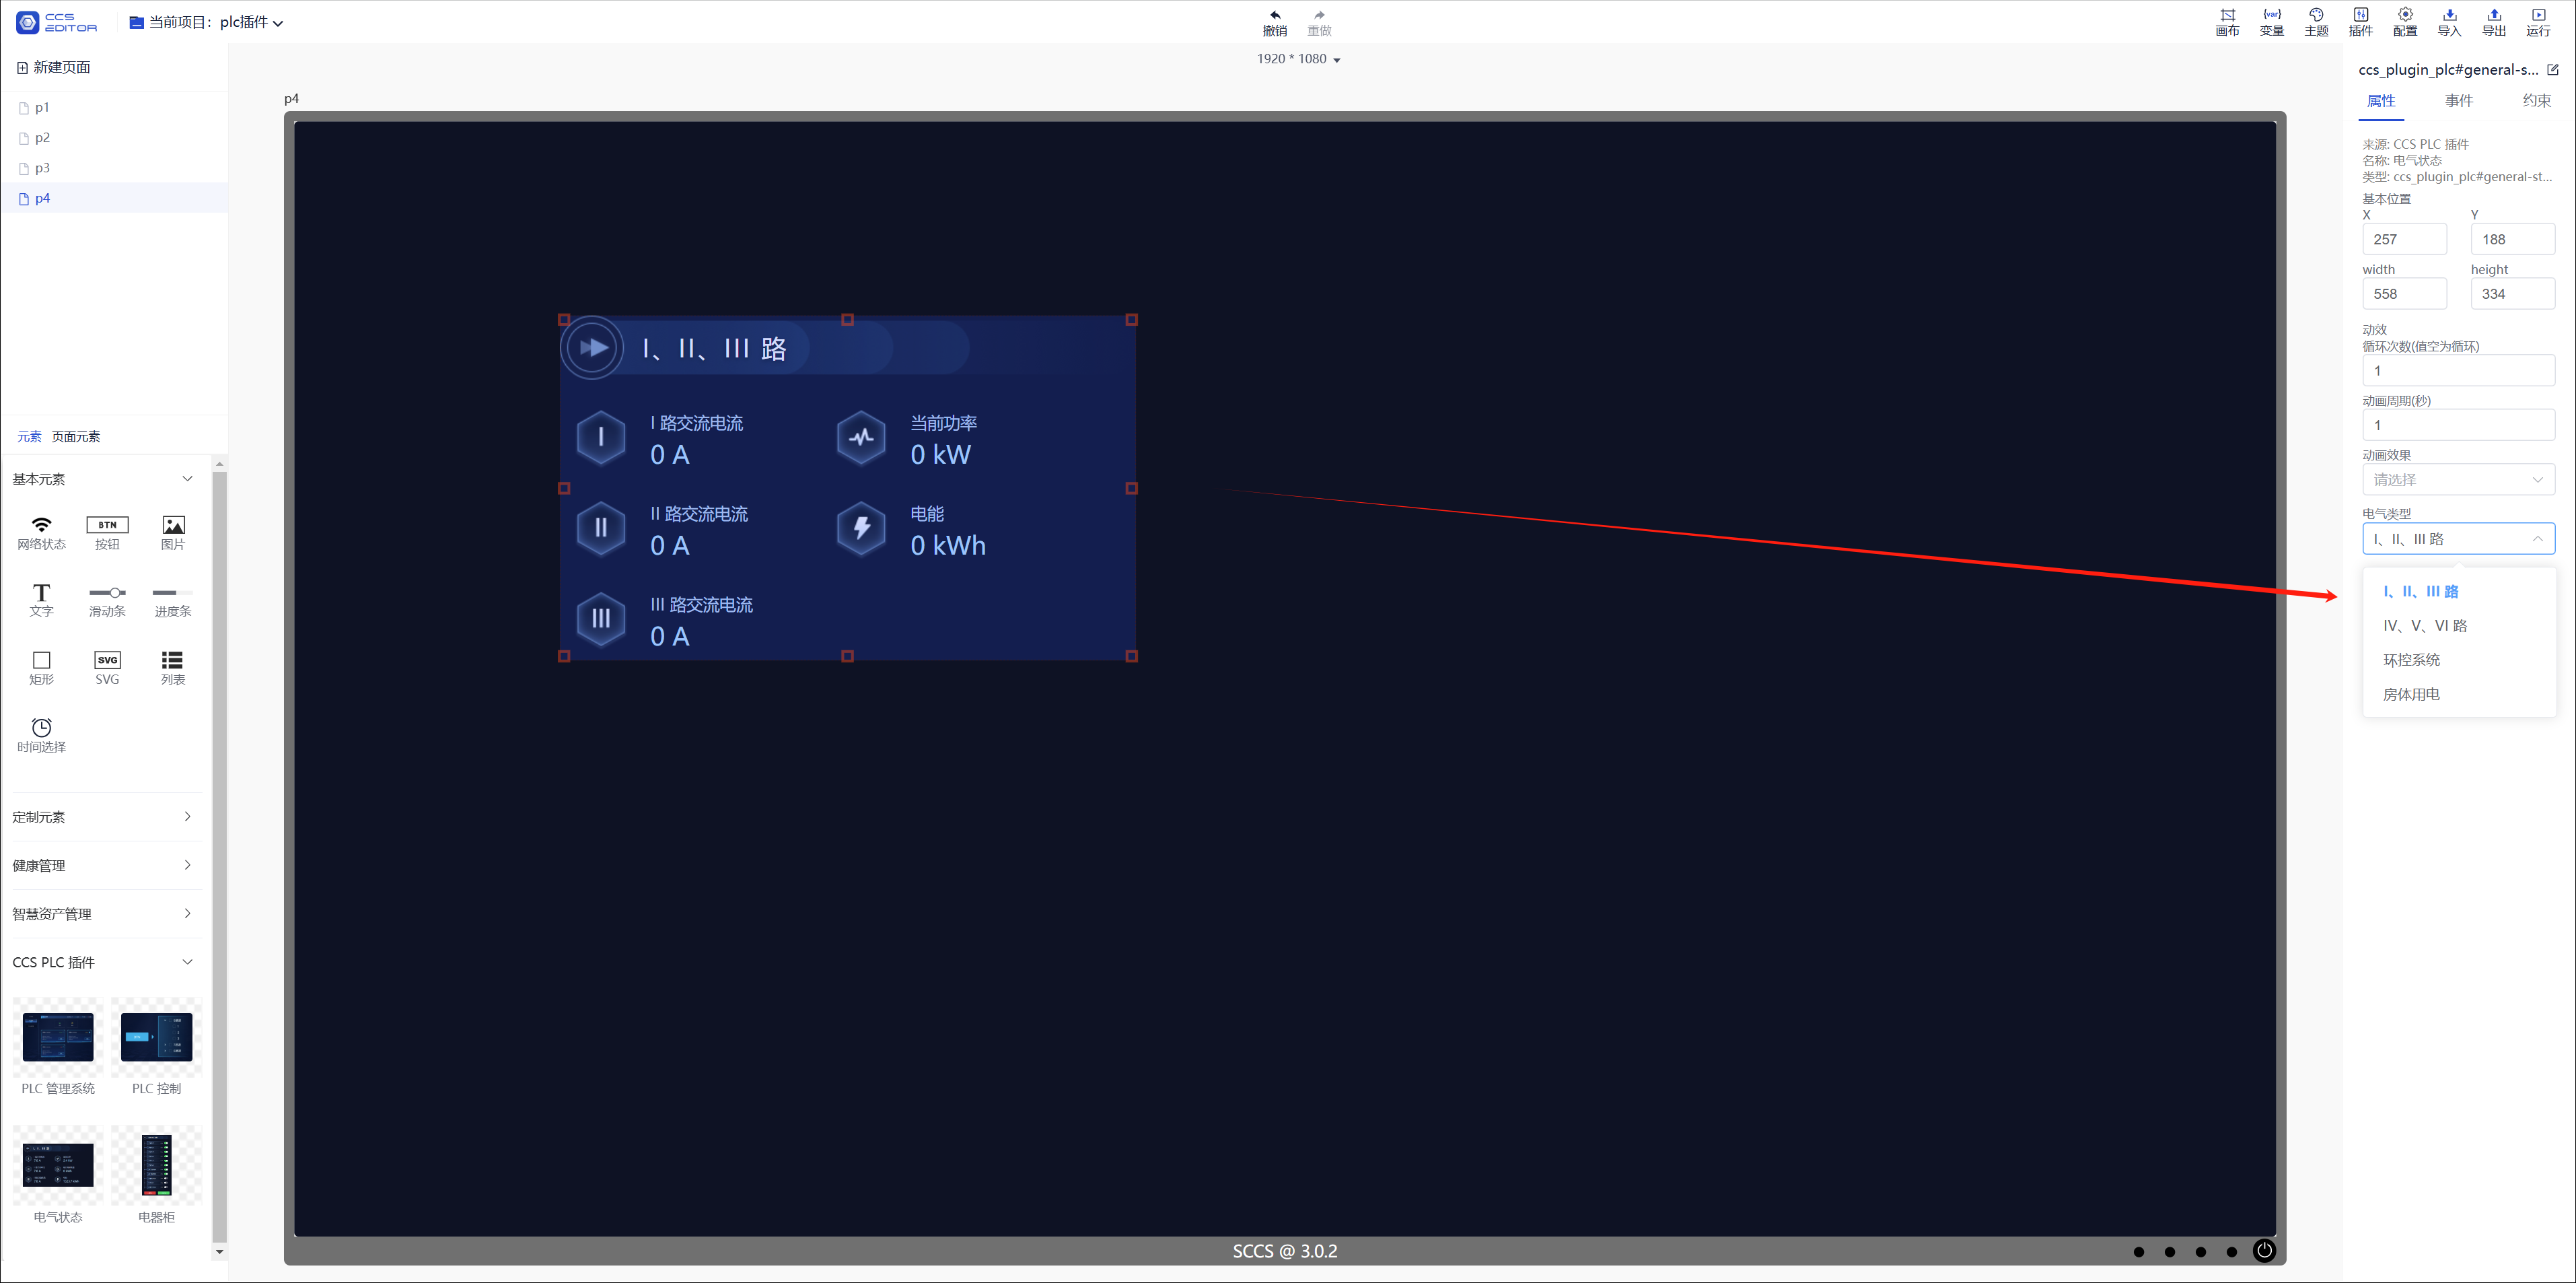
- Bind the PLC

- Set the status polling time, default 3000 (in milliseconds)
- Drag in the electrical state (single) component
- Bind the PLC
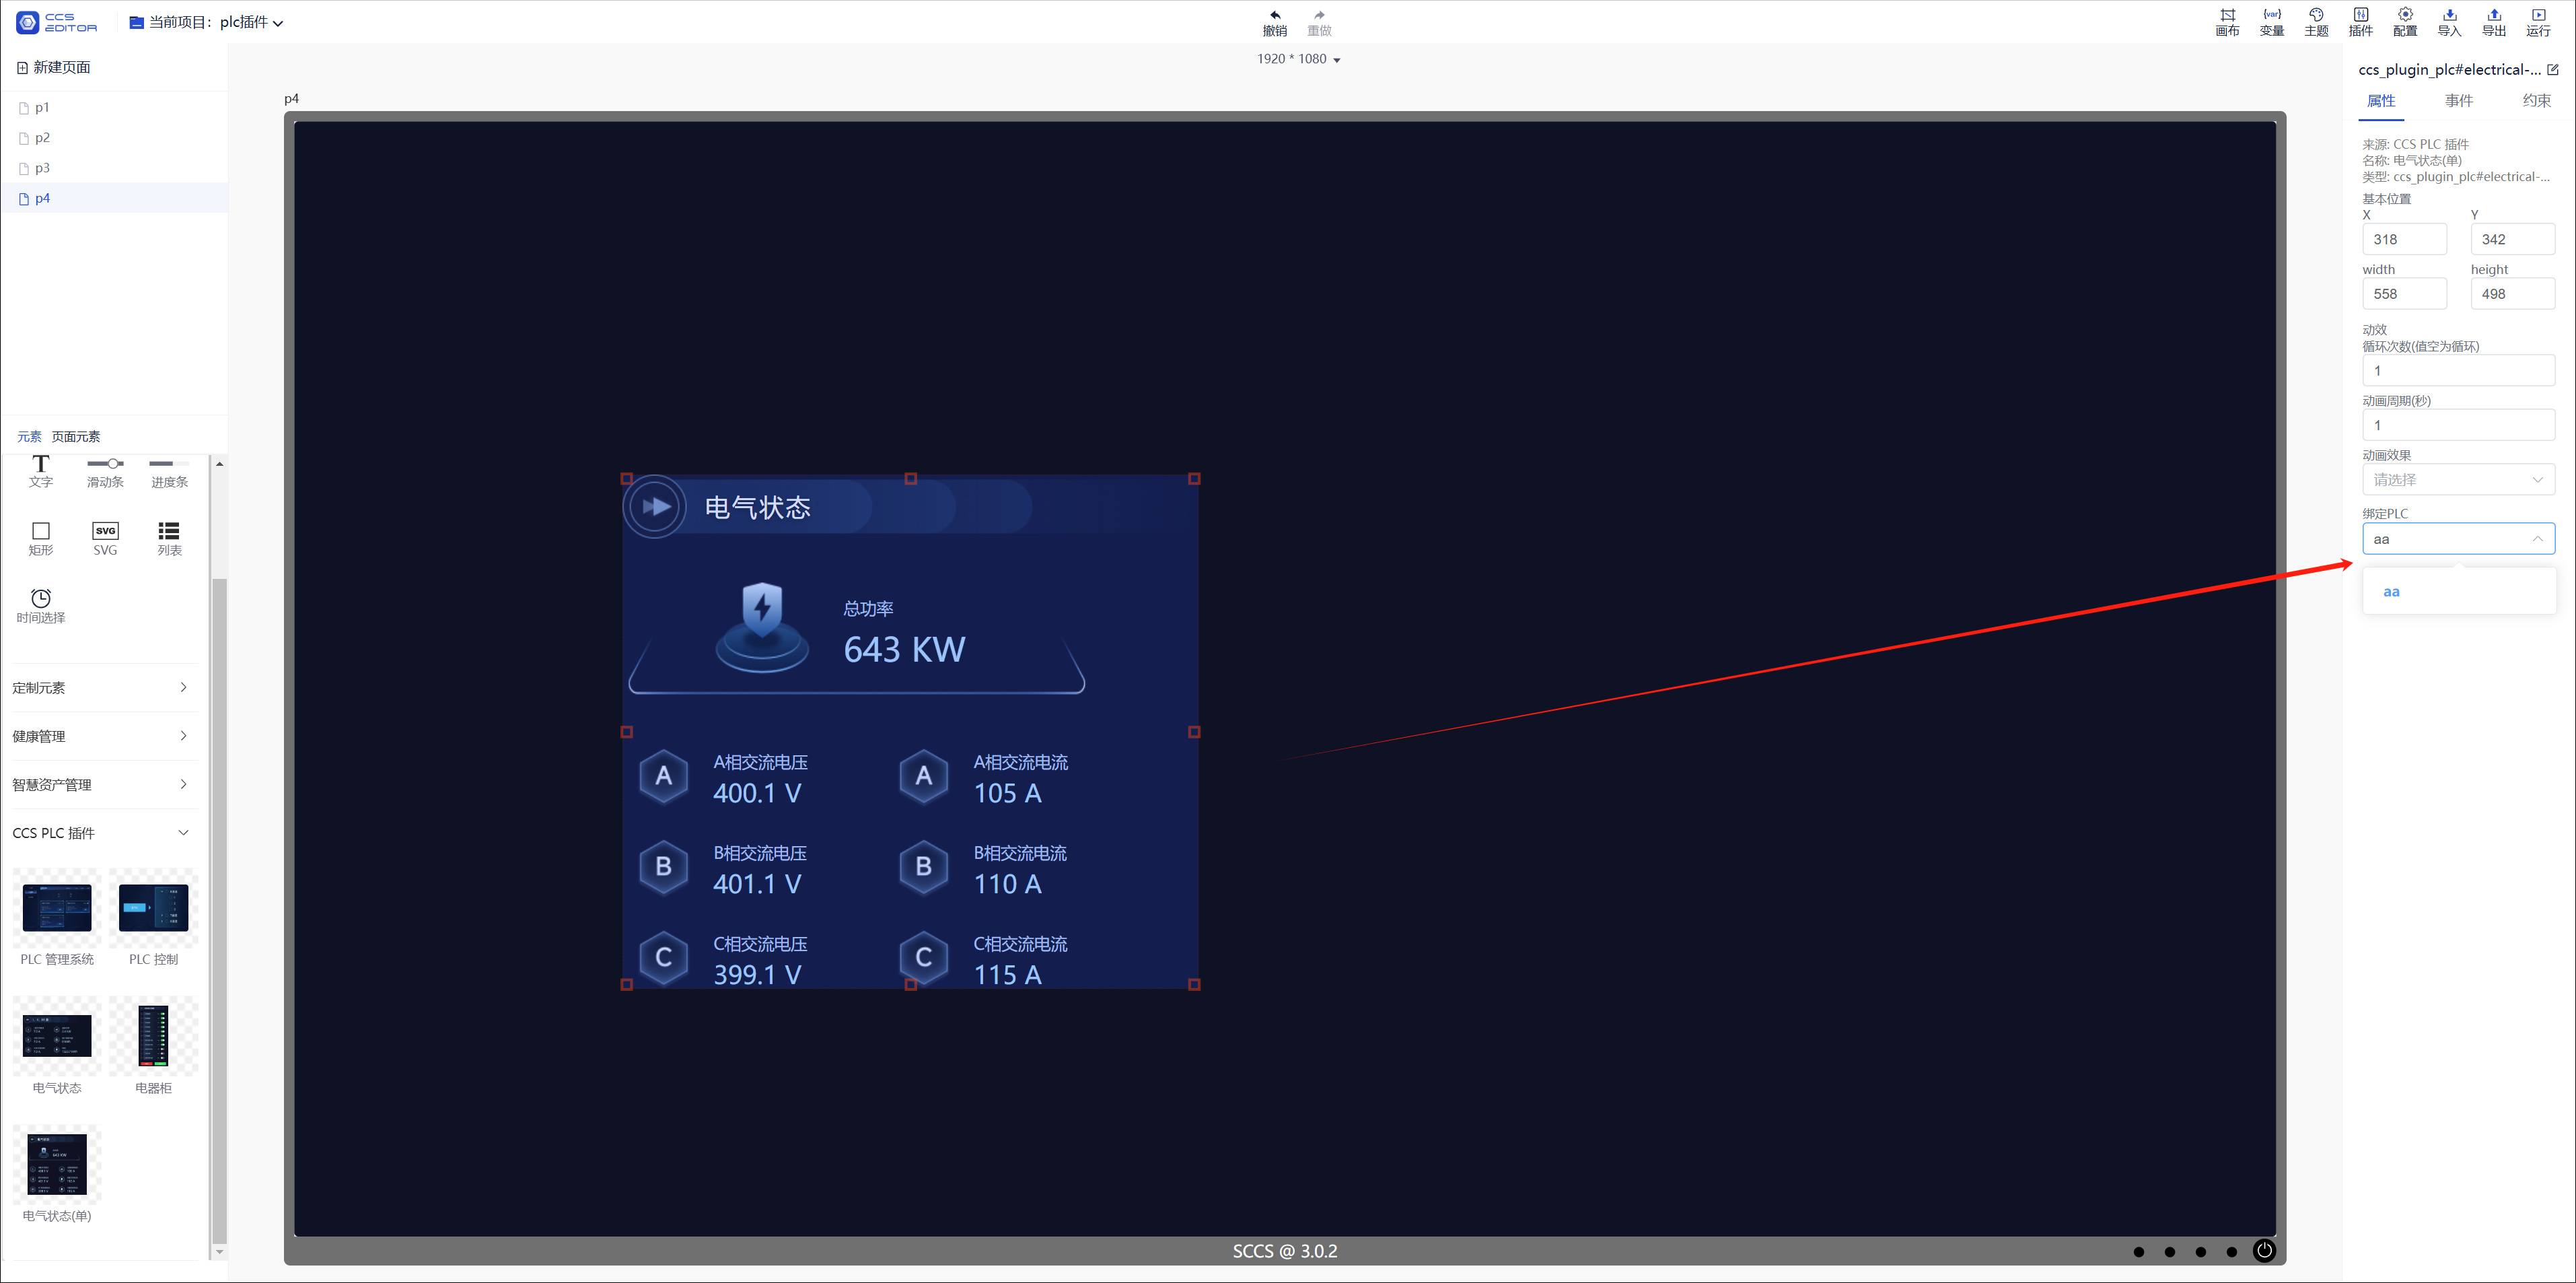
- Set the status polling time, default 3000 (in milliseconds)

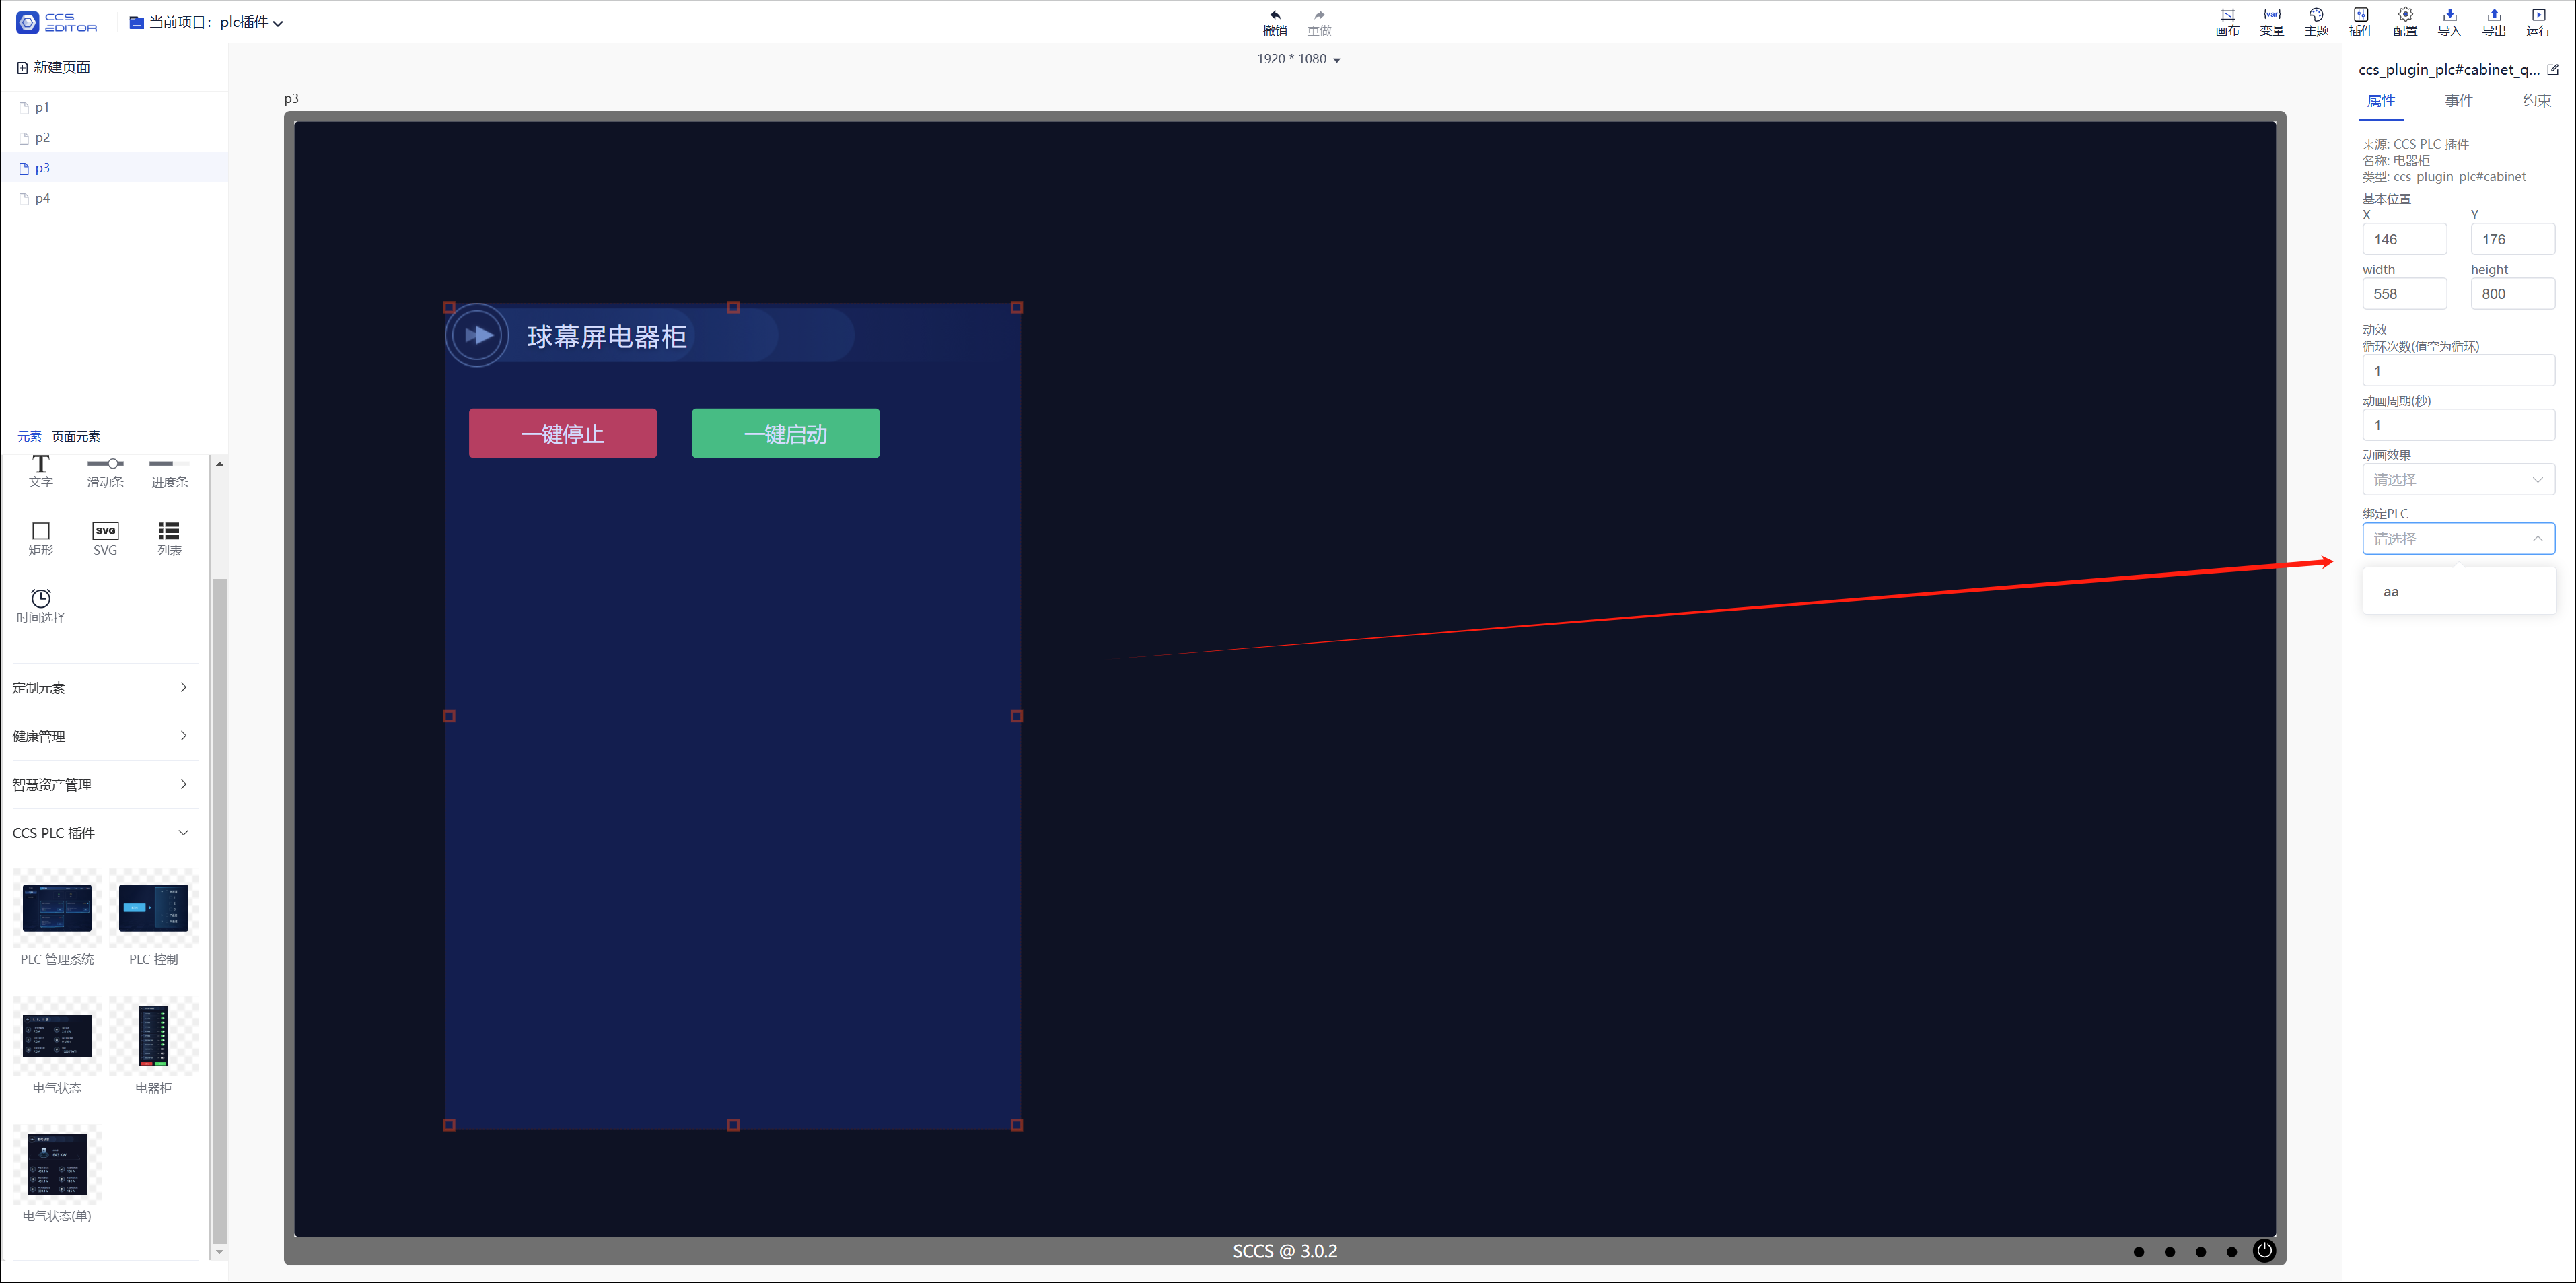
- Drag in the electrical cabinet assembly
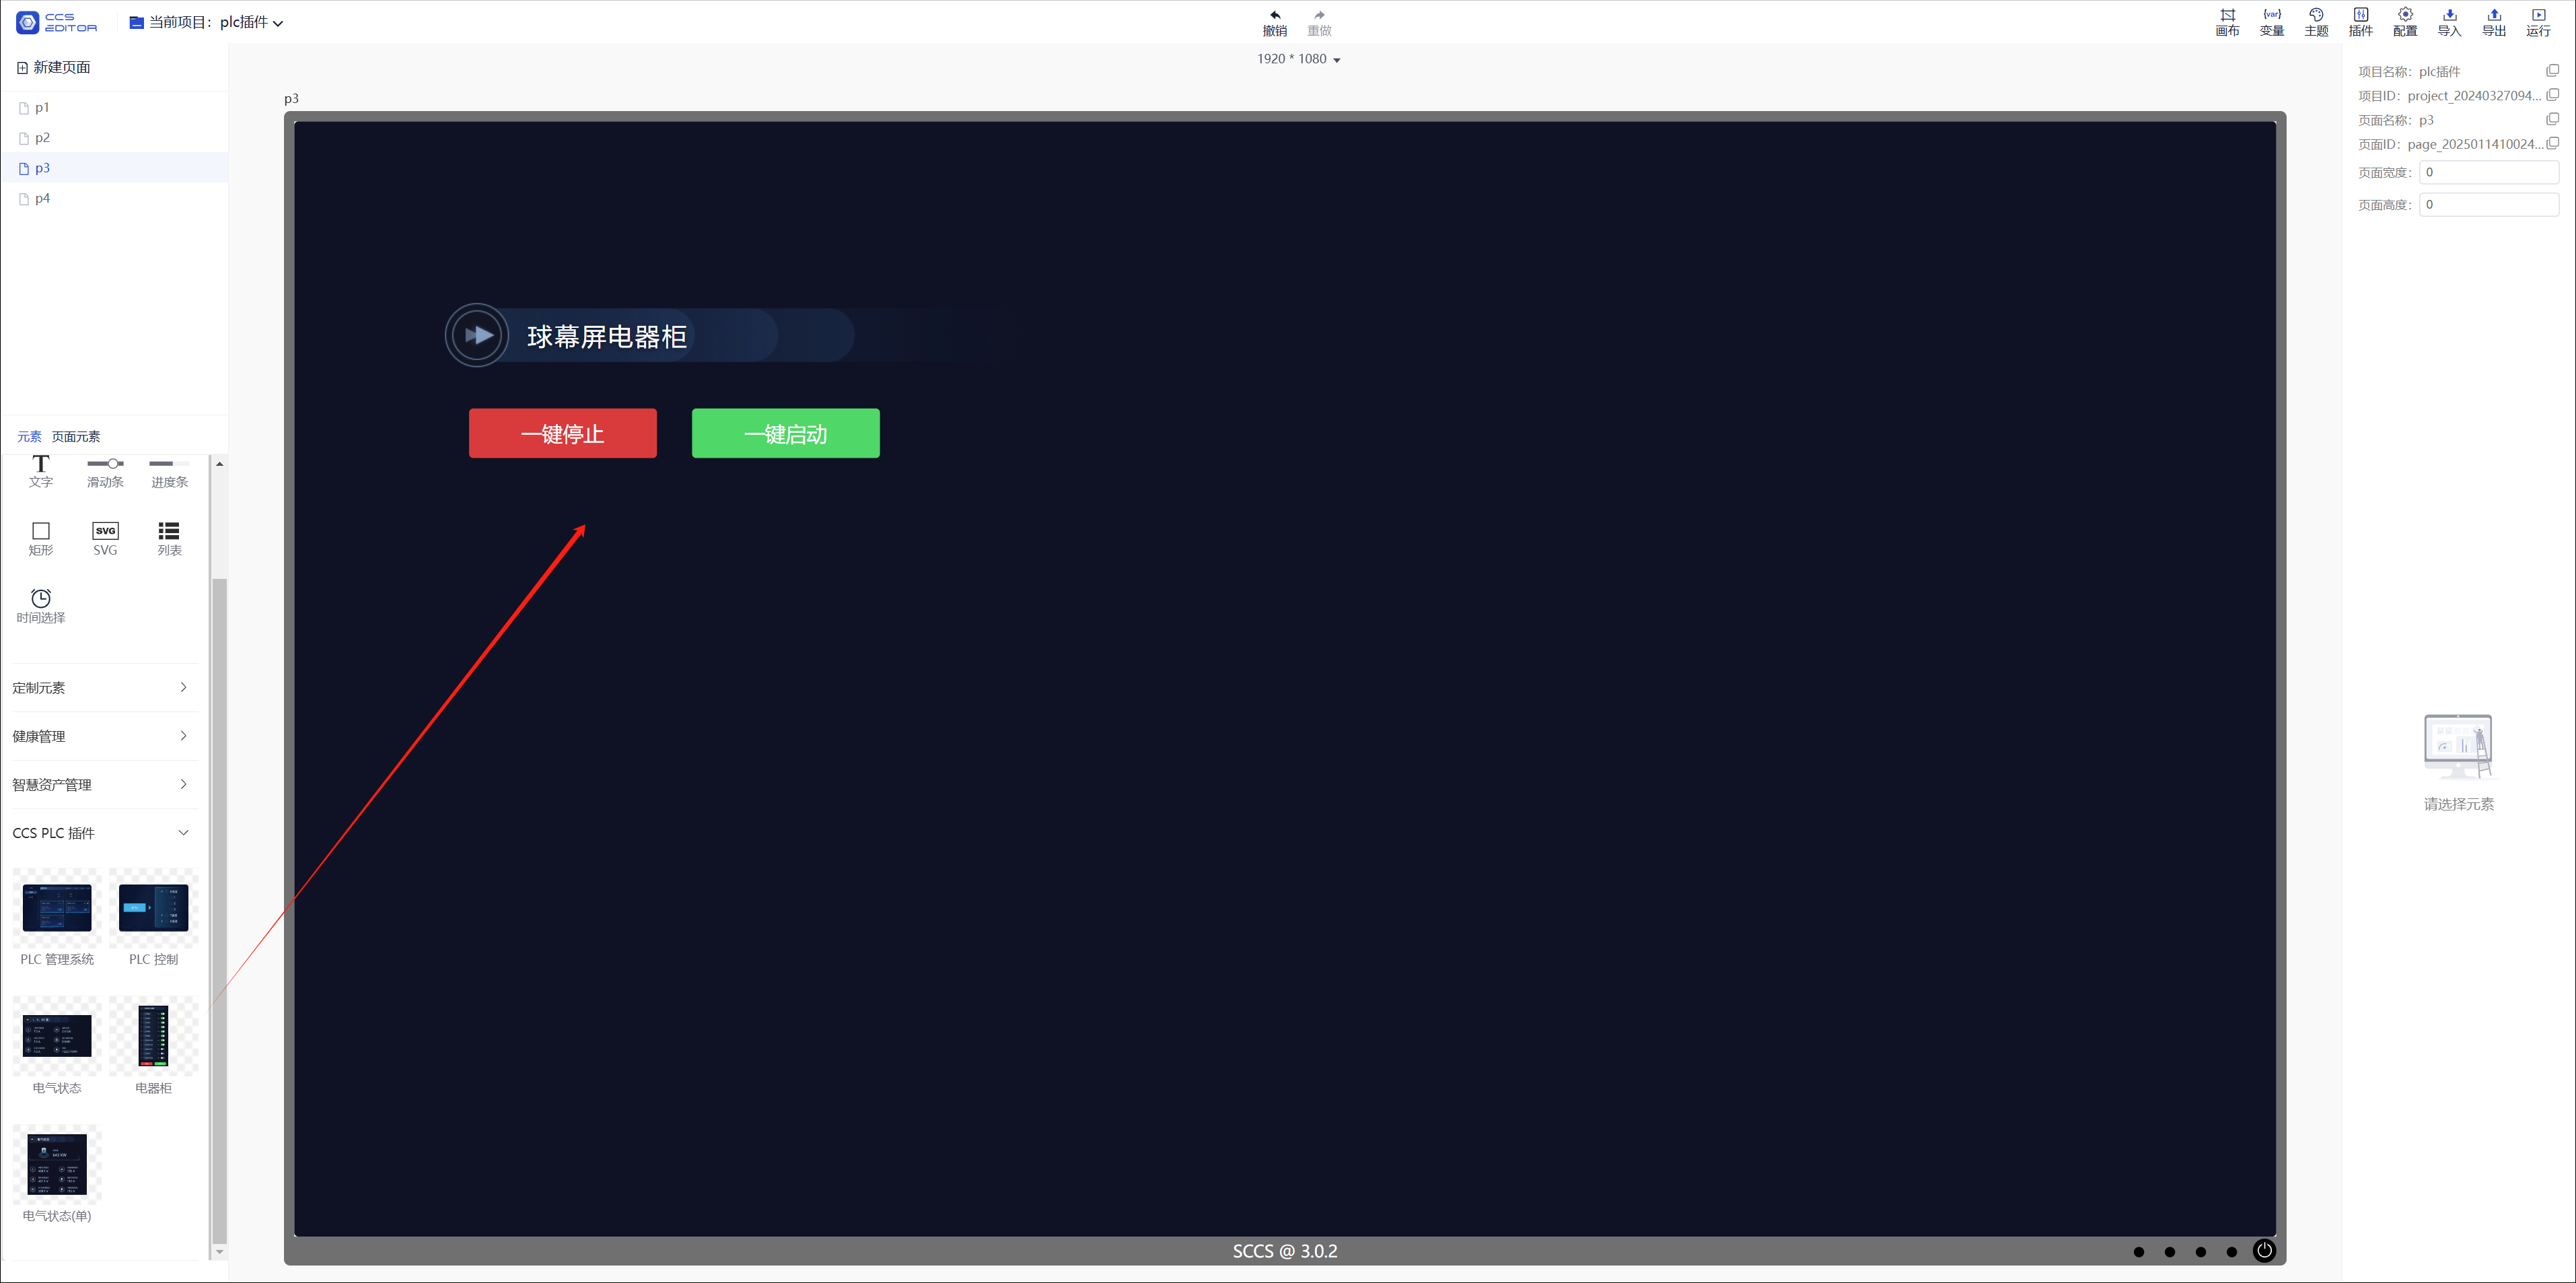
- Bind the PLC
- Drag in the PLC control component
Improve the appearance of the component according to the design draft
Select the bound channel
Select the On/Off command

- Set a group name for the component to be used to mutually exclusive states when clicked
Set the component status picture
