# Splicer System - User Instructions - V01
# Explanation of Referenced Terms:
protocol:Web protocol, e.g., http or https
host:The host being accessed, e.g., 127.0.0.1
port:The access port, e.g., 9090
config.js:The deployment file located at /static/config.js
# 1. User Login
# 1.1 Access Path:
{protocol}: //{host}:{port}/#/login
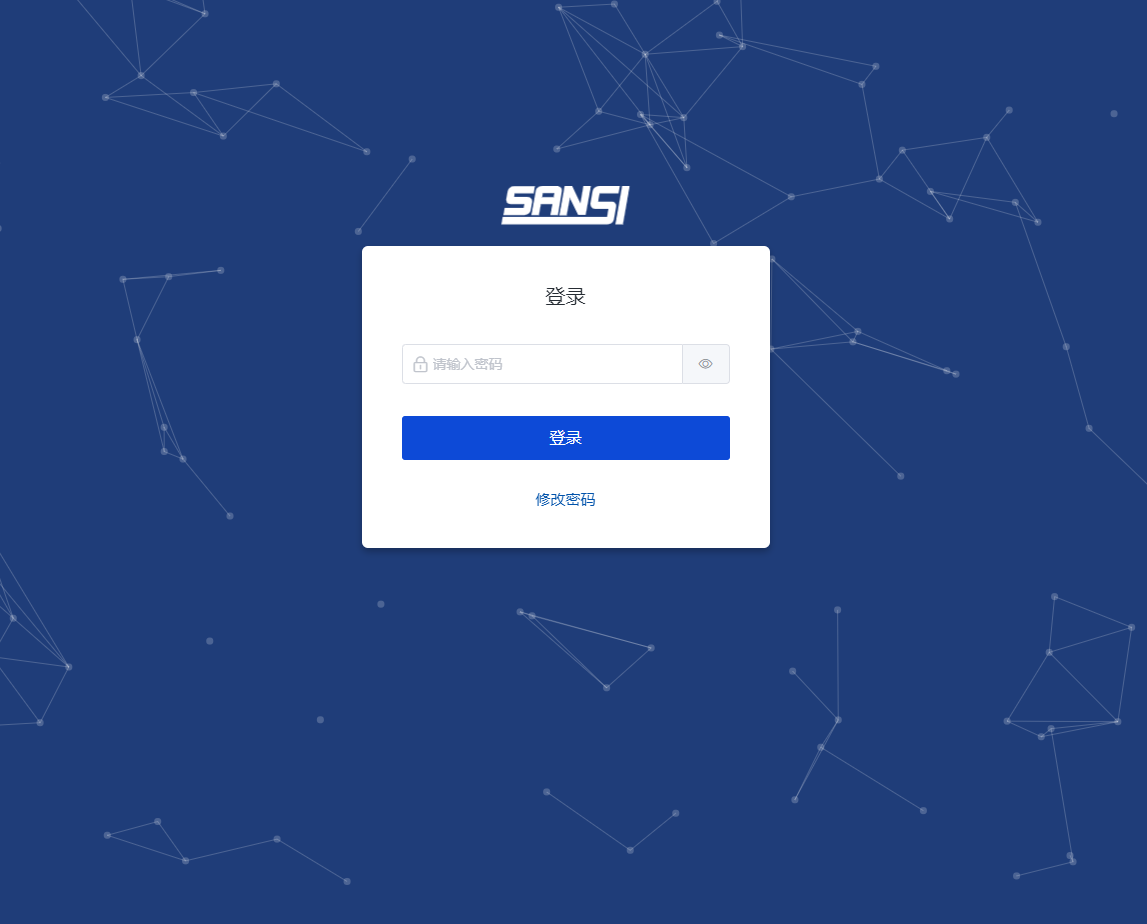
# 1.2 Interface Preview:
# 1.3 Function Description:
- When the hasLogin field in {config.js} is true, the system will check the token in the cookie; if it does not exist, or if the API returns 401, it will automatically redirect to the login page. If the hasLogin field is false, users can directly access the homepage.
- Enter a password and click the 【Login】 button to log in as admin. The password must include at least one uppercase letter, one lowercase letter, one number, one special character, and be 8-32 characters long.
- To view the entered password, click the eye icon next to the input box after entering the password to convert the encrypted text to plain text.
- Click the 【Change Password】 link to enter the change password page.
# 2 Change Password
# 2.1 Access Path:
{protocol}: //{host}:{port}/#/editPass
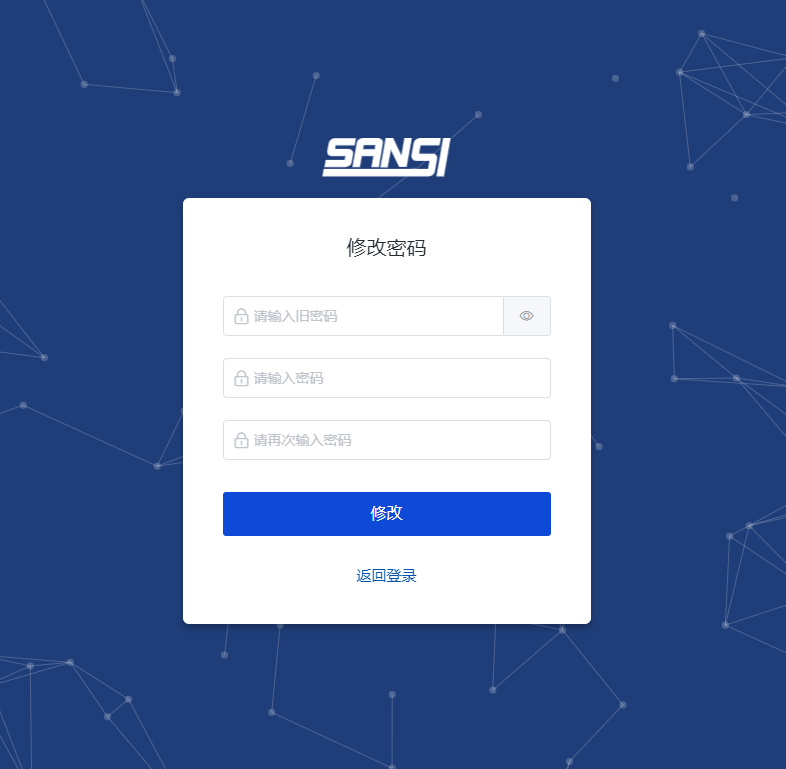
# 2.2 Interface Preview:
# 2.3 Function Description:
- Enter the old password, new password, and confirm the new password. Click 【Change】 to modify the password. The password must include at least one uppercase letter, one lowercase letter, one number, one special character, and be 8-32 characters long.
- To view the entered password, click the eye icon next to the input fields after entering the old password, new password, and confirmation password to convert the encrypted text to plain text.
- Click the 【Back】 link to return to the login page.
# 3. Splicer Homepage Layout
# 3.1 Access Path:
{protocol}: //{host}:{port}/#/
# 3.2 Interface Preview:
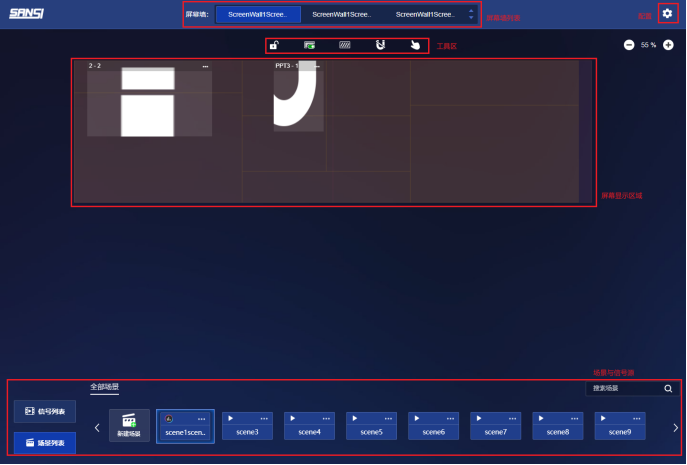
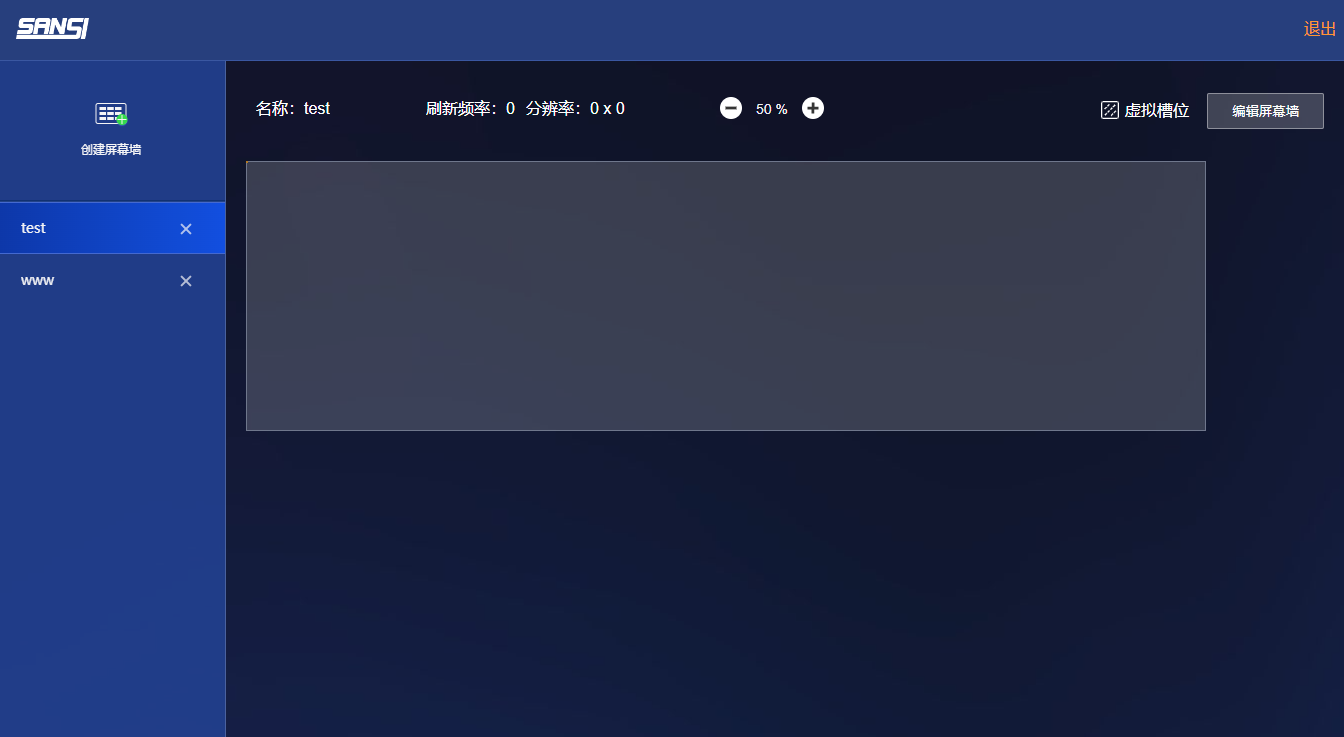
# 3.3 Function Description (The page is divided into 4 parts):
- Screen Wall List (Top of the page)
- Screen Display Area, including Tool Area (Middle of the page)
- Signal Source List (Bottom of the page)
- Scene List (Bottom of the page, switches with the Signal Source List)
# 4. Screen Wall Switching
# 4.1 Page Location:
Enter the homepage -> Upper section of the page
# 4.2 Screen Wall List:

When the number of screen walls exceeds one and switching permission is granted, all screen walls in the current system are displayed in a list format. Clicking one will switch to the corresponding screen wall, displaying the relevant screen window preview and scene list.
# 4.3 Screen Wall List Pagination:
When the number of screen walls exceeds three, pagination is displayed. Clicking will switch to the next screen wall if switching permission is granted.
# 5. Screen Preview
# 5.1 Page Location:
Enter the homepage -> Center of the page
# 5.2 Toolbar:

# 5.2.1 The toolbar includes 9 tools in sequence:
- Lock Screen Tool: Locks the screen, preventing any operations on the screen.
- Virtual Slot Switch: Enables or disables virtual slots within the current scene of the screen wall.
- Layer Display: Toggles the display of physical slots, LED slots, and virtual slots.
- Virtual Slot Edit: Modifies the layout of virtual slots in the current scene (see details).
- Magnetic Tool: Determines whether windows automatically fill the slots when moved or resized.
- Lock Window: Controls whether the signal source window on the screen can be moved. This tool's display is also subject to window movement permissions.
- Clear Screen Function: Clears all signal source windows on the current scene. This tool's display is also subject to window deletion permissions.
- Force Sync: Forces a sync with hardware and refreshes all data in the current scene.
- Screen Preview Zoom: Modifies the zoom ratio of the screen preview.
TIP
All the above tools can be configured for visibility in the 【Page Configuration】 settings.
# 5.3 Screen Preview Area:

# 5.3.1 The Screen Preview Area includes three layers:
- Physical Slots (Light gray layer, actual physical display)
- LED Slots (Light purple layer, area of the actual displayed image after splicing physical displays and excluding offsets)
- Virtual Slots (Light yellow layer, slots defined by splicer software)
Friendly Reminde
All layers can be toggled using the tool 【Layer Display】.
# 5.4 Signal Source Window List:
# 5.4.1 Operations on the Signal Source Windows include:
- Move Window Position: Select a window, drag it with the mouse to change its position, and upon releasing, save the window's information to the scene.
- Change Window Size: Select a window, then drag the corner or edge to modify its size. Changes will be saved to the scene.
- Right-Click Functionality on Windows: Send to Back, Bring to Front, Delete, Fullscreen, Adjust (popup layer for changing z, y, width, height).
- Double-Click on an Individual Window: Adjust its size to match the size of the slot at the mouse click position.
- More Window Operations (three dots at the upper right corner of the window): Popup layer to adjust z, y, width, height.
- Window Deletion: A window will be deleted when it is dragged out of the screen area (or right-click on the window to delete).
Friendly Reminder
In tablet mode, long-press the window for 700 milliseconds to display the right-click menu for the window.
# 6. Scene Switching

# 6.1 Page Location:
Enter the homepage -> Lower section of the page.
# 6.2 Scene List Functions include:
Scene List Pagination: If the number of scenes exceeds the browser's display width, a next page option appears, otherwise, a prompt for "This is the last page" is displayed.
Scene Search: Enter a keyword, then click the magnifying glass icon next to the input field to search for scenes whose names contain the keyword.
Add Scene: A popup allows for entering a new scene name, and upon confirmation, a new scene is added to the end of the scene list.
Right-Click Menu on Scene Items: Pin to Top, Pin to Bottom, Rename, Delete.
Pin to Top: This scene will be moved to the front of the list.
Pin to Bottom: This scene will be moved to the end of the list.
Rename: Modify the name of this scene.
Delete: Confirm deletion in a secondary prompt.
More Scene Operations: Same operations as the scene right-click menu: Pin to Top, Pin to Bottom, Rename, Delete.
Scene Switching: Clicking a scene will update the slots and windows in the screen preview area.
Friendly Reminder
Scene List: You can modify the display position of the scenes to float on the right side of the page through the 【Page Configuration】 layout function, maintaining the same functionality.
# 7. Signal Source List

# 7.1 Page Location:
Enter the homepage -> Lower section of the page。
Click the configuration icon at the upper right corner -> Open the menu -> Click 【Screen Wall Configuration】 -> Enter the page.
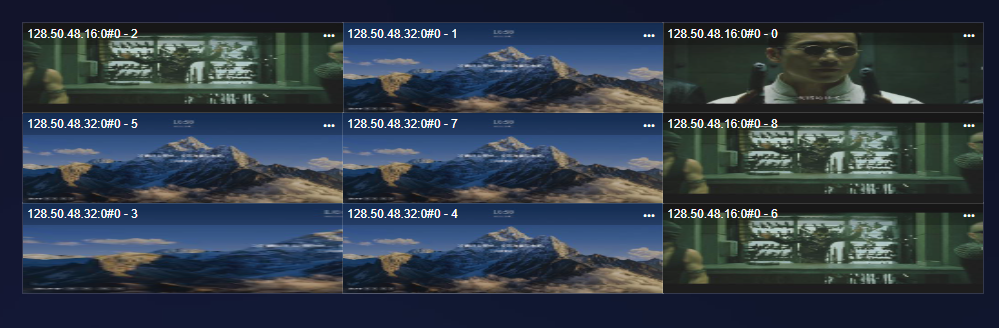
# 7.2 Signal Source List Functions include:
- Signal Source List Pagination: If the number of signal sources exceeds the browser's display width, a next page option appears; otherwise, a prompt saying "This is the last page" is displayed.
- Signal Source Search: Enter a keyword, then click the magnifying glass icon next to the input field to search for signal sources whose names contain the keyword.
- Rename Signal Source: Click the name of a signal source, enter a new name, and save it upon cursor exit, refreshing the signal source list and windows.
- Signal Source Grouping: Tags for grouping are displayed above the signal source list. Clicking will switch to the corresponding group and display the signal sources within that group.
- Right-Click Menu on Signal Sources: Add to Group, Create and Add to Group.
- Add to Group: Clicking opens a prompt displaying all group lists; upon selection and confirmation, the signal source can be added. Unchecking removes it from the group. The group list supports editing, deleting, and adding groups.
- Create and Add to Group: A quick method to add to a new group; clicking opens a prompt to enter a new group name, adding it to the list and including the signal source in that group after confirmation.
# 8. Screen Wall Configuration
# 8.1 Preview Image:
# 8.2 Access Path:
{protocol}: //{host}:{port}/#/splicerConfig
# 8.3 Opening Method:
Click the configuration icon at the upper right corner -> Open the menu -> Click 【Screen Wall Configuration】 -> Enter the page.
# 8.4 Functions on the Screen Wall Configuration Page:
- Current Screen Wall List
- Delete Screen Wall: After a confirmation prompt, delete the currently selected screen wall.
- View Basic Information and Slot Information of the Screen Wall: Displays the screen wall name, refresh rate, resolution, etc. on the right, along with its slot information. You can switch between physical and virtual slot displays.
- Edit Basic Information and Slot Information of the Screen Wall: Modify the screen wall name, the number of horizontal and vertical slots, resolution, LED offsets and sizes, and the bound ports. Click 【Confirm】 to modify the screen wall.
- Add Screen Wall: Provide the screen wall name, number of horizontal and vertical slots, resolution, LED offsets and sizes, and bound ports. Click 【Confirm】 to add a new screen wall.
- Exit: Return to the homepage.
# 9. Page Configuration
# 9.1 Opening Method:
Click the configuration icon at the upper right corner -> Open the menu -> Click 【Page Configuration】 -> Open the prompt.
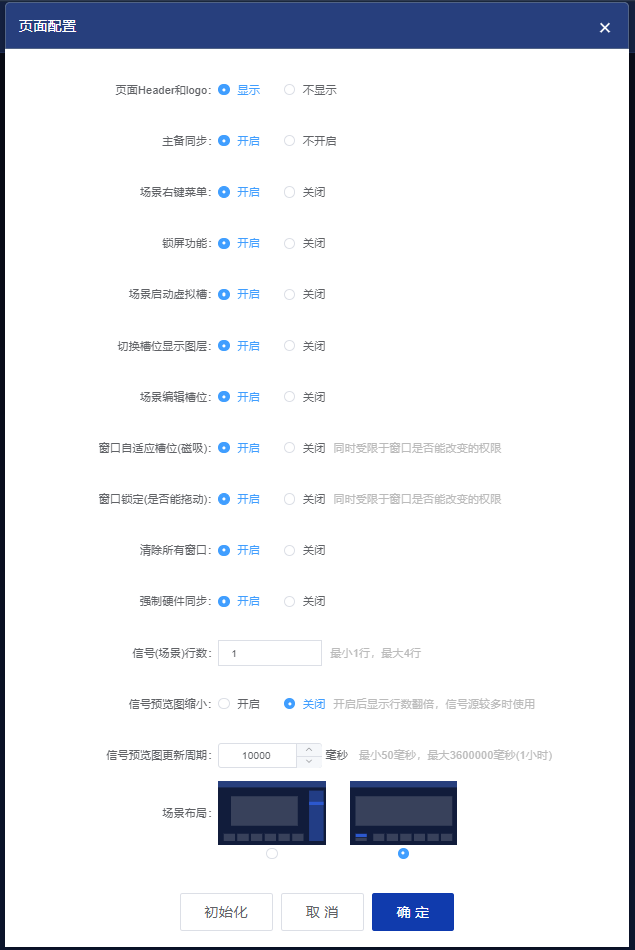
# 9.2 Configurable Options in the Page Configuration Prompt:
- Display or Hide Page Header and Logo: This is useful for embedded pages in a universal control system. If there is a shared header, you can hide the system's header.
- Enable or Disable Main and Backup Synchronization: Keeps multiple computers operating the same splicing service in sync.
- Scene Right-Click Menu: Enable or disable the right-click functionality of the scene list.
- Lock Screen Functionality: Control whether the lock screen tool is displayed.
- Launch Virtual Slots in Scenes: Control the visibility of the virtual slot switch tool. If disabled, LED slots will be used.
- Switch Slot Display Layer: Control the visibility of the slot display layer switch tool.
- Edit Scene Slots: Control the visibility of scene slot editing tools.
- Window Auto-Size to Slot (Magnetic): Control the visibility of the magnetic tool, subject to the permission to change windows.
- Window Lock (Can it be dragged?): Control the visibility of the window lock tool, subject to permissions to change windows.
- Clear All Windows: Control the visibility of the tool to clear all windows.
- Force Hardware Synchronization: Control the visibility of the tool to force hardware synchronization.
- Signal (Scene) Row Count: Set the number of rows for displaying signals or scenes, minimum 1 row, maximum 4 rows.
- Reduce Signal Preview Size: Enabling this option will double the number of displayed rows, useful when there are many signal sources.
- Signal Preview Update Interval: Set the refresh rate for signal source and window echoed images, in milliseconds; minimum 50 ms, maximum 3600000 ms (1 hour).
- Scene Layout: Choose whether scenes are displayed at the bottom or float to the right side.
# 10. Signal Source Audio
# 10.1 Opening Method:
Click the configuration icon at the upper right corner -> Open the menu -> Click 【Signal Source Audio】 -> Open the prompt.
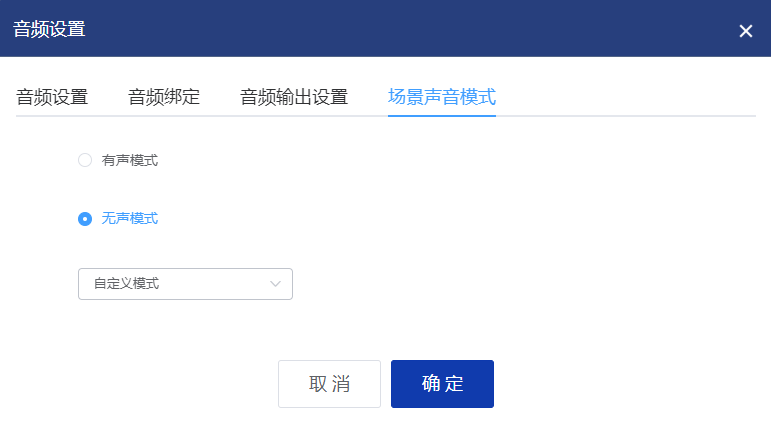
# 10.2 The Signal Source Audio prompt includes four tabs, with the following functions:
- Audio Settings: Set up audio matrix and audio input/output formats.
- Audio Binding: Bind audio to signal sources.
- Audio Output Settings: Configure audio input and output ports.
- Scene Sound Mode: Specify whether the scene should have sound or be silent.
# 11. Slot Editing
# 11.1 Opening Method
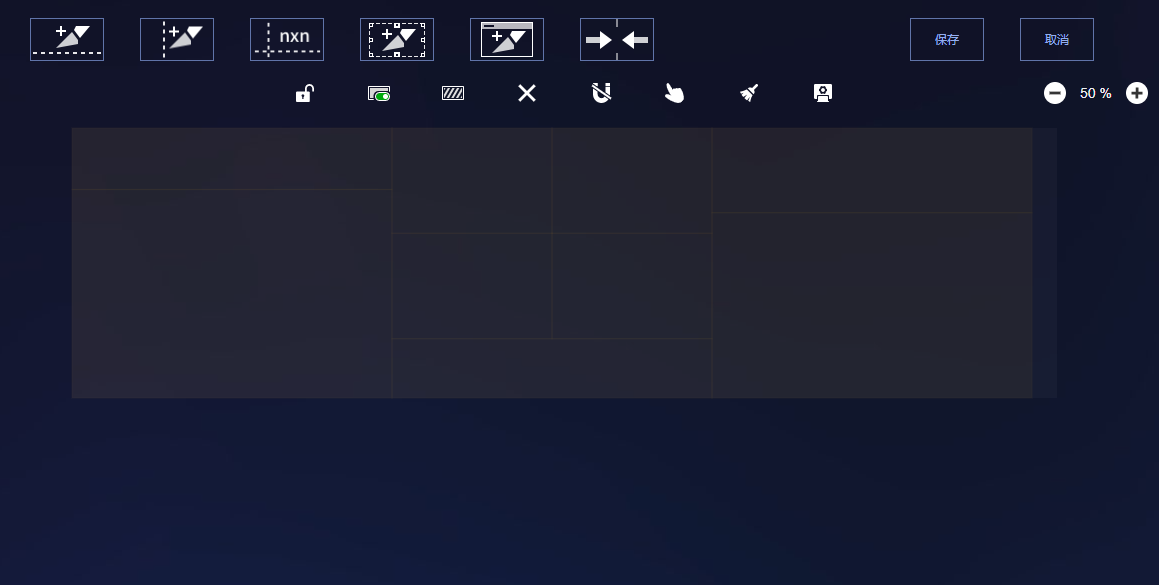
In the Screen Preview Area -> Toolbar -> Slot Edit Icon -> The toolbar for slot editing appears at the top of the page, and the screen preview area only shows slots.
# 11.2 Functions of Slot Editing:
- X-axis Cutting: Click the X-axis cutting tool, move the mouse to a point on the slot, and click to split the slot in the X-axis direction (hold the Shift key to switch to Y-axis cutting).
- Y-axis Cutting: Click the Y-axis cutting tool, move the mouse to a point on the slot, and click to split the slot in the Y-axis direction (hold the Shift key to switch to X-axis cutting).
- Equal Division Cutting: Select a slot, then click the equal division cutting tool, input the number of rows and columns in the popup, and confirm to split the selected slot into specified rows and columns.
- Rectangle Cutting Layer: Click the rectangle cutting layer tool; a yellow rectangle appears in the slot preview area. Move or resize the rectangle, and upon clicking or double-clicking, a slot area matching the rectangle size will be cut out.
- Window Mirroring Cutting Layer: Click the window mirroring cutting layer tool; several layers appear in the slot preview area, each matching the current window size. Clicking any layer will cut the slot into the size of the window.
- Merge Slots: Merging two adjacent slots that have equal adjacent edges into a single slot.
- Change Slot Size: Select a slot in the preview area; edges become draggable. If adjacent slots have equal edges, you can change the size of the slot (Use arrow keys for fine adjustments).
# 12. Project Deployment and Configuration
# 12.1 Deploying in the Hulk Service:
Once the Hulk service is deployed, it automatically includes the Splicer Control System with default configurations, requiring no modifications.
Friendly Reminder
【Recommended Usage】 Just start and configure the Hulk service without changing the Splicer Control System configuration.
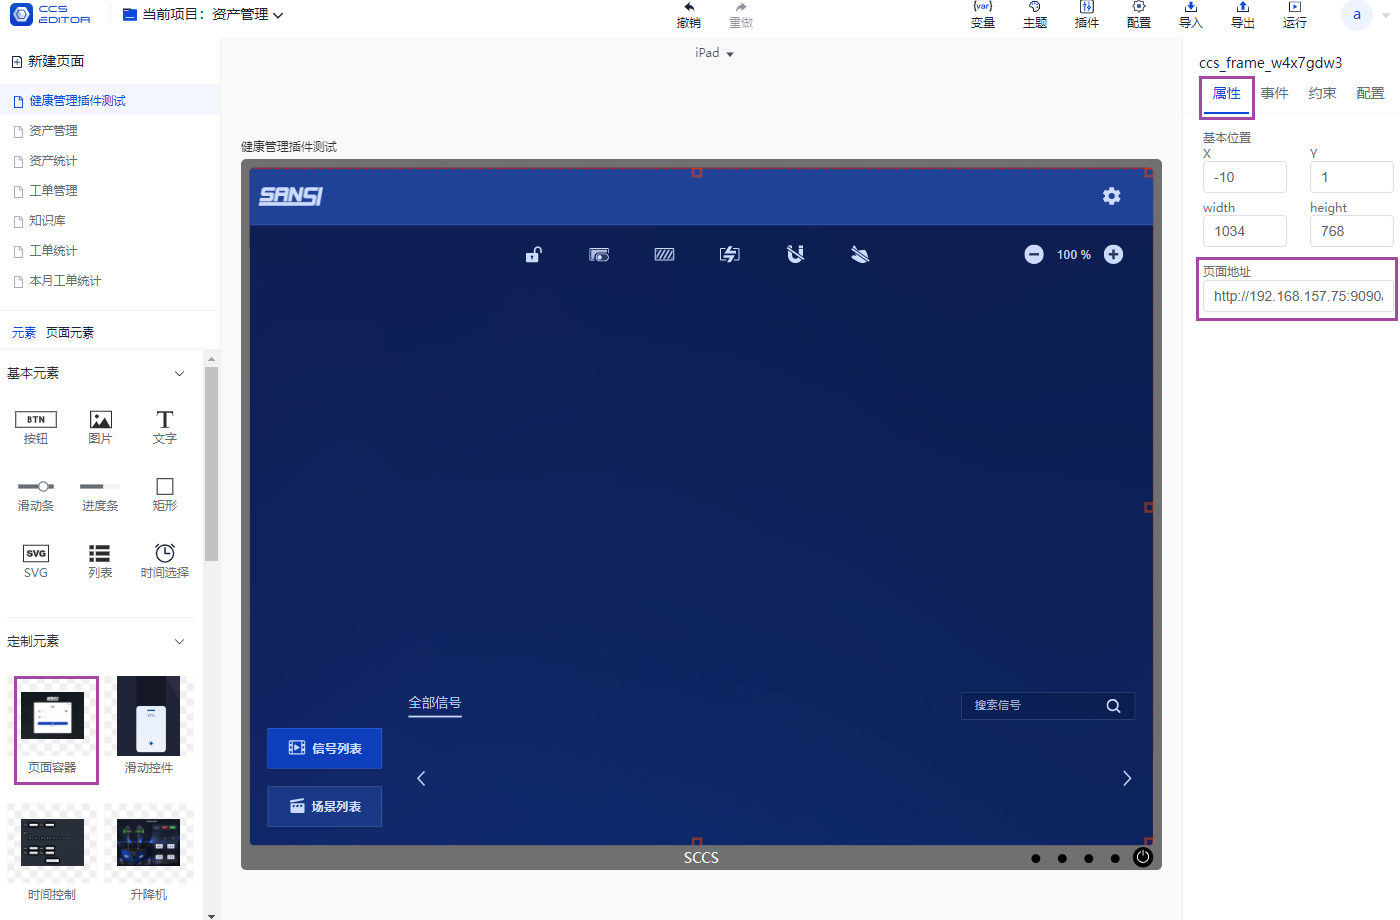
# 12.2 General Controller Using Hulk Service:
In the editing mode of the General Controller, use the page container component and set its page address to the Hulk service address. The Splicer Control System configuration requires no modifications.
Friendly Reminder
【Recommended Usage】 Just start and configure the Hulk service without changing the Splicer Control System configuration.
# 12.3 General Controller Splicer Control System:
In the editing mode of the General Controller, use the page container component and set its page address to: /ccs-common/#/. At this point, modifications to the Splicer Control System’s configuration file {config.js} are needed.
The {config.js} file is located at: \ccs_pro-v2.0.1\www\ccs-common\config.js
The following configurations in {config.js} need to be modified: 【CCS_SERVER_PROTOCOL】【CCS_SERVER_HOST】【CCS_SERVER_PORT】, with real protocol (the HTTP protocol opened by the Hulk service), hostname (the IP of the Hulk service), and port (the port of the Hulk service).
The configuration item explanations in the file are as follows:
/* eslint-disable */
const config = {
  //Protocol for requesting data, e.g.,https
  CCS_SERVER_PROTOCOL: '',
  //IP for requesting data, e.g.,127.0.0.1
  CCS_SERVER_HOST: '',
  //Port for requesting data, e.g., 9090
  CCS_SERVER_PORT: '',
  //WebSocket port for synchronization among multiple devices, e.g., 8000
  CCS_WEBSOCKET_PORT: '8000',
  //Whether to enable Main and Backup synchronization function. This can only be enabled when this is true and CCS_WEBSOCKET_PORT has a value.
  hasMainBack: true,
  //Whether to enable user login
  hasLogin: false,
  //Whether to have the page header content
  hasHeader: true,
  //Toolbar: Enable or disable virtual slot
  hasSlotOn: true,
  // Toolbar: Whether the screen lock function is available
  hasLock: true,
  //Toolbar: Whether slot editing is allowed
  hasSlotEdit: true,
  // Toolbar: Slot layer display
  hasSlotLayoutShow: true,
  // Toolbar: Whether slot switching is allowed
  hasSlotSwitch: false,
  // Toolbar: Window size adaptive to slot (magnetic function)
  hasWinAutoSize: true,
  // Toolbar: Whether window dragging is allowed
  hasWinDrag: true,
  // Toolbar: Clear all windows
  hasClearAll: true,
  // Toolbar: Force hardware synchronization
  hasAsync: true,
  // Signal Source: Set row count
  hasSignalLineNum: 1,
  // Signal Source: Display smaller thumbnails
  signalMinSize: false,
  // Scene: Whether there is a right-click menu
  hasScenesRightMenu: true,
  // Scene: Layout, lr: left-right, tb: top-bottom layout
  layoutStatus: 'tb',
  // Signal Source: Preview image refresh cycle, unit: milliseconds
  imgRC: 10000
}


```****